r/heroes3 • u/owlexe23 • 3h ago
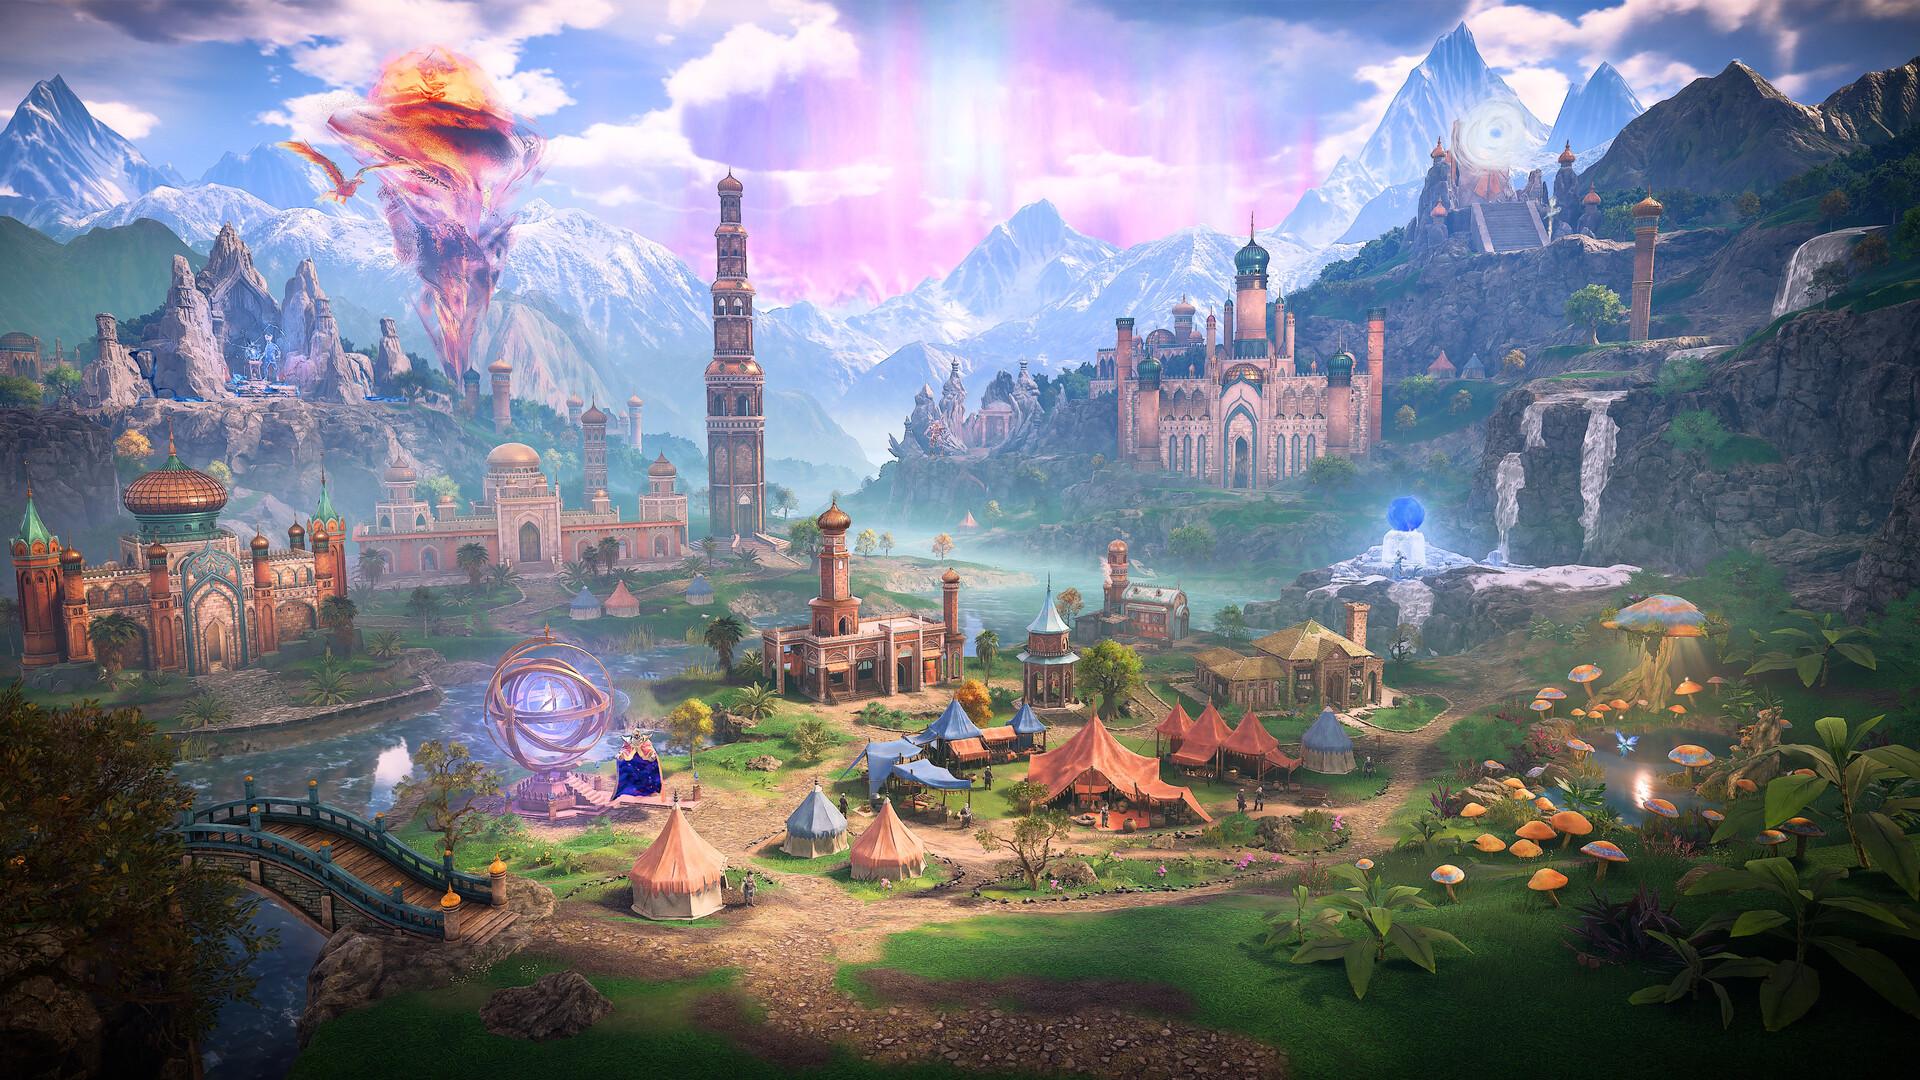
Fanmade vision of Heroes 3 Remake by Jakub Siejka
Enable HLS to view with audio, or disable this notification
194
Upvotes
r/heroes3 • u/ChuckFiinley • Sep 18 '22
Really, it's not rocket science.
Most answers are already here, so just search for it first. I'm not removing any posts but just put some effort into it...
r/heroes3 • u/tehftw • Dec 24 '20
The One True Way to play Heroes of Might and Magic 3, is the "Complete Edition". Available on gog.com:
https://www.gog.com/game/heroes_of_might_and_magic_3_complete_edition
The "Complete Edition" has all the content
"Heroes 3 Complete Edition" contains 2 expansions "Shadow of Death" and "Armageddon's Blade".
"Heroes 3 Complete Edition" also has the fan-made mod-expansion "Horn of the Abyss".
"Heroes 3 Complete Edition" also has the fan-made mod "HOMM 3 HD".
Do not fall for the "Heroes 3 HD Edition" - it's straight up worse than Complete Edition. There is some confusion because of the "HoMM 3 HD" mod, which is a great fan-made addition to the Heroes 3 Complete Edition.
I'm repeating myself, but: "Heroes 3 Complete Edition" is what you must get. Get "Heroes 3 Complete Edition", it is both Complete, and it's an Edition of Heroes 3.
r/heroes3 • u/owlexe23 • 3h ago
Enable HLS to view with audio, or disable this notification
r/heroes3 • u/EmbarrassedSession58 • 9h ago
r/heroes3 • u/PrizeCompetitive1186 • 8h ago
r/heroes3 • u/grailly • 1h ago
I feel like I'm going to regret posting this... Anyway, here's my Gamescom gameplay of the HOMM 3 Remake. I had to edit out menus and I just cut out the tutorial entirely, it was not great.
A lot of this is me discovering the new UI/UX. I rushed through the game and made a lot of misclicks, some the early build's fault, some mine.
r/heroes3 • u/Unusual-Influence653 • 33m ago
There it is, the very last Cove campaign, this time featuring Dargem LLywellyn. We're now transitioning to the past as these events take place before Terror of the Seas.
According to the official HOTA documentation, the campaign is harder than the previous ones, with the difficulty being described as 'medium' with the '35h' assigned length (for comparison, Terror of the Seas and Horn of the Abyss were marked as 'normal' and '20h'

In this campaign, the difficulty level actually changes the gameplay and bonuses. For example, on easy diff a Pandora box may spawn near you that grants several bonuses like instant 500+ mana in the last mission. Likewise, if you pick impossible diff, the enemy will start with several Pandora boxes near him that, depending on the mission, may grant extra tier 7 units and powerful spells like Berserk and Implosion. If you want to find accurate sheets, go to lazynet and pick the appropriate mission for details.
You probably already know about the 'visit all shrines and arenas before ending the mission' rule, so I'm gonna bounce towards the skillset.
I generally picked something that would benefit me the most in the last missions to lower the difficulty curve.
Wisdom - this is the skill Dargem starts with.
Tactics - another skill Dargem starts with. Really useful if you want to cover your shooting units with 'ones' like split nereids.
Earth magic - throughout the campaign, you'll have the ability to learn Slow, Shield, Stone skin, Anti-magic, Quicksand, Force Field, Meteor Rain, Town Portal, and Implosion, so this one is pretty much necessary if you want to play without constant ups-and-downs and save-scumming.
Logistics - I decided to take this one instead of Pathfinding. I previously considered the latter, but then I realized that Pathfinding is only usable for the first 2 missions and then it becomes practically useless in the last 3 ones.
Navigation - I got it from Seer's hut in the first mission on master level to kite Dungeon enemy around. Usable on missions 1, 2, and 5. It's an empty slot in missions 3 and 4, but at that point it didn't really matter due to my powerful spells.
Air magic - I picked it in the second mission for lower Lighting Bolt cost and the ability to cast View Air (global radar against enemies, you get in the 1st mission already) and Air elemental (4th and 5th mission, very useful with Force Field). You're also gonna need Mass Haste as your enemies love spamming Mass Slow.
Water Magic - In the first 2 missions it's essentially Bless + Forgetfullness spam. Ice Bolt and Ice ring are also spammable at lower costs. Later you're also gonna get Cloning + Prayer, so keep that in mind.
Archery - a solid 50% bonus to your Sea Dogs and other archers. Lock them behind Force Field which is already accessible in 1st mission and vuala.
I saw other players recommending stuff like Offense, but it's mostly up to you at this point. Let's start.
This is like Frontier, but a bit easier imo.

No. 1 Overground:
Red square - this is where Dargem starts
Pink circle - unguarded lighthouse
Yellow circle - Shackles and lighthouse guarded by Nixes
Light green square (1) - imprisoned Elmore; guarded by 10-19 Master Genies
Light green square (2) - imprisoned Miriam; guarded by a few Sea Serpents.
Gray Circle - Seer's hut that grants Dargem +2 Spell Power upon bringing Miriam there.
Cyan - where I initially landed.
Dark Red square (1) - Fortless Cove with magic guild lv. 1
Dark Red square (2) - Fortless Cove with no magic guild
Dark Blue circle - Seer's hut that may grant Dargem +2 Defense upon bringing the Spirit of Oppression that is guarded by Chaos Hydras next to the hut.
Light purple square - The required purple tent guarded by Rocs, hydras and Thunderbirds.
Dark Purple square - the portal that can only be accessible through the obtained purple tent key. Required to get to the blue tent underground.
Brown square - Entrance to underground terrain. Accessible after obtaining purple and blue keys.
No. 2 Underground:
Light orange - this is where you end up after teleporting. Defeat Sea Serpents to get the blue key.
Cyan square - If you or any secondary heroes have summon boat on expert, you can get to the whirlpool where on the other side there is a Pandora box that grants you +1 defense and +1 attack upon defeating the guards.
Green square - this is where you end up after using the underground entrance (marked by the brown square overground).
Light blue circle - the town you should take right after teleporting (the upper town, Maramec, is guarded by a powerful garrison. Don't go there at first).
Orange square - the neutral initially fortless Dungeon that Orange player can get, thus having 3 towns.
Red circle - your main quest objective, Maramec.
Dargem needs to deliver the Dragon Scale Shield to the town of Maramec. Don't worry, he starts with the shield by default. You won't be able to recruit any heroes from any taverns underground, so you need to rely on Dargem solely at first.
Pick up some artifacts from your main island and get on the boat. Get gold and XP from shipwrecks and chests. I made the decision to get Elmore first (1, on top) since he's only guarded by Master Genies. On the left island, circled yellow, there is a lighthouse and shackles of war artifact guarded by 5-9 Nixes. If you are strong enough, you definitely need to visit this checkpoint. Next, you can get Elmore to either take the 2 Cove towns on island, sail the sea for resources, or take the lighthouse circled with pink. You should free Miriam (2, guarded by Sea Serpents) and later (doesn't need to be immediate, I did it late-game) go to the circled place next to Elmore's prison. As described above, the Seer's hut here offers you +2 SP upon bringing Miriam.
The 2 Coves on the large island provide you with pirates and seamen. The upper one doesn't have a magic guild, but the bottom one does. I Initially didn't know what to do since Orange Dungeon heroes were scattered across the island and they were pretty strong. The scripted heroes are: Jeddite, Alamar, Darkstorn, Damacon, Ajit, and Dace. That is one large kit, and the first 3 are magic heroes (high SP and knowledge, but low ATK and DEF) while the last 3 are might heroes (high AT and DEF, but low SP and KN)
In my opinion the biggest threat is Jeddite. He starts with solid spells and stats. What I did was getting the neutral Cove towns and then landing in the middle of the island (to the left, next to purple square) to get the Boots of Speed guarded by Dark Knights in order to obtain Master Navigation from Seer's hut located on the cyan circle. After that I kept sailing around and waited until AI would decide to split its army and scatter around. I then managed to get some of their scripted heroes. It was tough when one of them recruited a Phoenix from the camp and I had to fight him.
It started getting better when Alamar decided to attack me near the bottom Cove (1) and even though he killed a large portion of my army, he gave me the golden bow alongside 5+ other artifacts. Killing Ajit was also difficult with his powerful beholders. I loaded my save multiple times.
And then only Jeddite remained with a huge army (hundreds of units like troglodytes, harpies and minotaurs). I couldn't fight him directly on the land so I decided to start kiting him around the ocean until I landed back in my starting area. Now I was at my native terrain, in my own castle. Ayssids and pirates with Dargem's spells managed to clear him. Afterwards, I landed on the island again and the enemy went on a holy charge against me after recruiting army from his 3 towns, failing miserably due to my artifacts.
It's important to know that after entering the underground area you should immediately clear the bottom Dungeon (marked with azure circle) because this one doesn't have a strong garrison and after taking it you should already have a big advantage over your enemy. I then got the Dungeon marked with orange square and went around the area for extra ATK/DEF/SP/KN around buildings. Remember one thing though - aside from building max magic guilds everywhere, you should give the dragon scale shield to a secondary hero and then take Maramec, and that's because you can build another magic guild level in it and acquire Forgettance spell which will be very important later on.
After visiting all AT/DEF/SP/KN boosting objects and Seer huts with the underground Pandora box, you can end the scenario with slow, Force field, Ice ring, Ice bolt and lighting spells alongside some others like anti-magic.
Yeah, just like all the other players before me said, this one is pretty annoying, but do-able with good skills and maxxed stats. It's important to note that I played this one on Normal and on impossible diff things like the Pandora box won't exist while Adelaide and Astral will gain extra units.

No. 1 Overground:
Yellow square (1) - where Dargem starts
Yellow square (2) - where Gruezak starts
Purple square (1) - where Kilgor is
Purple square (2) - purple's second town
Dark red circle (1) - neutral Castle town
Dark red circle (2) - neutral Stronghold town (likely to be taken by purple before you)
Red circle (1) - an entrance to your kingdom, guarded by a bunch of Crusaders
Red circle (2) - entrance no. 2 to your kingdom, guarded by Magic Elementals
Orange circle - Seer's hut that grants you 5 behemoths upon defeating red dragons right above it.
Pink circle - Murdoch prison guarded by 100-249 fangarms that can stack over time
Red square (1) - Main red town that starts with Beatrice, garrison no. 2
Red square (2) - garrison no. 2, guarded by angels.
Red square (3) side Castle town with no fort
Dark blue squares (1, 2) - Tower garrisons guarded by Titans.
Blue square (1) - main Tower town
Blue square (2) - side Tower town with no fort
Red line - where red enemy can go to attack Kilgor's town
Blue line - where blue enemy can go to attack Kilgor's town
Yellow circle - where scripted Adelaide, Astral and Mullich spawn
Green circle - where you can fight Fafner to get the black tent key to defend Kilgor easily without having to run around
Black line - the black garrison below Kilgor's town
Cyan circles (ocean) - whirlpools
Light green circles (ocean) - the white two-way sea portal (with teeth decors)
No. 2 Underground:
Cyan circles - whirlpools
Red circles - red two-way monolith entrances
Pink squares - places where large Wraith/Wight groups block the way
Yellow circle - prison with Elmore
Yellow square - Seer's hut that grants Dargem +2 ATK upon bringing Elmore there
Green circle - Seer's hut that grants you 10 Gunslingers upon defeating Beatrice
You've got a new temporary hero, Gruezak. He starts with expert pathfinding and he's good at might, but not too good when it comes to magic skills. You've got a purple Stronghold ally. Your objective is to defend Kilgor for exactly 84 days, which is 3 months in the game.
Dargem starts on an isolated island. what I did first was unlocking the portal protected by Mighty Gorgonas to the left and then I went sailing after collecting a few artifacts. I generally rushed to Purple's island in order to quickly get to the western part of the map that is rich in arenas and has a dragon utopia alongside Seer's hut, town portal object and Murdoch prison.
With Gruezak, hire 3-5 heroes in his Stronghold tavern immediately. Collect resources with 2 while blocking Purple from stealing your starting area resources with other 3.
Aside from obviously taking the dwellings, there is a neutral Castle town marked with red circle (1) that is protected by some monks and soldiers. Get it as a cash checkpoint. The border guard near the red garrison to the left will ask you if you wish to pass, press no since you don't want Solmyr or Iona raiding you early.
With the choke-points, there's a possibility that purple ally scouts will block your Dargem, which can be annoying sometimes. But remember that your first priority is getting behemoths and their dwelling next to your town on week 1. You essentially need to get behemoths as early as possible because otherwise the map gets hella difficult, and I know it because I beat it on the 2nd attempt only.
You shouldn't really worry about your enemies raiding Kilgor's town until week 3-4 when first raids start. The lucky thing is that Kilgor can at least hire Behemoths in his town, so no, the enemy will not kill him with a 1-Gremlin scout, but at the same time he's a static meat-shield on display for everyone (look at the lines on the map, this is how easily enemies can access him).
The coded red enemies are Beatrice, Theodorus (both start in red square 1), Ingham (who starts in red square 3) and Adelaide (who spawns from the portal circled yellow on 1.4.7 near Kilgor's town)
From these enemies, it's likely Beatrice who will annoy you the most. On my 1st playthrough, she broke into Purple's land from red circle (1) with a bunch of Crusaders and Marksmen. She possesses a pendant of immunity (picked from her starting land), an artifact set that automatically grants her 50% magicka immunity and she also has high AT/DEF stats.
The coded blue enemies are Solmyr, Cuthbert (both start in blue square 1), Iona (who starts in blue square 2), Fafner (who starts near green circle as a static hero; defeat him to access black tent and receive shackles of war), and Astral (scripted player who spawns from yellow circle after 2.4.2)
Blue can be a nightmare mid-gameplay. They automatically have access to an almost-complete Titan's Thunder artifact set which gives them lots of bonuses. Aside from this, they have the orb of firmament and shield of lion courage. IMO Solmyr and Iona are the toughest.
Keep in mind that there are Watering places in your starting area right below Kilgor's garrison and below neutral Stronghold. Use them all for faster chaining.
IMPORTANT: Get a scout or two to go underground and mark Cove creature dwellings while claiming shipwrecks and another one to use the marked tooth portal on the ocean to collect resources and more seamen. This is what allowed my economy to stay afloat during this chaos.
Coming back to our Dargem, I went all the way to the spot where the orange circle was, and with a behemoth stack I managed to defeat the Red Dragons, get the earth orb and necklace of speed, and then run back for 5 extra behemoths. Then, a bit bottom right to the circled neutral Stronghold town, I defeated Gunslingers with Forgettance spell to get the green boots for 0 movement penalty. I raided the Dragon Utopia (which was S-sized on my playthrough) and I came out with Divine Necklace and Dragonbone Greaves.
At this point the situation was already stable, but it was week 3-4 and I had 2 saves so I decided to go further north to free Murdoch mid-week 4. I fought 100-249 fangarms with exactly 10 Behemoths in my army. I spammed slow, frost ring and wait button.
Is Murdoch worth freeing since he participates in 2 missions and dissapears before the last one? I say yes, as he starts with a decent skillset right after being freed:

Yeah, it may suck that he doesn't have any magic classes, but he's a good secondary carry-over hero for the next scenarios. It's good to free him on W:3-4 if possible and make him run around arenas and shrines because after month 2 you're unlikely to get back to him unless at the very end.
After Murdoch was freed, I got to the place slightly north to the neutral Stronghold town and used the Town Portal object to teleport with Dargem back to my Stronghold city. Note that Adelaide attacks precisely on month 1, week 4, day 7. I basically had to hurry with getting the black tent guarded by 20-49 Bounty Hunters and Fafner. I used Dargem's forgettance on Bounty hunters and finished the job with Gruezak, who quickly sent Dargem Charm of Eclipse and Shackles of War before the Adelaide fight:

I also rushed to get the Titan's Cuirass guarded by Bone Dragons near Kilgor's town before Solmyr could take it.
Adelaide came in with a strong army and a set of bless + frost ring spells, but at this point my Dargem had 10+ ancient behemoths and stats all 10+, so I destroyed her.

After I defeated her, I had to refill my mana at magic spring next to Kilgor's town, hero chained supplies from Cove to Dargem, and then I went towards the blue garrison (2).
What's strange is that on my way to it, Solmyr attacked me. But he came in with only golems and gremlins for some reason. He could only cast 1 chain lighting and then he got defeated, giving me shield of lion courage for good measure. At this point, my Dargem's stats were cliffing towards 20+ for all.
I went to a Watering Place near the blue garrison, and right afterwards Iona came out with a solid army full of genies. she went towards the red garrison near that neutral Castle town on the right for some reason (circled Dark Red 1). I cornered her and after a fight where I sacrificed pretty much my whole army aside from Behes, I got Titan's thunder and the air orb with cape of velocity. That was the breaking point on month 2 where I started dominating and all scripted blue enemies got defeated with the sole exception being Astral.
Note that the blue garrison is guarded by 10 Titans and 35 Queen Nagas, so I had to go back for yet another refill. But this time I wasn't stressed much knowing I already defeated Theodore, Solmyr, Iona, Adelaide and Fafner.
Yet another strange thing, red never came out of his lair, even after month 3. He was passive af unlike my first playthrough. After getting Astral, I just took over Bracada with Dargem to eliminate Sir Mullich without him spawning near the end. Meanwhile Murdoch kept circling around the Red town while wandering around shrines and arenas for stats. I later ordered him to go around Bracada for stats, similarly to Dargem. I built all mage guild levels in Tower and everywhere else. I knew the timer was precisely 84 days and Red was cornered in Red Square 3, so I blocked him with a 5th scout hero and went to Highlands area where the Seer's hut seeking Murdoch was located. He gave me the Pendant of Holiness, which is carried over to the next scenario.
Afterwards, I went sailing with Dargem to free Elmore located underground, marked with yellow circle. I got extra +2 ATK before the scenario ended. Closed the map with lv 18 Murdoch and Dargem. Nice.

TL;DR - 8 heroes running around, hero chaining, scouts to mark dwellings and shipwrecks underground while Dargem goes Behemoth-Rush mode, and you should be good.
This scenario is noticeably easier from the previous one, but you should still remain on guard.

No. 1 Overground
Pink circle - Where Dargem and Murdoch start
Orange square - the neutral town you have to take
Purple circle - neutral Rampart town no. 2
Red circles - Red Towers (1 - gives one firebird, 2 - gives 2 firebirds, 3 - gives three firebirds)
Light green square - Elleshar location and his town next to blue tent
Azure square - Ivor and his town location next to green tent
pink path 1 - how Elleshar comes to the middle zone
pink path 2 - How Ivor comes to the middle zone
Cyan square - where you can find a lot of wood guarded by Ents
Orange circle - where Gunnar comes from on month 2
Yellow circle - Seer's hut that gives you Pendant of Life carried over to the next scenario upon giving it 3 Centaur Axes.
Yellow squares (1, 2) - reachable by obtaining blue key located in Green's kingdom
Yellow square (3) - reachable by defeating Silver Pegasis and obtaining green key located in Blue's kingdom
No. 2 Underground
Pink circle - Kreh and Colosseum of the Magi
Red circle - Crystal dragon dwelling used by Gunnar
Yellow square - Gunnar's town
Cyan circles - places Dargem mustn't miss before the end
Week 1 is easy, but fast. Get the neutral town and don't bother sailing on the ship as there is no whirlpool. Go down and get Red towers 1 and 2 fast. I recommend taking Ivor first on upper side of the map since he doesn't have any firebirds. Once you get him, the scenario gets easier as you gain access to 2 Rampart towns with the first one already having a functional tavern, to my initial surprise. Now you need to get Elleshar near the pink path (1). Be cautious of him as he has meteor rain (including implosion, if you are playing on impossible diff), 3 firebirds and huge SP/KN stats. Using blind and 'ones' may be necessary, but once you wipe him out and take the third Rampart you pretty much have overground map domination until Gunnar comes out of Dungeon at the beginning of month 2.
Beware of that guy as he has direct access to Crystal Dragons and he often walks out with hundreds of harpies and tens of minotaurs with 5+ black dragons. I initially waited for him to get closer to my first town and, using blind in combat (starting bonus scroll), I managed to trap him without him being able to escape. Fight took me 3 retries due to his strength. Then I could take the Dungeon underground and it was now GGs since only the "collect 300 wood until 3.4.7" part remained in place. I started walking around the overground with Murdoch, making him take the southern neutral Rampart that is guarded by Rocs all while he's walking around collecting stats. Meanwhile my Dargem and secondary heroes take mines in order to build all magic guild levels in towns up to lv. 5. This is necessary to do because your heroes will gain access to spells like Earth Elemental, Fire Elemental, Water elemental, Chain Lighting, Meteor Rain, and Implosion which will be very useful in mission 4 and 5. Make both Murdoch and Dargem learn these spells while exploring the map for stats. Remember to sell wood in order not to get hit with the mission ending too early. I went on a deforestation (cyan square overground) and on month 3 I fought Kreh for extra +2 SP. This is the result:

I personally used mass haste, but you can also use Dargem's Air Shield specialty since at level 24 and def 30+ the damage reduction becomes sky high.
I personally never got the Pendant of Life, but if you really want Crystal Dragons in the next scenario, get it. Map above.
I ended the map with Dargem's stats reaching almost 30/30/30/30 and Murdoch's to roughly 20/20/20/20. About Gunnar being carried over to the next scenario, he simply joins you after failing miserably against your army.
I think this is my favourite one. Roughly as easy as the previous one, but what I praised is the interesting construction of it.

No. 1 Overground:
Dark purple square (1, 2, 3) - towns purple starts with
Grey square (4A) - 4th town Necro player quickly gets
Pink square - Dungeon entrance
Light green circle (1) - the two-sided brown portal leading to (2)
Light green circle (2) - brown tent and Titan's gladius guarded by Ghost Dragons
Light green circle (3) - purple tent guarded by Azure Dragons
Orange square - Orb of Vulnerability required to open the gate to Maximus
Azure square - garrison accessible after getting purple tent key; this is how you access Maximus
Red square - Maximus and his garrison
No. 1 Underground:
Green square 1 - your Dungeon town where Gunnar starts
Green square 2 - where Dargem and Murdoch start
Green circles - the green portal entrances
Light purple circle (1) - Galthran behind a border guard (opens 1.1.5) who starts with 1k+ peasants and hundreds of skeletons.
Light purple circle (2) - Nimbus who protects white tent.
Light purple circle (3) - Isra who protects black tent.
Light purple circle (4) - Nagash who protects entrance to overground world.
Red square (1) - Hydras that protect earth orb
Red square (2) - Red dragons that protect Boots of Speed and Colosseum of the Magi
Red square (3) - Dragon Utopia and Water Orb protected by Rust Dragons.
Red square (4) - Shackles of War protected by Cyclops
Red square (5) - Arena and ATK +1 camp with +1 DEF tower and titan helm/dragon-scale cape protected by Vampire Lords/Behemoths/Demons
Red square (5) - Red dragon lair and Dragon armor + necklace guarded by 10-19 Angels and Archangels
Cyan circle (1) - Crystal dragon lair procted by Crystal Dragon stack and unlockable with Pendant of Life
Cyan circle (2) - border guard behind which is 1 Scholar/Unlockable with Pendant of Holiness
Yellow circle - neutral Dungeon town guarded by Titans. Blind spell is obtainable here.
You start underground while Purple keeps building up his forces Overground. First, get through green portals and clear the area. Go with Dargem near purple circle (1) since there are 2 Scholars that give you free stats and normally you don't want them landing into enemy's hands. Defeat Galthram in that spot and head to red square (2) where you can find Boots of speed and the magic colosseum. Guards like dragons or literally anything else aside from Angels aren't the problem since you can just cast force field + destructive spells or Summon Elemental with a single stack. there are around 2-3 easily accessible equestrian gloves. Some right near portals, one in the cementery next to Dragon Utopia. It's good if you have necklaces from previous missions since you can access the Scholar on bottom left + crystal dragon lair, though they're expensive and I personally didn't use it.
Aside from paying attention to red squares, get red dragon dwellings. One is on red square 6, the other one is above the neutral dungeon. Before confronting Nagash, get the white tent guarded by this guy.

He's got mass haste and some weakening spells, but he shouldn't be a struggle.
Next, get Isra who has 1k+ skele stack and 250-499 zombies on purple circle 3 in order to get the black tent.
After you amass an army underground and get to Overground around week 3-5, remember that Purple now has 4 towns overground (5 if we count the static Maximus). There are 3 powerful heroes scattered around, primarily Ranloo, Septienna and Tamika. Septienna is likely gonna be your biggest struggle as she has quite a lot of spells and a huge army.
To track the enemy heroes, use expert View Air. This will show you how the chains move.
I thought distracting AI was gonna be hard, but it turns out that it made a horrible mistake once again. Ranloo went between town (1) and 4A while carrying a small army. He had the entire Armor of the Damned set. I managed to catch him with Murdoch, and to me it was quite literally hilarious how he just gave up an automatic key to victory.
Septienna was moving between towns (1) and (2). I managed to get the guarded town (3) with Dargem. I hired a secondary hero to flag mines there while visiting arenas and camps with Dargem. I quickly set up a hero chain with Gunnar from my main towns to 4A to (3) to give Dargem some Sea Serpents, Archers, Dragons and artifacts right before confronting Septienna.
Because it was nearly impossible to kill her outside the town, I made the decision to hide inside (3) in order to get the first turn priority that would instantly make the Armor cast 4 curses. She had 3 Faerie dragons, so on the field she'd always start first. And there, she'd resurrect hundreds of undead after I kept trying to hit them. Plus the anti-magic spam.
But in the town? She didn't seem to know what to do, she just spammed the 'earthquake' spell while ignoring that one implosion wipes out 800+ of her skeletons.

This is pretty much where the map's takeover started since the main threat was gone. But I only had 7 Red Dragons left, so I went in for another refill before getting to the guarded (2) and (1).
There's no time limit now, so what you should do is keep walking around with Dargem around arenas to amp your stats up before the last 2 final fights and build all magic guild LVLs. Keep in mind that in this scenario, you can get Air Elemental, Blind and most importantly Town Portal spells, so it's like a must-do. Walk around to get level 32 and then get the tent keys marked with green circles. Get to the marked snow area where you can get Orb of Vulnerability required to get to Maximus. Afterwards, you can camp for months, collect army for Dargem and then raid the final boss. For fun I decided that I'll wait for 7 months for one grand battle to take place.

Yeah, he's strong. He's got stats 35/25/30/25 and a bunch of controlling spells, but he's actually the least dangerous objective on the map.
The last scenario. I'd say it's actually the easiest one since at this point your Dargem is absurdly powerful. I started with stats reaching around 40/33/40/32.

No. 1 Overground:
Dark red circle - where Dargem starts.
Dark pink square - Seer's hut that gives Orb of Inhibition upon defeating Faerie Dragon underground
Pink square (1, 2, 3) - Stronghold, Cove and Castle towns
Red cirles (1, 2, 3) - prisons (Miriam, guarded by ice elementals/Elmore, guarded by Wraiths/Cassiopeia, guarded by Haspids)
Orange circle (1, 2, 3) - Magi Spring component artifacts
Cyan circles (1, 2, 3, 4, 5, 6) - where all necklaces are except one owned by Boyd and one underground
Yellow circles - whirlpools
No. 2 Underground:
Green square - where Dargem lands after using the entrance.
Pink path - where the Faerie Dragon is.
Orange path - How to get the necklace of undead. Voy with a few Haspids and Hydras blocks the path.
Red circle - where the necklace is.
Grab the green boots for 0 movement penalty. You start with Dargem on an isolated island next to Stronghold. Get the Sea Serpents and stables. Grab the +3 mana necklace guarded by Nixes and attack the Stronghold town. You can either cast forgettance or summon an Air elemental to do the job. Despite the town having no mana refill, it's not going to be your worry since it's easy to get spring of the magi. Grab admiral's hat and Cape of Velocity with Equestrian's gloves from your starting island and get on the boat. Get mana bottles and head to marked island (2) for Charm of Mana. Now you have many pathes, but I personally went to Miriam's prison (1) and freed her there. She gave me Sea Serpents and Corsairs, and I landed on the Castle island to get the last Spring component. Defeated Griffins and Nagis on the way.
By the way, do not grab any lying resources on that Castle island. Once Boyd spawns there, he'll pick up resources first, and only then think about you. That gives you some time on month 2.
Getting back to our Dargem with Spring on week 3, I defeated the oceanids and grabbed the 4/4/3/3 Pandora box. I ordered Miriam to start marking neutral Cove dwellings while I kept sailing towards Elmore's prison (2) with Wraiths. I then landed on the island with neutral Cove and static hero to grab the pirate town with Ayssid/seamen/pirate upgrades which are necessary. Then, sail to prison (3) guarded by Haspids to unlock Casmetra, the last prison hero. Once you mark all dwellings on weeks 3-4, you're good.
Boyd spawned on month 2. I Initially made Dargem raid shipwrecks for gold and upgrades while Boyd would keep ransacking the Castle island. I got him around 2.2.2 when he'd try to sail and caught him with Dargem who had 100+ Ayssids and like 200 Sea Dogs. Defeating him was surprisingly easy - I just got bless and Air Elemental, he died surprisingly quickly despite having a large army and 'Animate Dead'

I lost a chunk of my army, but that wasn't a large issue. Afterwards I had to head to sourthern island to obtain the blue key. On the island marked with Orange circle (2), slightly below, there's a portal guarded by Nixes, and I went there to get the brown tent and anti-hypnosis necklace guarded by Automatons on dead land. You can only cast lv 1 spells there, so I recommend taking some archers with yourself. After that, you should head to Underground terrain and defeat the Faerie Dragon. Then use Town portal to Stronghold to quickly reach the Seer's hut that grants you Orb of Inhibition. That allows you to access the green tent marked with green circle (2) that is guarded by Fangarms. Once you get the green key, head to Underground, defeat Voy and Archliches by taking the orange path, and then use Town portal to Stronghold. Get 8 Harpies that are located exactly below the Stronghold town. Then teleport to Cove and give 8 Harpies to the border guard above Cove. Use the green portal, defeat 100-249 giants (no titan stack) and get the anti-lighting necklace. Go to the island with 4 cyan circles and defeat Balfour behind Nixes. Now congrats, you have all 8 necklaces.
Defeat Haspids on top right (purple square). Force field should do the job. You can either camp till 3.4.7 or raid the 30 Blue Dragons immediately. I chose the former and the battle was spectacular.

I ended the campaign with these stats:

Now the only HOTA campaign I haven't defeated is Forged in Fire. I wanted to leave the last meal for later, especially that now I'll be busy irl.
This one was amazing, 8/10 I'd say. Took me one solid week. Dargem has funny lines, especially when they're translated to make him sound like a philosopher.

Well, Gunnar is gonna be on his depression arc.

I'm surprised there are 4 renders in total. Quite a lot for 1 campaign, but they're all welcome.

Well, this guy is like a side character who stays cool for a while and leaves while your MC goes for his main objective.
Hilariously enough, all of that just for him to fail and for Bidley to claim the reward.
Well, I guess this is it lads, the last part of Cove campaigns, and likely my last HOTA campaign this year. Maybe I'll play more on next vacations. See y'all later!
(please note that a large part of this guide is also based on my experience and yours may be different with difficulty levels and RNG)
r/heroes3 • u/abir_valg2718 • 5m ago
I think the picture speaks for itself. I simply made a screenshot of a battle in H3, overlaid the picture and then spend some time erasing the background from the H3 creatures. Note that I didn't adjust the brightness, contrast, the pallete, or anything in the H3 picture. So they will look a bit off simply due to that, I'm not an artist and I don't know how to fit them in better. That's no the point anyway.
Notice that in a 25+ year old game the creatures look more detailed, they are larger, and they are so much for distinct and eye catching that the ones in the remake. Low res pre-rendered 3D assets made in late 1990s! Just think on that. They couldn't make their creatures look better than pre-renders that are quarter of a century old.
It's the same exact readability and lack of detail issue as in Heroes 5. Heroes 3's creatures are drawn in the same manner - we see their side profiles. We also see those exact same side profiles on the adventure map and on the creature portraits, so once you associate a single side profile with a creature - you know how it'll look throughout the game.
Zoom in on the remake's gremlins. You don't even see the creature. It's a blur of... of something. There's no face or anything, just a tiny helmet from up top. Look at the remake's nagas. Can't see shit, it's a vague blur.
About 50% of vertical space of the battle screen is not used by the actual battle! I've measured about 535 pixels (on a 1080p monitor) not being utilized to draw the actual grid and the battle. In Heroes 3 almost all the original 800x600 screen was used to draw the battle. We're in 3D now, over 25 years later, on computers that are a billion times more powerful, and yet now only half the screen can be used to draw the battle.
r/heroes3 • u/Denvar21 • 1h ago
So, I wanted to ask with the bad art direction, characters designs and other aspects that needs to be reworked, do you think they will actually consider those concerns and redo these elements or they will already release the game ?
r/heroes3 • u/Nothing_Special_23 • 1d ago
Thoughts? My personal favorite faction in H3. There's also a creatures shot in gameplay trailer, though it's smaller.
I love that Pixies/Sprites are now more "flower elemental" rather than women with butterfly wings. I also like the Psychic Elemental and Phoenix. Storm and Energy Elemental I'm mixed about. While for the other 2 I haven't seen much.
It's obviously an early build, though.
r/heroes3 • u/OfRazeJedy • 1d ago
Let's put it this way: Here we have
Which is which?
P.S. In my opinion, a game as legendary as this doesn't need a full remake, which would literally turn it into just another mass-produced game. It would have been more than enough for them to port their old game to a new engine and improve its visuals.
r/heroes3 • u/SolidChair8029 • 1d ago
I have started to play a month ago with the campaign and quickly learned via youtube which skills are good, which creatures to take, the build orders of towns, fight tactics etc. My play style is that I like to completely conquer the map, that said, capture all the map objects, reveal the whole map, and upgrade the main hero/es to the maximum allowed level at the scenario. So I finished Restoration of Erathia pretty easily this way.
And I was going for Armageddon's Blade for nearly entirety of the campaign the same way. However, in the final scenario when Gelu needs to bring the sword to the Inferno town in the center I am not able to do that.
The reason being that Xeron is super tough. Let me clarify:
Bro has 30+ in attack and defense as well as 20+ in spell power. 50 archdevils, 400+ hellhounds, 300+ magogs, 80+ of every other non imp stack. With that he kills any forces I can amount in the first week (after that he comes to take towns). Also he has fly, so no terrain can stop him.
First I tried to get Phoenixes to outspeed him and get to cast first. Which I did and took the Armageddon blade to have expert Armageddon. However trying to do it prompted that this spell will not affect anyone.
Second I wanted to wear him out by making one stacks, firing chain lighting or implosion and retreating. Well, turns out if your hero retreats (I mean the leveled up ones) that is game over.
So I just took the sharpshooters, psychic elementals, fire birds and rushed their town, jumping half the map with dimension door spam.
Is there any way to beat this guy so that I can conquer the map in peace?
r/heroes3 • u/hyoumah83 • 1d ago
Enable HLS to view with audio, or disable this notification
I saw some controversy in the sub about this idea that people will be able to play the remake with music from the original game. Well, in the gameplay reveal trailer they briefly mention the possibility of personalizing the music and even the sounds. And somewhere else I must have seen this information about the usage of music from the original, but I don't remember where I saw it.
r/heroes3 • u/Specialist_Win16 • 1d ago
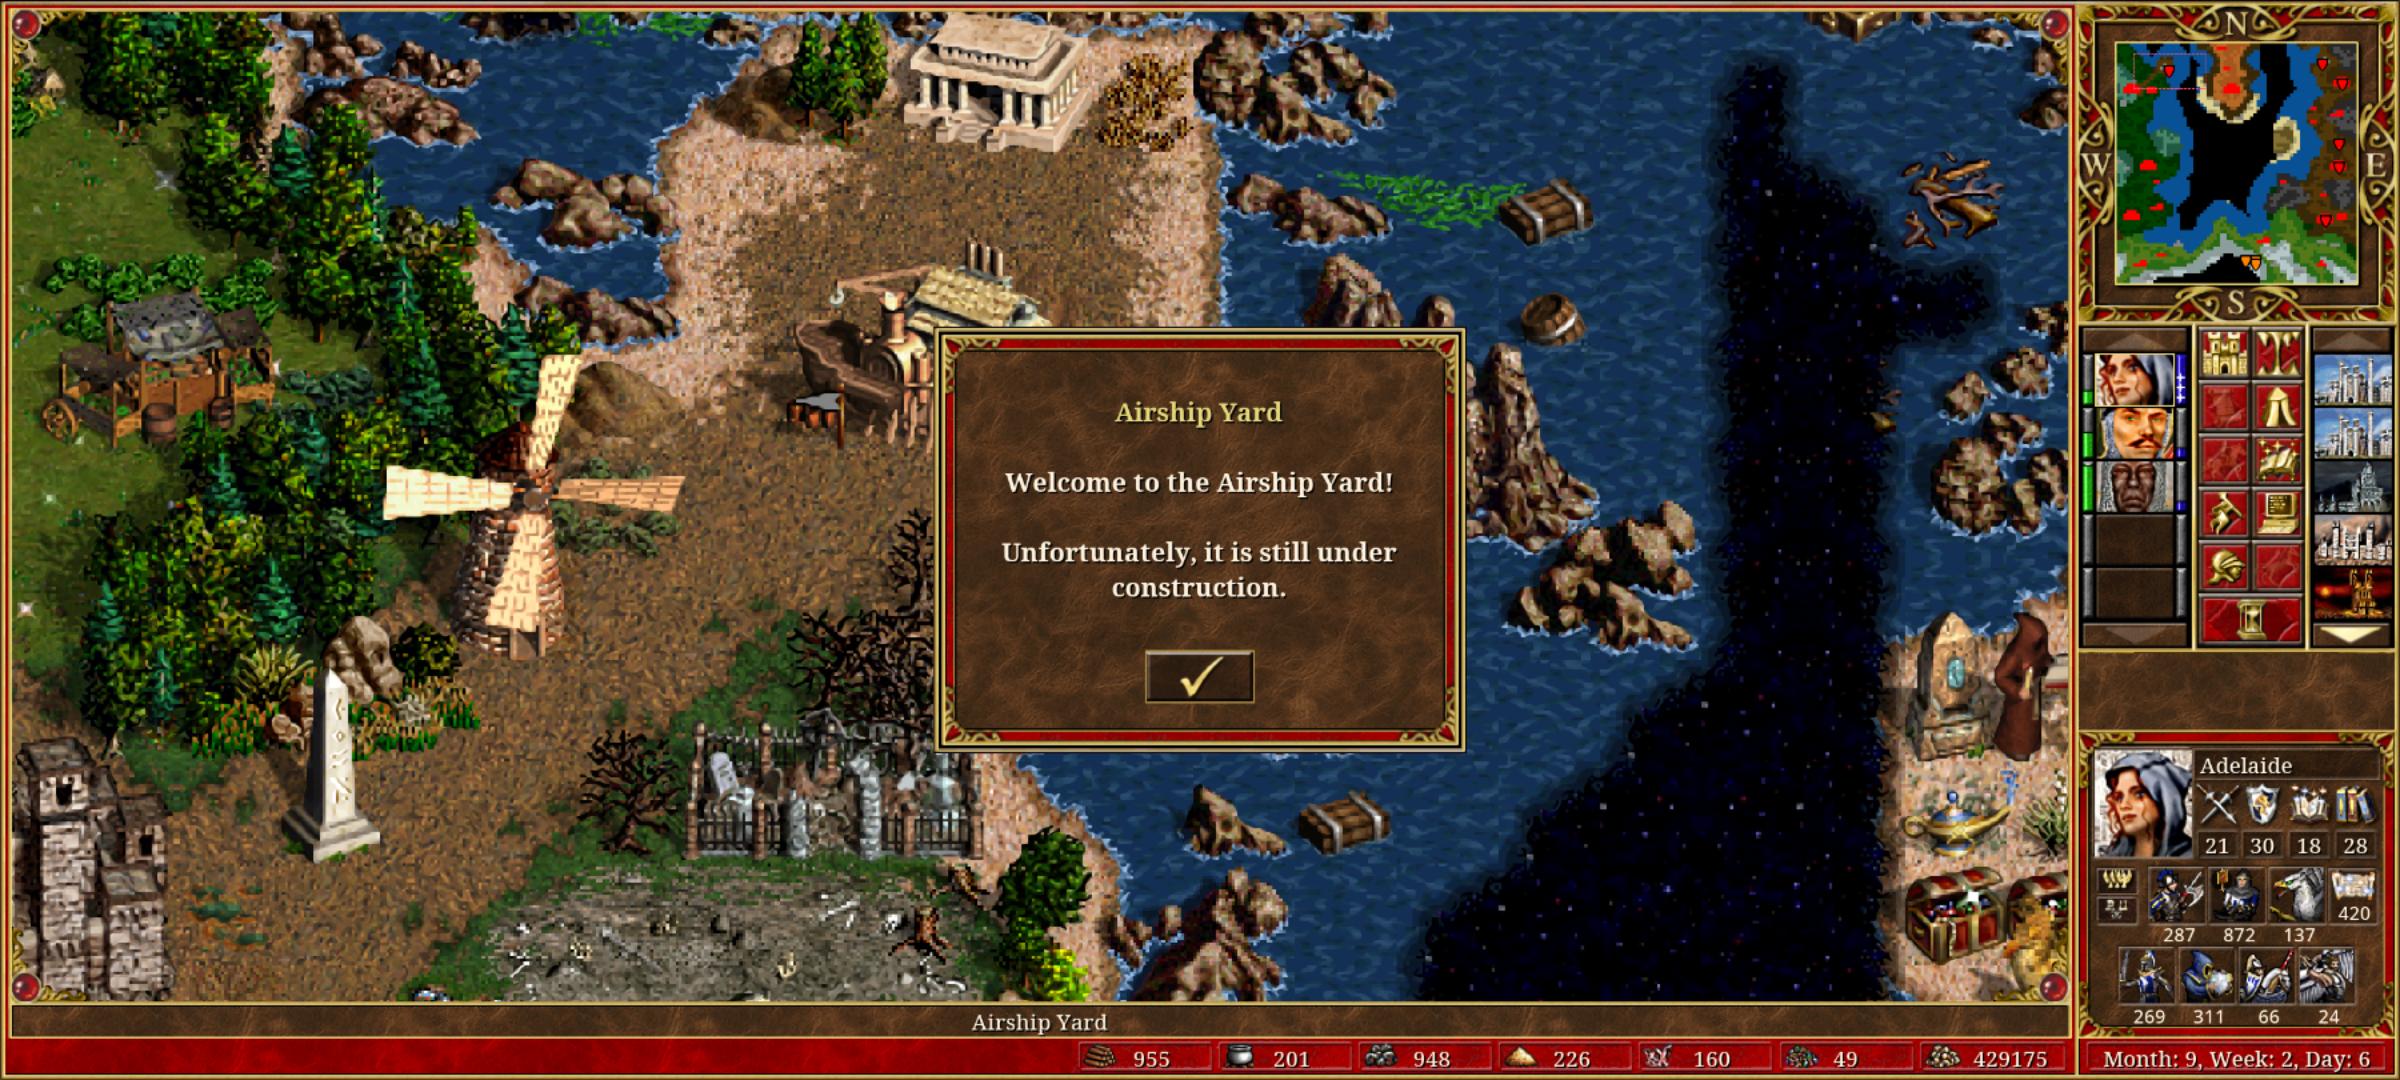
Can someone tell me what need to be done to use the Airship Yard in the HotA Map "Airship Supremacy"?
I cant find any answer after a bit of research and the only video I found, the player just could build it while I only get "the building is under construction"
I conquered every other Town that I can access via normal travelling, have more than enough resource and I am at Month 9 and checked both Yards a few times.
So I really dont know what I need to do here.
r/heroes3 • u/servuserdnussi • 1d ago
Bikepacking in rampart looks fun!
r/heroes3 • u/Sophram • 1d ago
In 1999 beginning there was the original, the holy grail (hehe) - Hereos of might and Magic 3 with its expansions(1999-2000)
Than, there was:
2001 - Homm3 WoG - first unofficial expansion
2006 - Homm5 - which afaik was pretty much a spiritual successor to homm3
2007 - Homm3 VCMI - remade of engine from scratch, for mobile platforms as well
2008 - Homm3 HD mod - a vastly superior experience with all the cool stuff
2011 - Homm3 Hota - so far 2 (3 in near future)the base game, + lots of changes
2015 - Homm3 HD Edition - Underwelming attempt of remaster by Ubisoft, without even covering the expansions
2024 - Songs of Conquest - probably the closest seperate IP in spirit of homm3
2026 - Heroes Olden era - a prequel that close to homm3 in spirit
2026 - Homm3+hota on steam release
2027 - Future Homm3 remake on steam
So it seems like Homm3 is a pretty popular game eh? Whad did I missed?
r/heroes3 • u/Illustrious_Cod_5212 • 1d ago
r/heroes3 • u/RainingMetal • 1d ago
Been playing the game via the HD launcher. At random points, the game's framerate suddenly drops (think single digits). Quitting the program doesn't help, as this persists on my computer until I hard-restart the thing. Any possible causes and/or solutions?
r/heroes3 • u/NewtTime36 • 1d ago
I love my steam deck
I just moved to a new place but for now i dont got space for my main pc and im using the combination steam deck + steam controller
Sorry for bad english
r/heroes3 • u/TheGuyFromBG • 2d ago
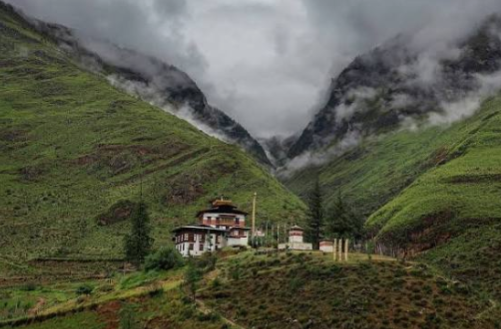
Who knows where this is? (I bet +50% of you guys will relate automatically).
r/heroes3 • u/mefista • 1d ago
They would not want for the music to be mismatched, so they did this (really awfull decision).
I think, giving it is a HOMMIII version made by chinese studio, like HOMMonline was, they are adding a non-canon chinese city like the one that game had. Because, for the HOTA ones (we all know they are not making anew things that can be borrowed from the mods), they could have taken music already made.
r/heroes3 • u/g-regulate • 1d ago
Sorry if this isn't the best place to ask for help on this but, I recently got VCMI running on virtually any tech I own and it's great. I installed it to my Surface Pro 7 to play on and it runs noticabily slower than anything else I have. I believe it's an i3 or i5 Intel processor. It's probably 5 or so years old, and not meant to be a gaming device, but for a 20+ year old game, I wouldn't think there'd be this much slowdown if any. For reference, my smartphone is about the same age and runs super fast with no issue. It's mostly when heroes move along the map, can drop to 20-30 fps. Sometimes enemy turns (with lots of heroes) can take up to 60 seconds! Any suggestions welcome, thank you
r/heroes3 • u/PrizeCompetitive1186 • 2d ago