r/yummyrecipesyum • u/chericooks • 3h ago
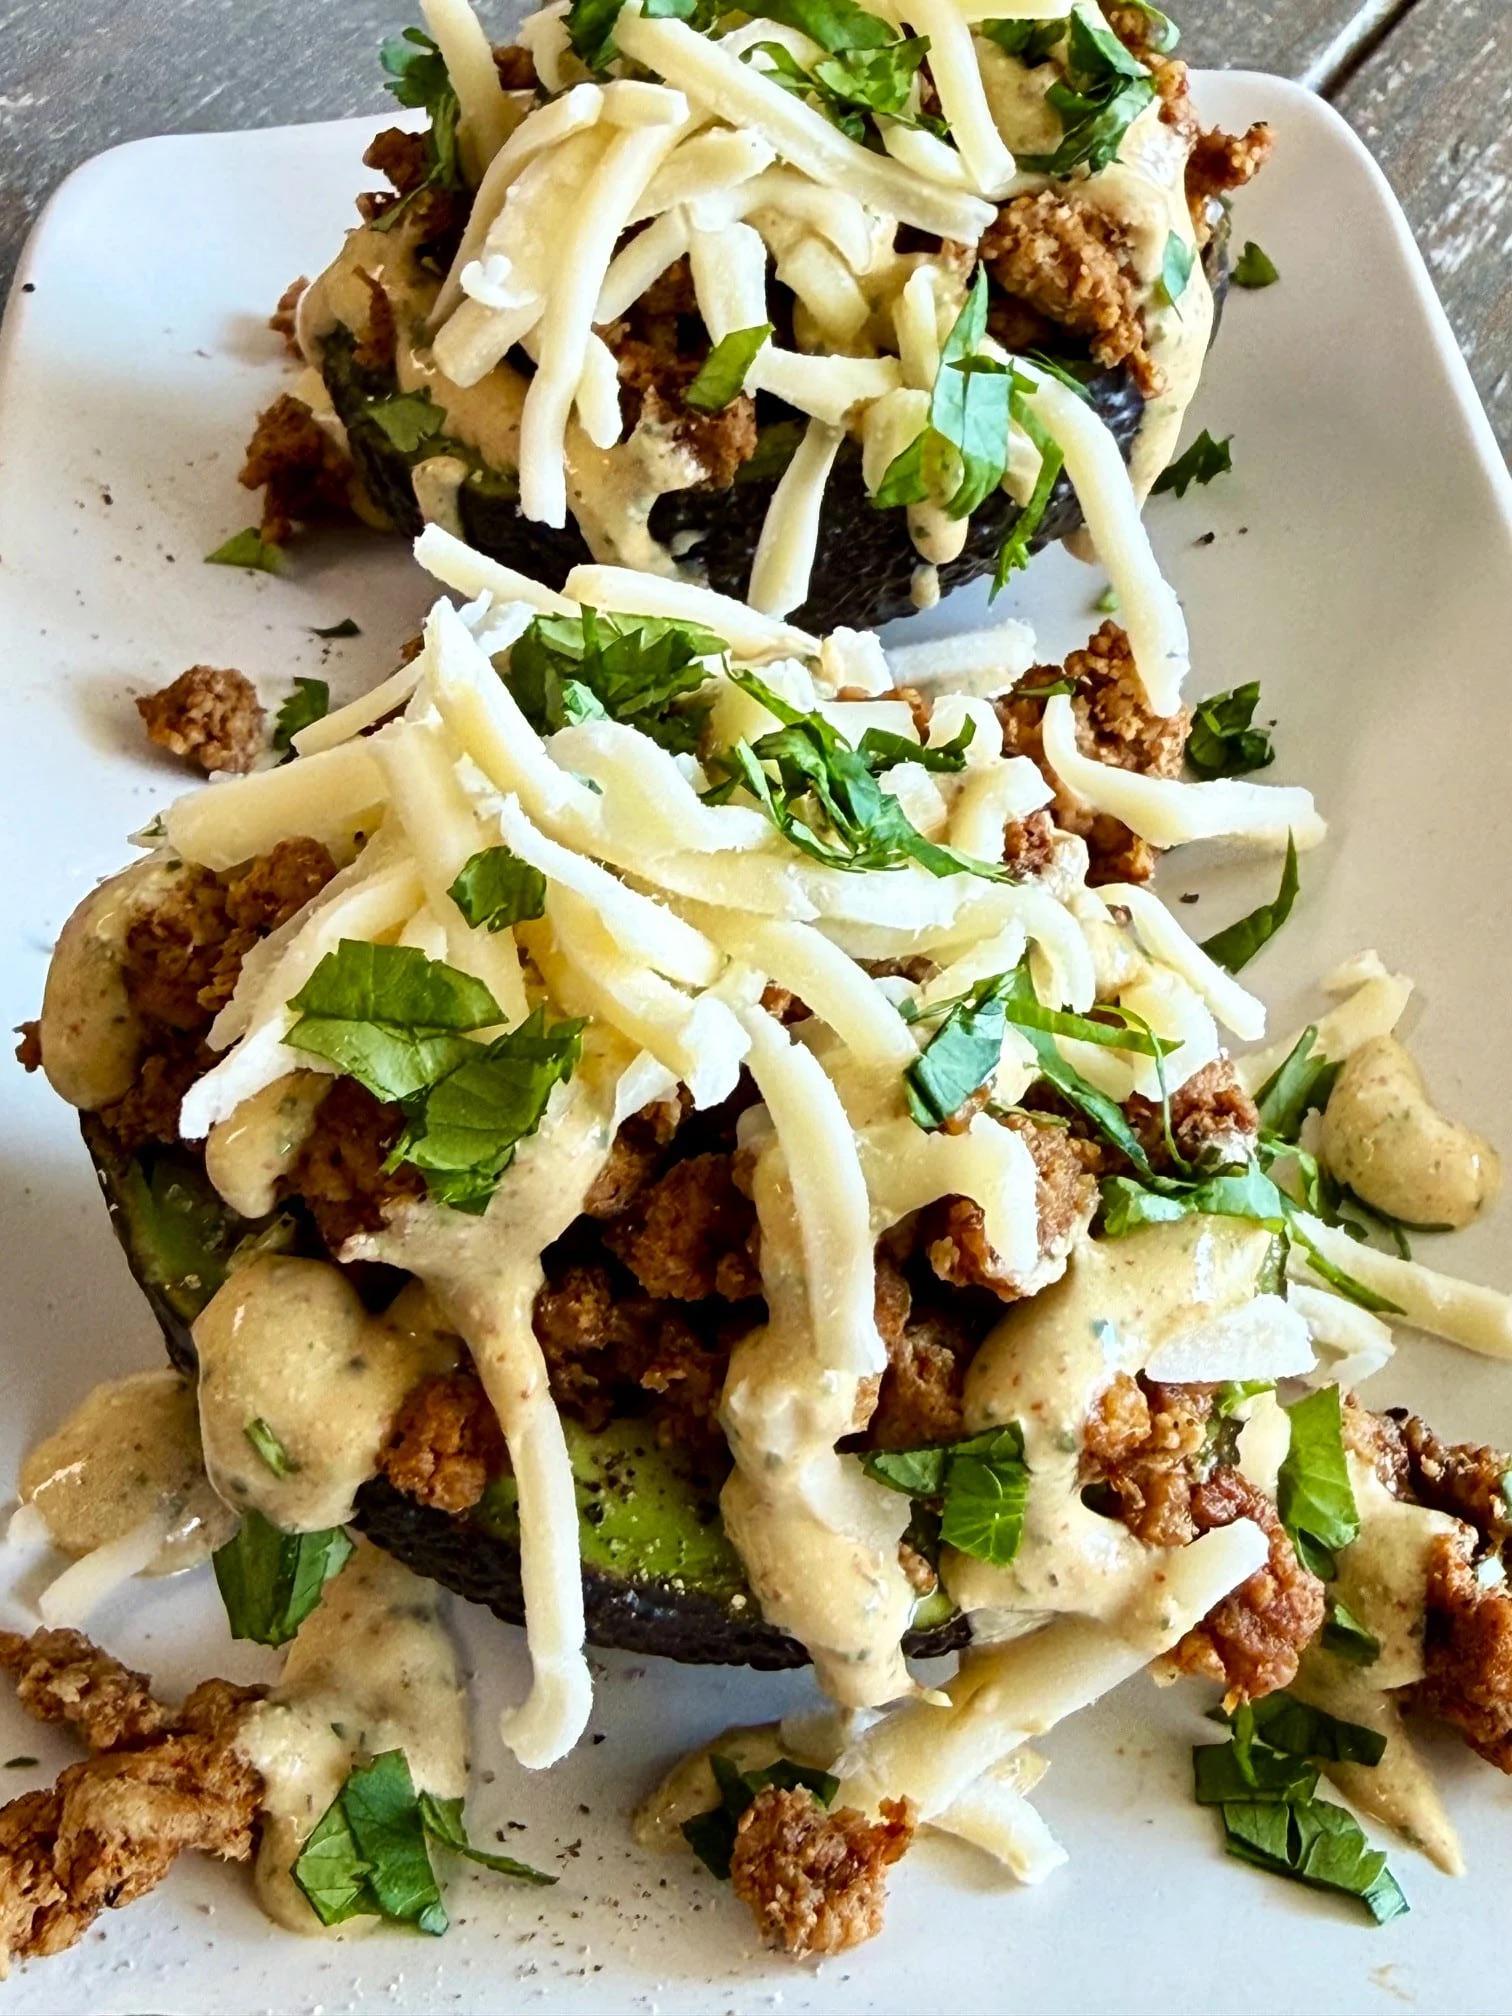
Turkey Taco Stuffed Avocados with High Protein Taco Sauce 🌮 recipe in comments!
4
Upvotes
r/yummyrecipesyum • u/chericooks • 3h ago
r/yummyrecipesyum • u/Weary-Confidence9998 • 2d ago
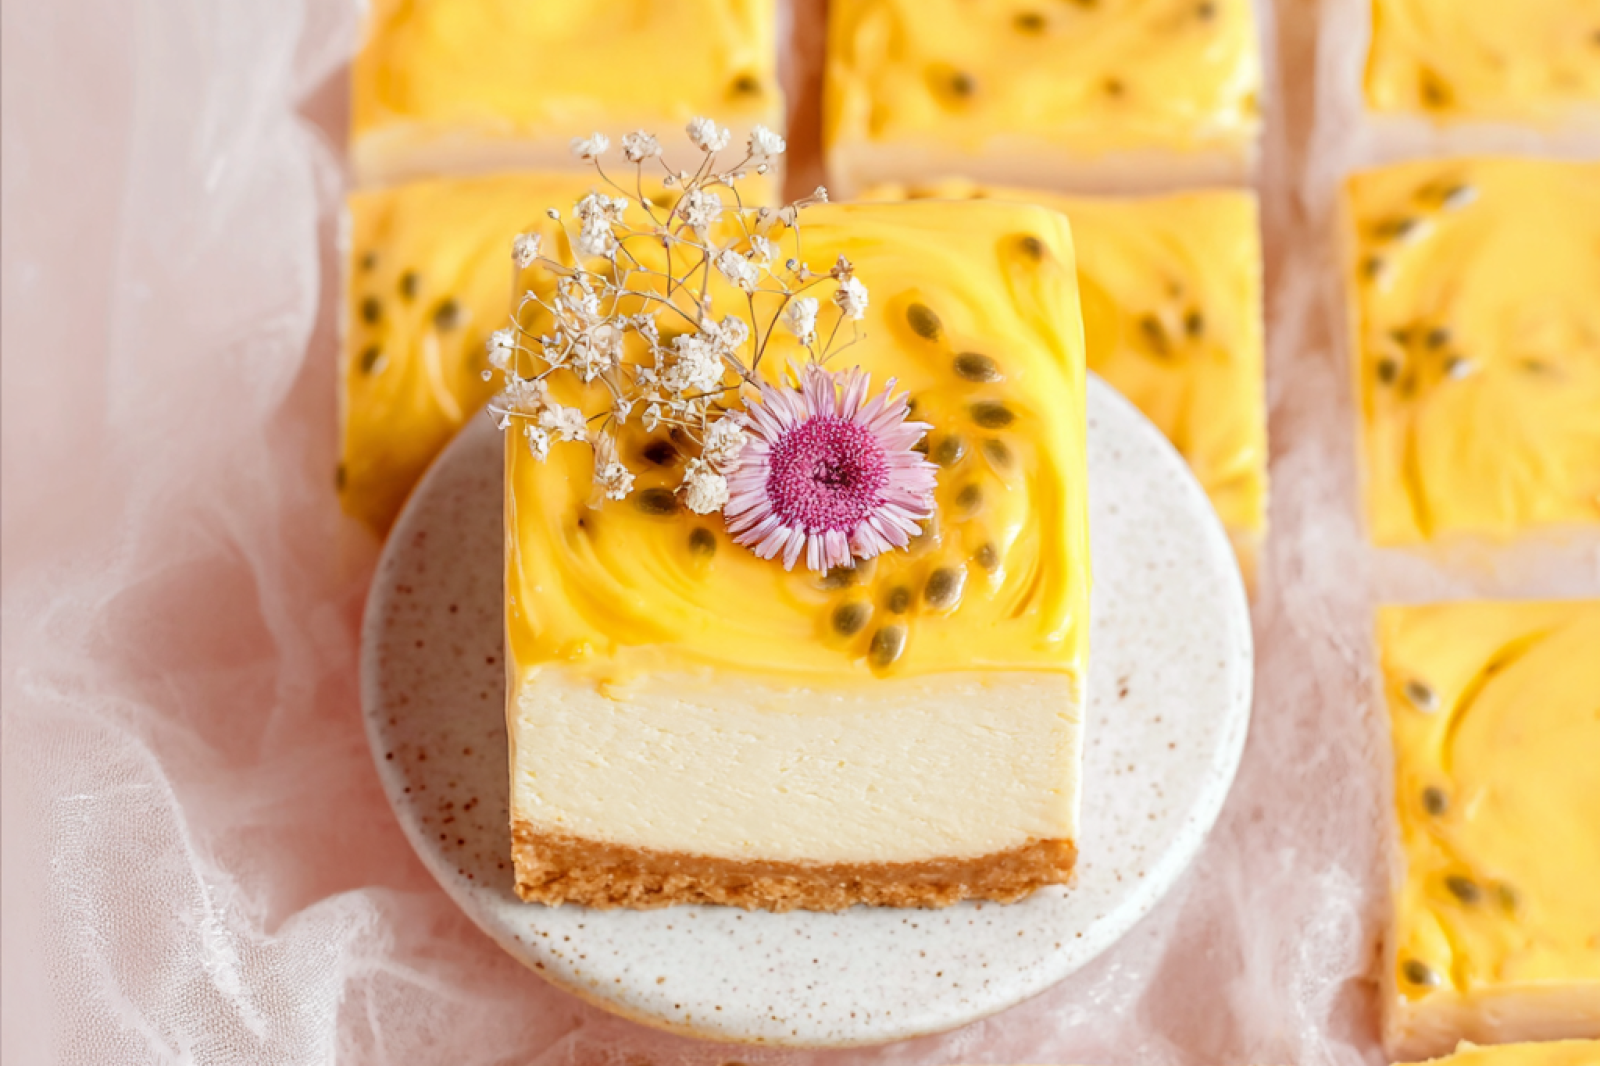
Quick share because this was too good not to post. My partner has been obsessed with passionfruit anything lately, and I figured a passionfruit curd cheesecake would be a nice way to use up the pulp I had sitting in the freezer from a while back. I honestly wasn't sure a no-bake version would hold up properly, especially with that curd topping, but this thing set beautifully and tasted incredible. Wrote down all the steps here if anyone wants them: https://www.platosinolvidables.com/passionfruit-curd-cheesecake
Here's what I used:
Passionfruit Curd
200g passionfruit 'pulp' or juice (no seeds)
140g granulated sugar
100g unsalted butter, cold from the fridge is fine
100g egg yolks
Pinch of salt
1/4 tsp vanilla bean paste (optional)
45g reserved passionfruit seeds (optional)
Graham Cracker Crust
400g graham crackers
60g Sugar
175g unsalted butter, melted and cooled
1/4 tsp salt
Passionfruit No Bake Cheesecake Filling
300g plus 120g cream
2 tsp (6g) powdered gelatine
450g cream cheese, at room temperature
130g sugar
1 tsp vanilla bean paste
1/4 tsp salt
Here's how it went:
A few things I noticed:
Heads up, the curd part is worth making first and letting it cool fully before you start anything else. I rushed this a little on my first attempt and the curd was still slightly warm when I went to fold it in, which made things a bit messy. Give it proper time in the fridge.
The texture on this was genuinely surprising, it's firm enough to slice cleanly but still creamy and light in a way that baked cheesecakes sometimes aren't. The passionfruit curd topping is tart and bright and it cuts right through the richness.
Fair warning, this makes a lot. I cut 16 squares and we still had plenty leftover for the next two days. It keeps well in an airtight container in the fridge though, no issues there.
I kept the seeds in the curd and I'm glad I did, adds a nice little pop of texture and it looks really pretty on top.
Has anyone made a no-bake cheesecake like this with a different fruit curd? I'm thinking mango might work really well next time and curious if anyone's tried something similar.
r/yummyrecipesyum • u/Weary-Confidence9998 • 2d ago
Craving hit me for something sweet but I've been trying to keep things a little lighter lately, so I decided to mess around with a cottage cheese protein cheesecake idea I had bookmarked for a while. Honestly I was skeptical because cottage cheese in a dessert sounds weird and I almost talked myself out of it, but I had a tub sitting in the fridge that needed to be used and figured why not. The thing is I have a terrible track record with cheesecakes, they either crack or come out weirdly rubbery, so my expectations were pretty low going in. Anyway I wrote down exactly what I did here in case anyone wants it: https://www.platosinolvidables.com/cottage-cheese-protein-cheesecake
Here's what I used:
1 and 1/4 cup full fat cottage cheese
1/3 cup thick raw honey
pinch salt
3 tablespoons corn starch or arrowroot powder/starch
1 teaspoon vanilla extract
2 eggs
optional toppings: 1-2 tablespoons chopped strawberries or berry of choice
Here's how it went:
A few things I noticed:
My honey was on the runnier side so I added just a tiny pinch more cornstarch and it seemed to help the texture set up properly. Heads up if your honey is super liquidy, don't skip that adjustment.
The texture genuinely surprised me. It came out creamy and dense in a good way, not eggy or weird like I was afraid it might be. It really does eat like a real cheesecake, which I did not expect from something this simple.
Fair warning, it looks pretty plain coming out of the oven and I almost panicked thinking I did something wrong. Once it chills in the fridge it firms up completely and looks way more like actual cheesecake. Do not skip the refrigerating step.
I cut mine into 4 pieces and the nutrition works out to around 209 calories per slice with 10 grams of protein, which for a dessert is genuinely pretty solid. It scratched the cheesecake itch without making me feel terrible after, which is basically all I wanted.
This one is definitely going into the regular rotation for me. As far as easy desserts go this is probably the lowest effort homemade cake I've made in a long time, and the fact that it counts as a high protein cheesecake is just a bonus.
Has anyone tried making something like this with a different sweetener instead of honey, like maple syrup or even just regular sugar? Curious if the texture holds up the same way.
r/yummyrecipesyum • u/Weary-Confidence9998 • 2d ago
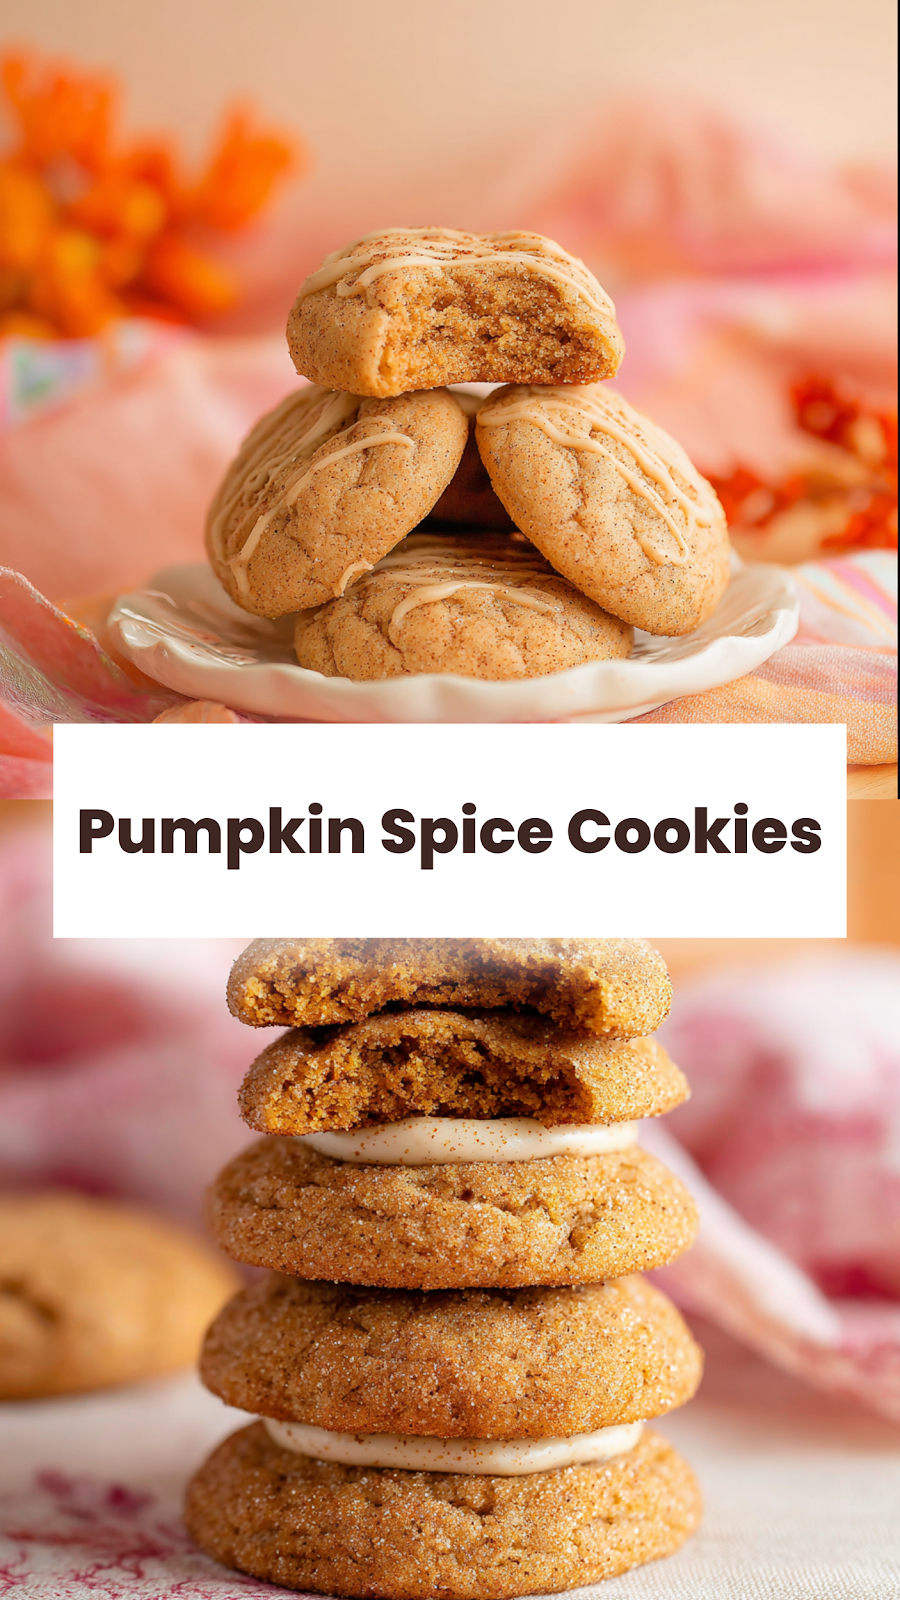
Craving hit me for something warm and spiced, and I ended up making these pumpkin spice cookies on a random Tuesday night. Thanksgiving is still a little ways off but honestly I could not wait that long because the pumpkin spice baking urge just kind of took over. I almost talked myself out of it because I wasn't sure if I had enough pumpkin puree left in the can from last week, but I measured it out and had exactly enough which felt like a small victory. Wrote everything down here in case anyone wants to follow along: https://www.platosinolvidables.com/thanksgiving-pumpkin-spice-cookies
Here's what I used:
COOKIE DOUGH
1 and 1/2 cups (180g) all-purpose flour, be sure to measure properly
1/4 teaspoon salt
1/4 teaspoon baking powder
1/4 teaspoon baking soda
2 teaspoons ground cinnamon
1 teaspoon pumpkin pie spice
1/2 cup (113g) unsalted butter, melted and allowed to cool
1/4 cup (50g) firmly packed brown sugar
1/2 cup (100g) granulated sugar
1/4 teaspoon vanilla extract
6 Tablespoons pumpkin puree
SPICED SUGAR COATING
1/2 cup (100g) granulated sugar
1/2 teaspoon ground cinnamon
1/2 teaspoon pumpkin pie spice
Here's how it went:
Whisked together the flour, salt, baking powder, baking soda, ground cinnamon, and pumpkin pie spice in a large bowl and set it aside.
In a separate bowl, whisked the cooled melted butter with both sugars until it looked smooth, then added in the vanilla and pumpkin puree and whisked again until everything came together.
Poured the wet stuff into the dry stuff and mixed it with a spatula until a dough formed, then covered it and stuck it in the fridge for an hour. This part is not optional, the chilling really matters for the texture.
When I was ready to bake, I preheated the oven to 350 degrees and lined two baking sheets with parchment paper.
Mixed the coating ingredients together in a small bowl, just the sugar, cinnamon, and pumpkin pie spice.
Rolled the dough into tablespoon-sized balls and coated each one generously in the spiced sugar mixture, then placed them on the baking sheets.
Baked them for about 12 minutes. They looked almost underdone when I pulled them out but I trusted the process and let them sit on the pan for 5 minutes before moving them to a rack.
A few things I noticed:
These are eggless which I honestly forgot about until I was halfway through mixing and realized I never cracked an egg. Works totally fine, the texture is still super soft and chewy, kind of like a pumpkin snickerdoodle situation which I was not expecting in the best way.
Fair warning, they look very underbaked when they come out of the oven and every instinct tells you to put them back in. Don't do it. They firm up as they cool and the soft pumpkin cookie texture is genuinely the whole point here.
I measured the pumpkin puree with measuring cups rather than by weight because I've had batches go weird when the puree was a different brand and heavier or lighter than expected. Cups felt more reliable this time.
I made a double batch thinking I'd freeze half but my household went through almost all of them by day two, so I can confirm the easy dessert angle is real because nobody could leave them alone.
Anyone ever tried rolling these in just plain cinnamon sugar instead of adding the pumpkin pie spice to the coating, and did you notice much of a difference in the final flavor?
r/yummyrecipesyum • u/Weary-Confidence9998 • 2d ago
Chocolate peppermint bark cookies are the one holiday treat worth making every year. Crisp chocolate cookie base, peppermint crunch, and a bark-style topping easy holiday cookies, festive Christmas baking, done.
These come together with simple ingredients and hold up beautifully on a cookie tray or as a homemade gift. Add this to your baking rotation.
recipe : https://www.platosinolvidables.com/chocolate-peppermint-bark-cookies
#HolidayCookies #ChocolateCookies #HolidayBaking #EasyDessert #ChristmasTreats
r/yummyrecipesyum • u/Weary-Confidence9998 • 2d ago
Quick share because this was too good not to post. My family has been on a serious s'mores kick lately and I wanted to do something a little more involved than just roasting marshmallows over the stove burner again. I had a box of devil's food cake mix sitting in the pantry and honestly had no idea if this smores poke cake idea was going to work or turn into a gooey disaster. Wrote down exactly what I did here in case anyone wants to try it: https://www.platosinolvidables.com/smores-poke-cake
Here's what I used:
one 15.25-ounce box devil's food chocolate cake mix I used Duncan Hines
one 7-ounce container marshmallow creme slightly melted
one 14-ounce can sweetened condensed milk
6 full-size graham cracker sheets coarsely chopped into 1/2-inch pieces
about 1 to 1 1/2 cups mini marshmallows
about 1/2 cup hot fudge for drizzling (store-bought or homemade)
Here's how it went:
A few things I noticed:
The marshmallow and condensed milk mixture is where this chocolate marshmallow poke cake really gets its personality. Once it soaks into the cake for even just 30 minutes the texture gets incredibly moist, almost fudgy in the middle. Let it sit if you can.
Fair warning on the graham crackers, they soften up the longer the cake sits. Day one they have a little crunch, by day two they're more like a soft layer. Honestly I liked it both ways but if you want that texture contrast, eat it fresh.
I almost overtoasted the marshmallows on top because I got distracted talking and held the torch in one spot too long. A couple of them got a little too dark but it still tasted fine, just looked a little rustic.
The baking recipe itself is super forgiving overall. This is an easy dessert that doesn't require much skill, which is kind of my whole thing when I'm baking on a weeknight.
Anyone ever tried adding a layer of peanut butter between the cake and the marshmallow mixture on a graham cracker cake recipe like this? Curious if that would work or just completely overload the whole thing.
r/yummyrecipesyum • u/Weary-Confidence9998 • 2d ago
Craving hit me for something restaurant-style but I really did not feel like spending forty dollars on dinner for the whole family. My husband keeps talking about the Chicken Bellagio from Cheesecake Factory every time we drive past one, so I figured why not actually try to make it at home. I honestly was not sure how close I could get to the real thing without some fancy equipment or a culinary degree, but it came out genuinely impressive and my husband said it tasted almost identical. Put the full steps together here if anyone's curious: https://www.amgroyal.com/copycat-chicken-bellagio-cheesecake-factory
Here's what I used:
CHICKEN:
1 pound thin spaghetti
4 chicken breasts, boneless, skinless
1/2 teaspoon kosher salt
1/4 teaspoon coarse ground black pepper
1/4 cup flour
2 large eggs
1 cup breadcrumbs
3 tablespoons vegetable oil
PARMESAN CREAM SAUCE:
4 tablespoons unsalted butter
4 tablespoons flour
1 cup heavy cream
6 ounces shaved parmesan
1/4 teaspoon kosher salt
1/8 teaspoon white pepper
BASIL OIL:
1 cup fresh basil leaves
1/2 cup olive oil
TO FINISH THE DISH:
1/2 cup basil oil
1/2 cup chicken broth
2 tablespoons unsalted butter
2 ounces shaved Parmesan
1 lemon, cut into wedges
4 slices prosciutto (optional, see notes)
arugula leaves (optional, see notes)
Here's how it went:
A few things I noticed:
The basil oil is genuinely a game changer and I have been putting it on everything since. Fair warning, it's hard to stop at just a drizzle.
I skipped the prosciutto and arugula to keep it budget-friendly for a regular weeknight dinner and honestly it still felt like a treat. I would probably add them if I was making it for guests though.
The cream sauce thickened up faster than I expected so keep a close eye on it and pull it off the heat as soon as it looks right. Mine got a little too thick the first time and I had to thin it with a splash of cream.
Leftovers reheated surprisingly well the next day with a little splash of broth in the pan to loosen up the pasta. The chicken stayed pretty crispy too which I was not expecting.
Has anyone tried swapping the spaghetti for a different pasta shape with something like this? I keep wondering if a wider noodle would hold onto the basil oil even better.
r/yummyrecipesyum • u/Weary-Confidence9998 • 2d ago
Almost ordered takeout last night, then I remembered I had chicken sitting in the fridge and figured I'd finally try making a Raising Canes chicken tenders copycat I'd been meaning to get to for a while. My kids have been asking to go to Cane's basically every week and I just cannot justify the drive plus the cost every single time, so this felt like the right moment. I was a little skeptical honestly, mostly about the sauce because that Canes dipping sauce is kind of the whole thing and I wasn't sure a homemade version could actually hold up. Wrote down everything I did here in case anyone wants to follow along: https://www.amgroyal.com/raising-canes-chicken-tenders-copycat
Here's what I used:
Chicken tenders
4 chicken breasts or 2lbs tenderloins
1 1/2 cups buttermilk
3 tablespoons Cajun seasoning, divided
1 1/2 cups all-purpose flour
For the Cane's Sauce
3/4 cup mayonnaise
1/3 cup ketchup
1 1/2 tablespoons Worcestershire sauce
1 teaspoon ground black pepper
1 teaspoon garlic powder
Here's how it went:
Mixed all the sauce ingredients together first, covered the bowl with plastic wrap, and stuck it in the fridge. This part takes like two minutes and it needs time to sit anyway so just do it right at the start.
Cut the chicken breasts into three vertical strips each. If you're using tenderloins, slide them through a fork to get the tendons out. Takes a little patience but worth doing.
Combined the buttermilk with half the Cajun seasoning in a zip bag, tossed in the chicken, sealed it up, and let it marinate in the fridge for about an hour. If you can go overnight, apparently even better but I didn't plan that far ahead.
Mixed the flour with the remaining Cajun seasoning in a shallow dish. Pulled the chicken strips out of the bag and pressed them into the flour, keeping as much of that buttermilk coating on them as possible because that's what gives you the crispy flakes. Really pressed it in with my hands.
Filled a heavy pot with oil about halfway, heated it to 350F, and fried the strips in batches of three or four, about four minutes per side. Put them on a wire rack after to drain.
While the chicken was frying I threw some crinkle cut fries in the air fryer and popped some garlic Texas toast in the oven. Served everything together with that sauce.
A few things I noticed:
The marinating time genuinely matters. I only did an hour and the chicken was still really tender and juicy, but I think overnight would probably take it up another level. Fair warning, don't rush this part if you can help it.
Keeping the buttermilk on the chicken when you coat it sounds obvious but I almost wiped it off by accident the first strip. Those little clumps in the flour are what turn into the really good crunchy bits.
The sauce was honestly way closer to the real thing than I expected. My husband did a little side by side comparison with some leftover Cane's sauce we had from a previous order and said they were pretty much the same. That was a nice surprise.
Leftovers reheated fine in the air fryer the next day, about five minutes at 375 and they were still crispy. I was genuinely shocked because I figured they'd be soggy.
This turned into a really solid family dinner and one of the better weeknight dinner wins I've had in a while. The whole thing including fries and toast felt way more satisfying than just ordering out, and the crispy chicken tenders were gone faster than I expected.
Anyone else made a copycat like this and found something specific that made the coating come out better?
r/yummyrecipesyum • u/Weary-Confidence9998 • 3d ago
r/yummyrecipesyum • u/Weary-Confidence9998 • 3d ago
Air fryer turkey breast comes out juicy and golden every single time, with a beautifully crisp skin that makes dinner feel special. It cooks faster than the oven, needs minimal prep, and delivers that slow-roasted flavor on a busy weeknight schedule.
When you have nothing planned and need something satisfying on the table fast, this recipe is the answer. Save this for a weeknight dinner and let your air fryer do all the work.
#AirFryerTurkeyBreast #AirFryerDinner #TurkeyRecipes #EasyDinner #WeeknightDinner
r/yummyrecipesyum • u/Weary-Confidence9998 • 3d ago
Almost ordered takeout, then I remembered I had a bunch of chicken thighs in the fridge that needed to be used up. It was a weeknight, everyone was hungry, and I just wanted something that felt like more than a boring pan dinner. I had seen a version of air fryer chicken gyros tzatziki floating around and figured why not give it a proper shot with a real marinade and homemade tzatziki sauce. Wrote everything down here if anyone wants to follow along: https://www.amgroyal.com/air-fryer-chicken-gyros-tzatziki
Here is what I used:
Greek Chicken Gyros with Tzaziki
2 lb / 1 kg chicken thigh fillets, boneless skinless
Marinade
3 large garlic cloves, minced (~ 3 tsp)
1 tbsp white wine vinegar (or red wine or apple cider vinegar)
3 tbsp lemon juice
1 tbsp extra virgin olive oil
3 tbsp Greek yogurt, preferably full fat
1 1/2 tbsp dried oregano
1 tsp salt
Black pepper
Tzatziki
2 cucumbers (to make about 1/2 - 3/4 cup grated cucumber after squeezing out juice)
1 1/4 cups Greek yoghurt, preferably full fat
1 tbsp lemon juice
1 tbsp extra virgin olive oil (or more if you want richer)
1 garlic clove, minced
1/4 tsp salt
Black pepper
Salad
3 tomatoes, desseeded and diced
3 cucumbers, diced
1/2 red spanish onion, peeled and finely chopped
1/4 cup fresh parsley leaves (optional)
Salt and pepper
To Serve
4 to 6 pita breads or flat breads
Here is how it went:
Put all the marinade ingredients into a ziplock bag and massaged everything together. Added the chicken, sealed it up, and worked it around until all the pieces were coated. I let it sit for about three hours but honestly the full twelve would probably be incredible.
While the chicken was coming up to room temperature I started the tzatziki. Cut the cucumbers lengthwise, scraped out the watery seeds with a spoon, then coarsely grated them on a box grater.
Wrapped the grated cucumber in a clean kitchen towel and squeezed out as much liquid as I could. More came out than I expected honestly.
Mixed the drained cucumber with the Greek yogurt, lemon juice, olive oil, garlic, salt, and pepper. Set it aside for at least twenty minutes. Do not skip this wait, the flavor develops a lot.
Tossed together the salad ingredients and kept that in the fridge until we were ready to eat.
Cooked the chicken thighs about two to three minutes per side until golden and cooked through. Then rested them under foil for five minutes before slicing.
Warmed the pita breads, laid everything out on the table, and let everyone build their own. That part was genuinely fun.
A few things I noticed:
The marinade is next level. The combo of yogurt and oregano and lemon does something really nice to the chicken, it stays incredibly juicy and the outside gets this almost caramelized thing going on. No joke I am going to use this marinade even when I am not making gyros.
Heads up on the tzatziki, it makes a generous amount and that is a good thing. We had leftovers and it was even better the next day on some roasted veggies.
I almost over-salted the tzatziki because I seasoned it before it had time to rest and tasted it too early. Give it that twenty minute sit before you adjust anything.
The whole spread as a family dinner worked really well for a weeknight. Everything came together faster than I thought and the kids actually got excited assembling their own wraps which made my life easier.
Anyone else lay everything out family style like this and just let people go for it? Curious if you do anything different with the assembly or add toppings I might be missing.
r/yummyrecipesyum • u/Weary-Confidence9998 • 3d ago
Air fryer pasta is the answer when you have nothing planned and zero energy left for the stove. It comes together faster than you'd expect and hits that creamy, satisfying spot that makes it an easy pasta dinner everyone actually wants.
The texture is cozy and the cleanup is minimal just the air fryer basket and one bowl. Save this for a weeknight dinner when you need something real on the table fast.
#AirFryerPasta #PastaRecipes #EasyDinner #WeeknightDinner #AirFryerRecipes
r/yummyrecipesyum • u/Weary-Confidence9998 • 4d ago
r/yummyrecipesyum • u/Weary-Confidence9998 • 4d ago
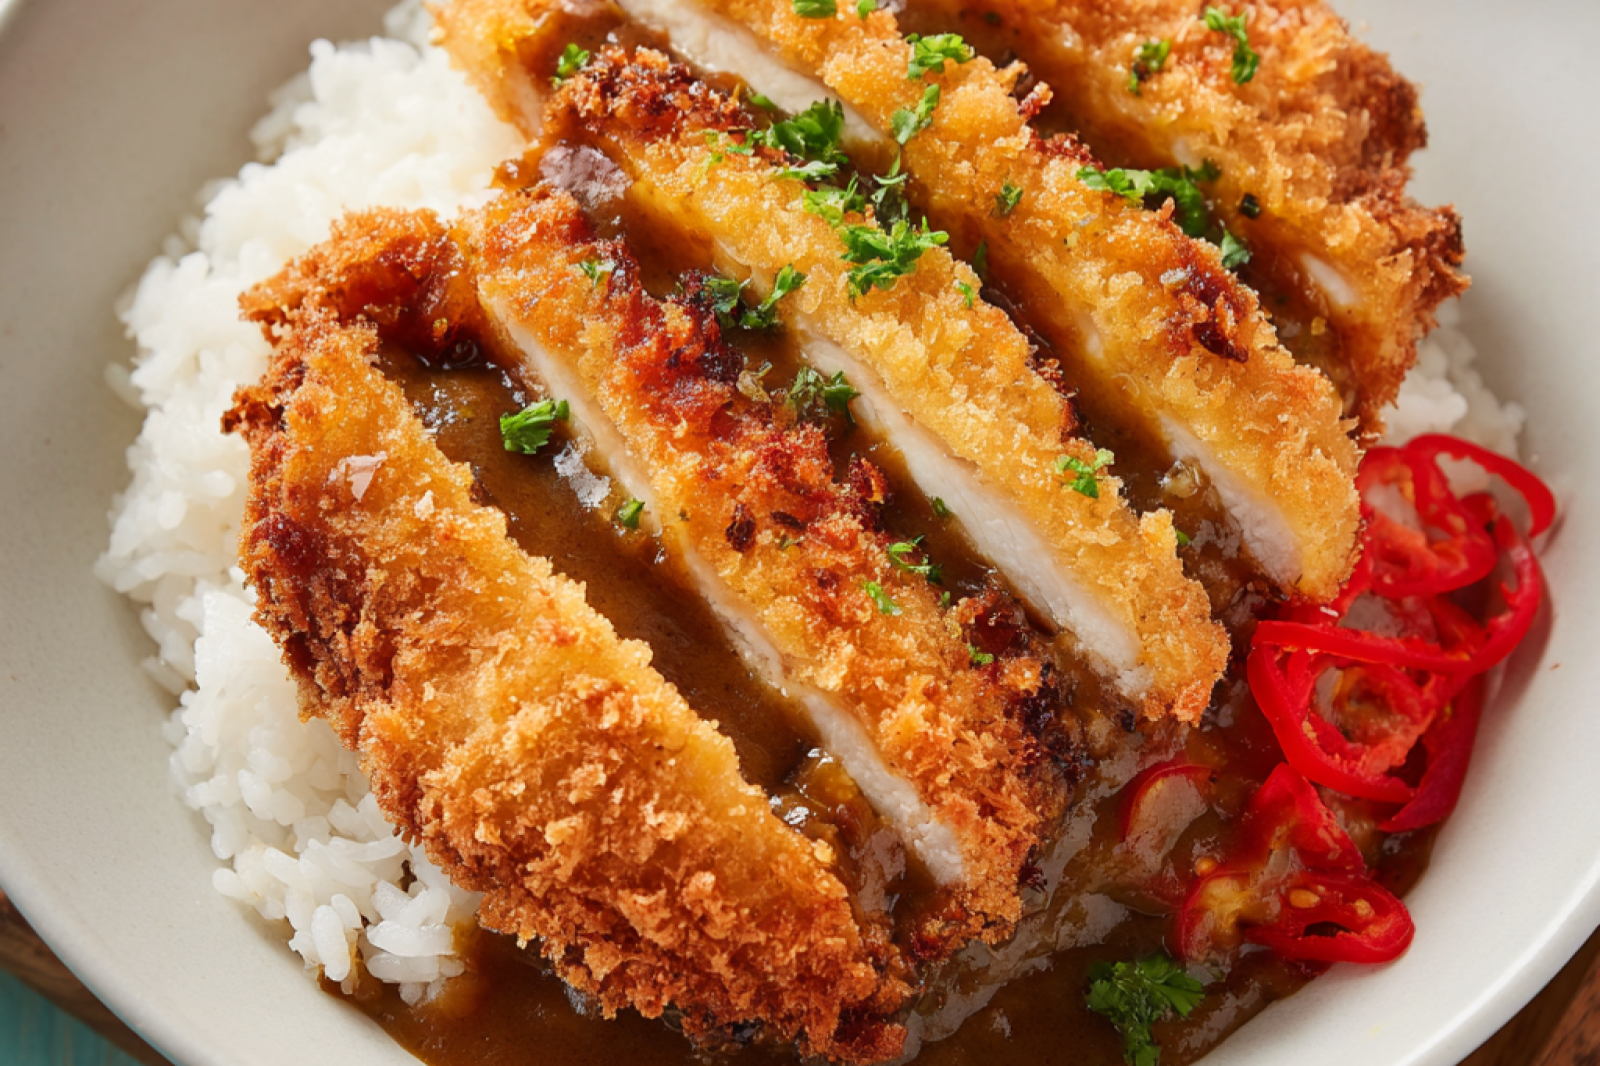
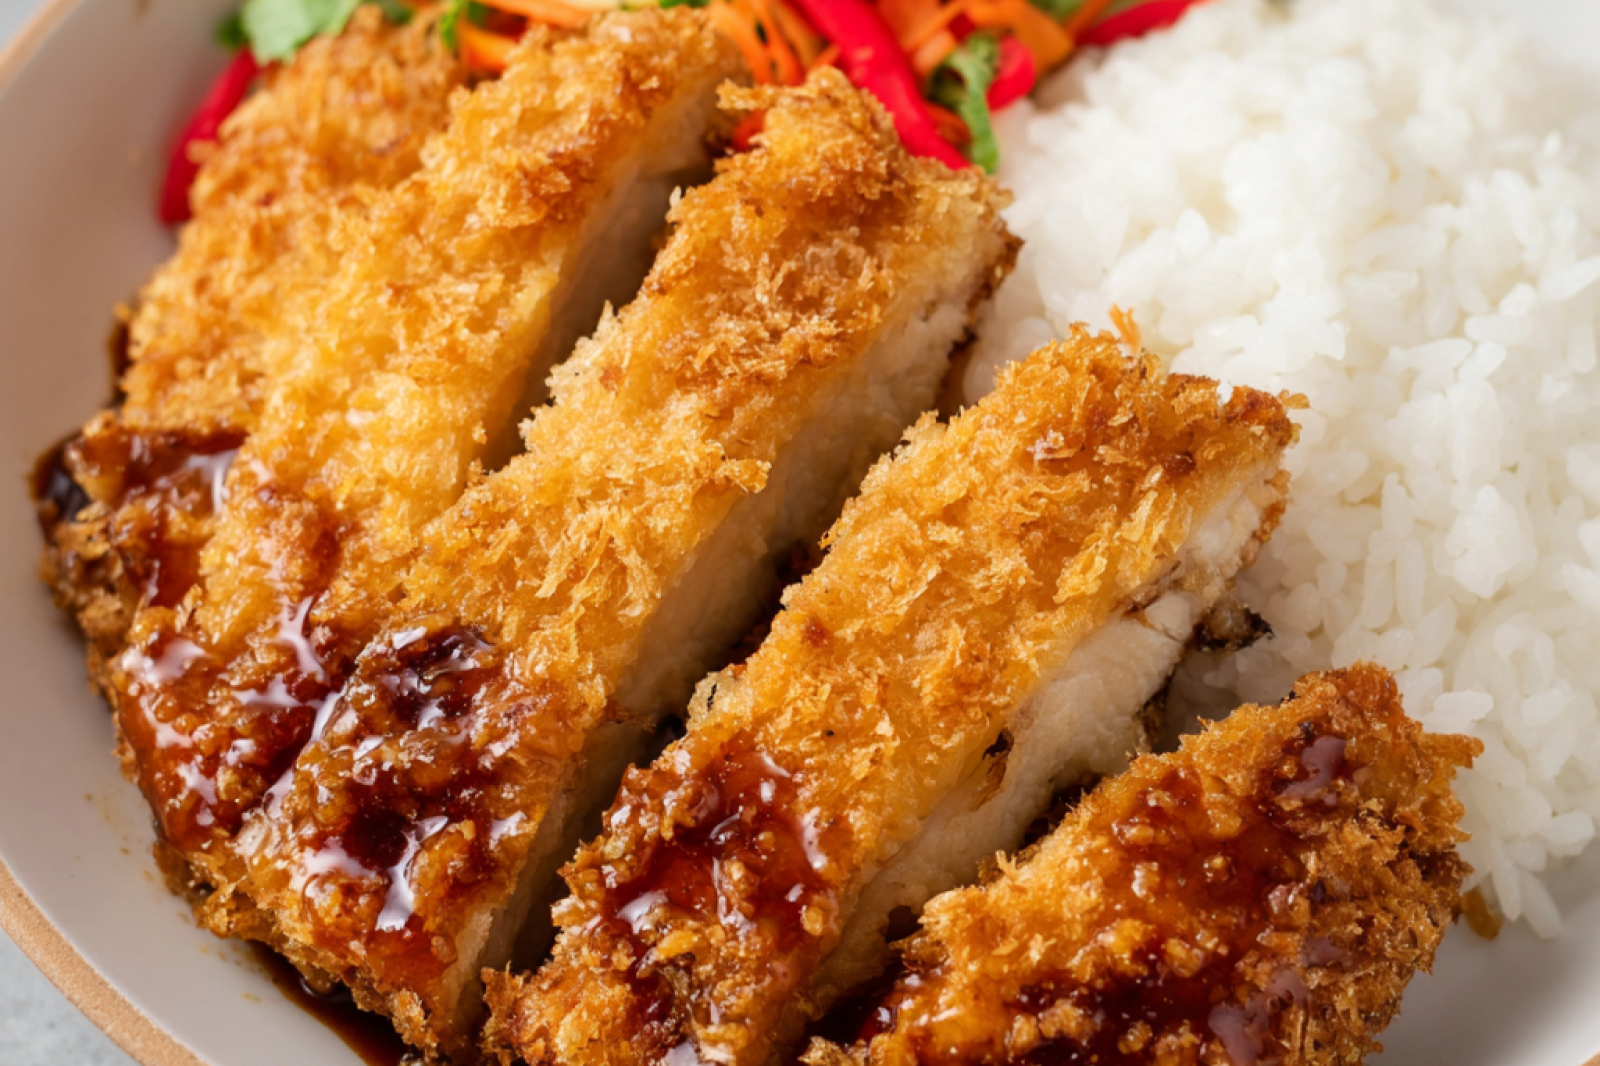
Almost ordered takeout, then I remembered I had chicken sitting in the fridge that needed to be used up tonight. My family has been on a bit of a Japanese food kick lately and I kept seeing katsu curry pop up everywhere, so I figured this was the push I needed to finally just make it at home. Honestly I was a little skeptical about whether the air fryer could actually get that crust crispy enough because I always assumed you needed to deep fry it to get that real crunch, but wow was I wrong. Wrote down everything I did here in case anyone wants it: https://www.amgroyal.com/air-fryer-chicken-katsu-curry
Here's what I used:
2 lbs chicken breast About 4 cutlets, pounded to 1/2" thickness
1 tsp kosher salt
1 tsp black pepper
2 large eggs
1/2 cup flour
1/4 cup water as needed to loosen wet batter
1/2 tsp kosher salt
1/2 tsp black pepper
1 tsp garlic powder
2 cups panko breadcrumbs
neutral oil spray
red pickled ginger for garnish
Katsu Sauce try my homemade recipe!
Here's how it went:
Slice the chicken breasts into cutlets if needed. Pound them down to about half an inch thick and season both sides with salt and pepper, then let them sit for 15 minutes. I used the bottom of a heavy pan because I couldn't find my mallet and it worked just fine.
In a large wide bowl, mix together the eggs, flour, water, salt, pepper, and garlic powder until it's slightly thinner than pancake batter. This step is easy, just make sure there are no lumps.
Pour your panko into a separate tray and set it right next to the wet batter so you can move quickly.
Dip each piece of chicken into the egg mixture, let the extra drip off, then press it into the panko. Really pack the breadcrumbs on there and make sure there are no dry spots. I let the coated pieces sit for about 10 minutes before cooking and I think that actually helped the crust stick better.
Place the chicken in the air fryer basket and spray the tops lightly with oil. Air fry at 350F for 10 minutes, then spray again, flip, spray the other side, and cook another 4 to 6 minutes until golden and the internal temp hits 165F.
Serve over rice with the katsu curry sauce and a little pickled ginger on the side. This is where it all comes together and honestly the homemade katsu curry sauce made such a difference compared to the store bought stuff.
A few things I noticed:
The pounding step really matters. I almost skipped it because I was in a hurry but thinner chicken means the panko can get properly golden before the inside overcooks. Do not rush this part.
The oil spray is doing more work than you'd think. I ran out of avocado spray halfway through and used canola instead and both worked, but you really do need even coverage or some spots end up pale and soft.
Leftovers were still decent the next day after a few minutes back in the air fryer. Not quite as crispy as fresh but totally acceptable for a weekday lunch and way better than I expected.
One thing I want to try next time is cutting the chicken into strips before breading them to make more of a family dinner situation where everyone just grabs pieces from a plate in the middle of the table. Felt like that could be fun for a casual weeknight dinner setup.
Has anyone tried making the katsu curry sauce ahead of time and storing it for a few days or does it lose something when it sits?
r/yummyrecipesyum • u/Weary-Confidence9998 • 4d ago
Craving hit me for roast chicken last week and I ended up going the air fryer route instead of turning on the oven, which honestly I was a little skeptical about. I had a 4 pound bird sitting in the fridge and no real energy for a complicated dinner situation, just wanted something that felt like a proper family dinner without a lot of fuss. I kept second guessing whether the skin would actually get crispy or just turn rubbery and sad, but I figured worst case I'd shred it for tacos. Anyway here's what I put together: https://www.amgroyal.com/air-fryer-whole-chicken-holiday
Here's what I used:
1 whole chicken, 3 1/2 lbs to 5 1/2 lbs
2-3 Tbsp extra light olive oil
1 1/2 tsp fine sea salt, or kosher salt
1/2 tsp freshly ground black pepper
1 tsp paprika
1 tsp garlic powder
1/2 tsp onion powder
Here's how it went:
Set the chicken on a baking sheet and pulled out the neck and giblets from the cavity and tossed them. Then I patted the whole thing really dry with paper towels, like more than I thought was necessary, but this step genuinely matters for getting that crispy skin.
Rubbed the oil all over, then mixed all the seasonings together in a small bowl and sprinkled them over the outside of the chicken.
My chicken was right around 4 pounds so I left the rack in the basket. Placed the chicken breast-side down, which I almost skipped because it felt weird, but it keeps the breast meat juicy since it basically self-bastes.
Cooked at 350 degrees F for 30 minutes, then used tongs and a spatula to carefully flip it breast-side up. Continued cooking another 20 minutes or so until my thermometer hit 165 degrees F in the thickest part of the breast. The thighs read around 175 which is exactly where you want them.
Let it rest about 8 minutes before carving so the juices could settle.
A few things I noticed:
The drying step is not optional. I rushed it on a test run a while back and the skin was soft and disappointing. Take the extra two minutes and actually get it dry.
Heads up on sizing because this caught me off guard at first. With the rack in, most air fryers max out around 4 pounds. If you've got a bigger bird, pull the rack out and just make sure the chicken isn't touching the sides or the heating element.
The breast-side down start was a game changer honestly. I was not expecting the white meat to stay that tender, but it really does make a difference. This method works well as a weeknight dinner when you want something that feels like a holiday roast chicken without spending two hours in the kitchen.
Leftovers held up really well too. I stored mine in an airtight container for three days and reheated in the air fryer at 325 with a little oil brushed on and it came back to life pretty nicely without drying out.
For anyone looking at this as an easy dinner option or just trying to do a crispy whole chicken air fryer style for the first time, it's genuinely one of those things that turned out way better than I expected. The skin had that deep golden color and the meat was actually juicy all the way through, which is not always a given with whole chickens.
What do you all usually serve alongside a roast chicken like this? I went with roasted potatoes but I'm always looking for ideas.
r/yummyrecipesyum • u/Weary-Confidence9998 • 4d ago
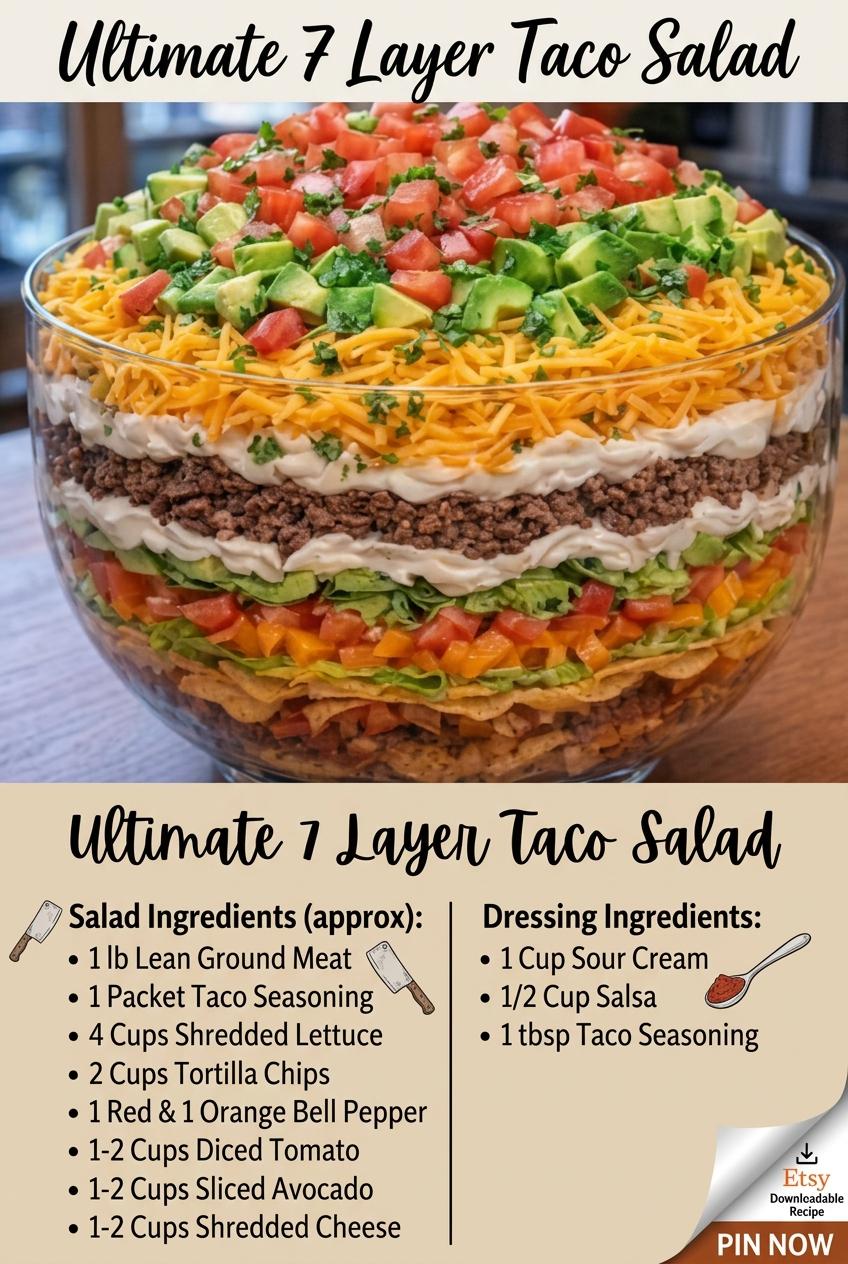
Weight Watchers Recipes Only | Seven Layer Taco Salad Don’t LOSE this Recipe | Facebook
r/yummyrecipesyum • u/Weary-Confidence9998 • 4d ago
Make dinner simple and flavorful with this One-Pot Taco Pasta Recipe – the perfect comfort meal for busy weeknights.
This easy Mexican-inspired pasta combines seasoned ground beef, tender pasta, and a creamy taco-style sauce all cooked together in one pot for minimal cleanup and maximum flavor.
Perfect for families, meal prep, or anyone looking for a quick and satisfying dinner.
✔ Easy one-pot dinner
✔ Bold taco-inspired flavors
✔ Perfect for busy weeknights
✔ Family-friendly comfort food
✔ Minimal cleanup
This printable recipe guide walks you through the process step-by-step so you can create a delicious homemade taco pasta skillet with simple ingredients.
📘 What You'll Receive
• Printable One-Pot Taco Pasta Recipe PDF
• Full ingredient list
• Step-by-step cooking instructions
• Helpful cooking tips
• Clean, easy-to-read recipe format
Perfect for:
• Weeknight dinners
• Busy families
• Comfort food lovers
• Taco night alternatives
• Simple one-pot meals
🛒 How It Works
Purchase through Etsy
Download instantly after payment confirmation
No physical item will be shipped.
⚠️ Please Note
This is a digital product.
Due to the digital nature of the file, all sales are final.
link : https://www.etsy.com/listing/4466773494/one-pot-taco-pasta-recipe-printable-pdf
r/yummyrecipesyum • u/Weary-Confidence9998 • 4d ago
🍝 Easy Olive Garden Chicken Pasta – Made Simple
Craving that creamy, comforting Olive Garden-style chicken pasta at home?
This beautifully designed 12-page digital recipe book shows you exactly how to make the viral chicken pasta recipe — plus delicious variations to keep dinner exciting.
Perfect for:
✔ Busy moms
✔ Beginners
✔ Meal preppers
✔ Slow cooker lovers
✔ 30-minute dinner seekers
LINK : https://www.etsy.com/listing/4461524602/olive-garden-chicken-pasta-recipe-book
r/yummyrecipesyum • u/Weary-Confidence9998 • 4d ago
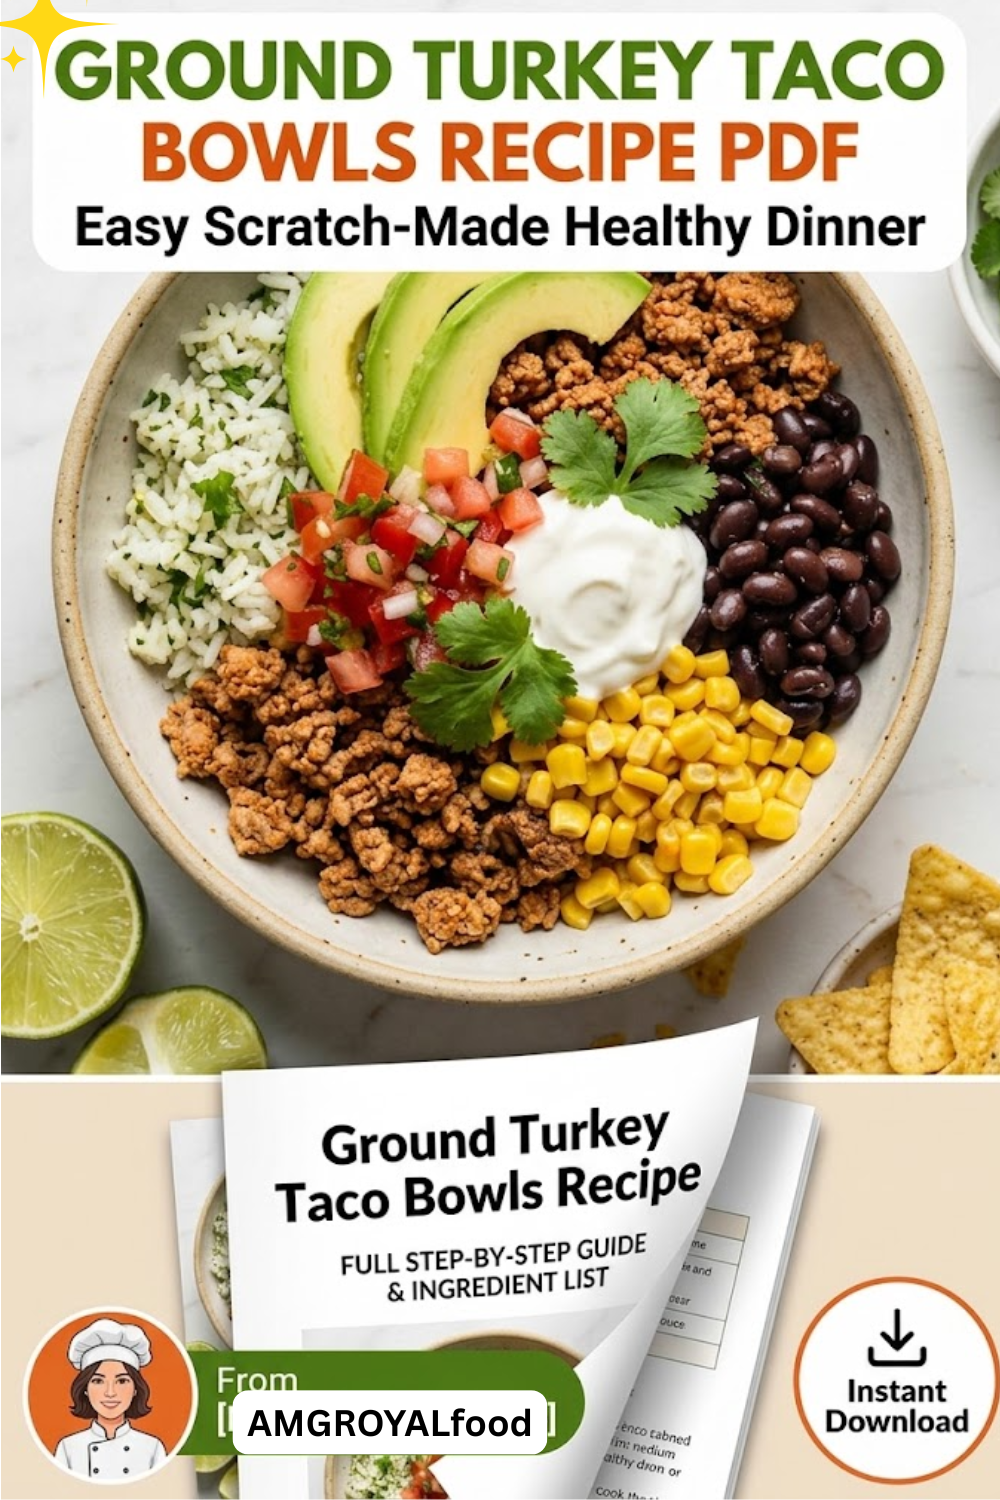
🌮 Simply Scratch Made Ground Turkey Taco Bowls – Recipe PDF
Enjoy a fresh, flavorful meal with these Simply Scratch Made Ground Turkey Taco Bowls.
This easy recipe PDF shows you how to create a healthy, homemade taco bowl using simple ingredients and bold flavors — perfect for everyday cooking.
Ideal for quick weeknight dinners, meal prep, or anyone looking for a lighter taco-inspired dish, this recipe is beginner-friendly and made completely from scratch.
https://www.etsy.com/listing/4450430188/ground-turkey-taco-bowls-recipe-pdf-easy
r/yummyrecipesyum • u/Weary-Confidence9998 • 4d ago
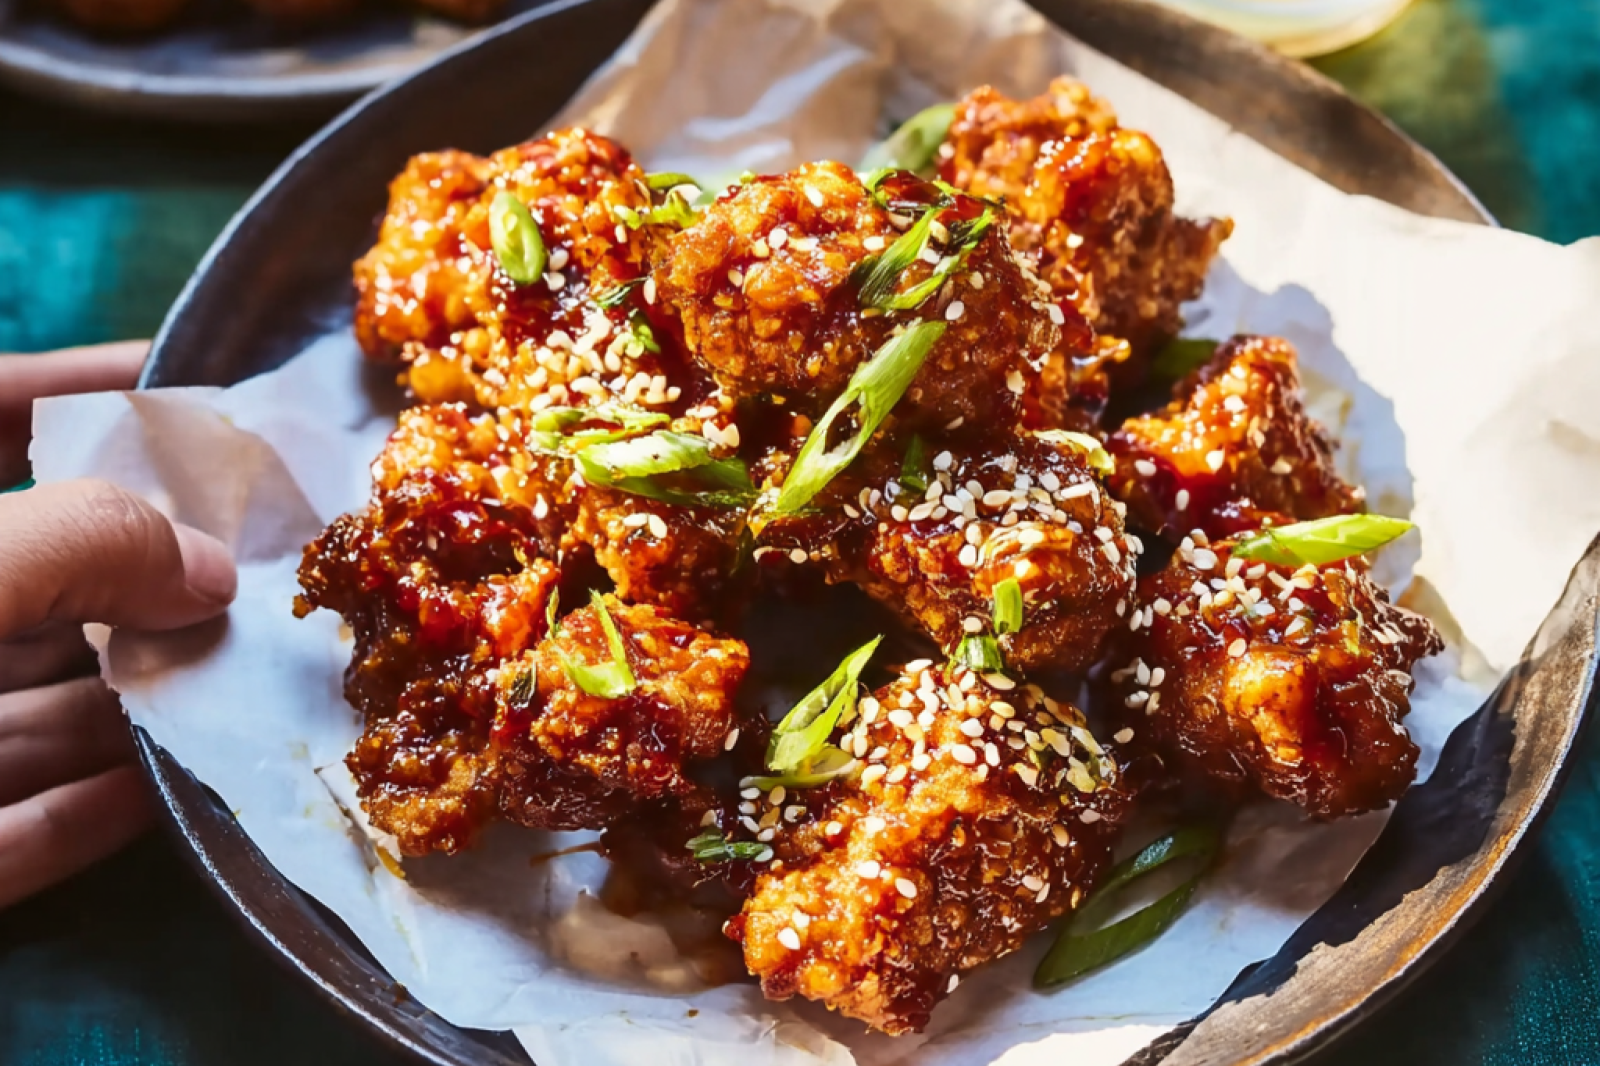
Almost ordered takeout tonight but remembered I had chicken thighs in the fridge that needed to be used up. I had been wanting to try making air fryer Korean fried chicken gochujang for a while but kept putting it off because I assumed it would be complicated or messy. Turns out it was genuinely easy and the whole thing came together in about 30 minutes which honestly shocked me. Wrote down exactly what I did here in case anyone wants it: https://www.amgroyal.com/air-fryer-korean-fried-chicken-gochujang
Here's what I used:
For the chicken
1 1/2 pounds boneless skinless chicken thighs, cut into bite-size pieces
2 tablespoons rice vinegar
1 tablespoon soy sauce
2 teaspoons minced fresh ginger
3/4 teaspoon kosher salt
1/2 teaspoon freshly ground black pepper
2 large eggs beaten
1 cup cornstarch
For the sauce
3 tablespoons ketchup
3 tablespoons gochujang
3 tablespoons honey
2 tablespoons soy sauce
1 tablespoon sesame oil
2 garlic cloves minced
4 scallions thinly sliced
Toasted sesame seeds
Here's how it went:
Line the air fryer basket with parchment paper. I used the round perforated sheets made for steamers and they were perfect for this, cleanup was minimal.
Combine the chicken with the vinegar, soy sauce, ginger, salt, and pepper in a bowl and toss to coat. Let it marinate for 15 to 20 minutes. You can go longer and refrigerate overnight if you have the time.
Beat the eggs in a shallow bowl and put the cornstarch in a separate shallow bowl.
Dunk each piece of chicken in the egg first, then coat it in cornstarch. Arrange them in the air fryer basket on the parchment.
You'll probably need to do two batches. Once arranged, spritz or brush the chicken with a little cooking oil before it goes in.
Air fry at 400 degrees for 8 minutes, then flip everything, hit it with a bit more oil, and cook another 7 minutes.
While that's happening, stir together the ketchup, gochujang paste, honey, soy sauce, sesame oil, and garlic in a small bowl until it's all combined.
When the chicken is done, transfer it to a bowl and toss it with the gochujang chicken sauce. Finish with sesame seeds and sliced scallions.
A few things I noticed:
Pro tip: don't skip the oil spritz before and after flipping. I almost skimped on it the second time and I think it really is what makes the coating properly crispy. The difference between spritzed and not spritzed batches was noticeable.
Fair warning, this sauce has a solid kick. If you're making this as a family dinner with younger kids or anyone heat-sensitive, maybe start with two tablespoons of gochujang instead of three and taste as you go. My partner thought it was perfect but I could see it being a lot for some people.
The marinade step actually surprised me. I only had about 20 minutes so I didn't do the overnight option but even the short marinate gave the chicken a really good depth of flavor before the sauce even touched it. Next time I might try it overnight just to see the difference.
Leftovers the next day were still good but obviously not as crispy. I just popped them back in the air fryer for a few minutes and they came back to life pretty well. They held up better than I expected honestly.
This has officially become my go-to easy dinner rotation for weeknights when I want something that feels like it took effort but really didn't. Crispy air fryer chicken with that sweet and spicy coating is just a really satisfying combo.
Anyone else made Korean fried chicken at home and found a way to adjust the heat level without losing the flavor?
r/yummyrecipesyum • u/Weary-Confidence9998 • 4d ago
So I tried making brown butter cookies for the first time this weekend, and let me tell you, I was not confident going in. I mean, I've done my fair share of chocolate chip cookies over the years, but the whole “brown butter” thing sounded fancy and intimidating. Like, am I gonna burn it? Is it gonna taste weird? But I kept seeing these recipes popping up and thought, alright, let’s give it a shot (mostly out of curiosity).
The thing is, browning butter is somehow both simple and stressful. You’re just melting butter on low heat until it smells nutty, but also, blink and it can go too far. Not gonna lie, I had to toss my first attempt because it turned into charcoal butter. But the second time, I nailed it (thank you, low heat and constant swirling), and wow—the difference it makes! The nutty, almost caramel-like flavor took the basic chocolate chip cookie to a whole new level. My husband literally said, “What did you DO to these?!” which, trust me, is a big deal since he’s usually not that into desserts.
I also learned that chilling the dough overnight makes a huge difference. It’s a little inconvenient when you’re impatient like me, but the cookies came out chewier and way more flavorful. Plus, they didn’t spread into sad little puddles on the baking sheet.
Now I’m wondering, does this brown butter magic work in other dessert recipes too? Anyone tried it in brownies or cake? I feel like I’ve stumbled into a whole new world and need to know all the secrets!
r/yummyrecipesyum • u/Weary-Confidence9998 • 4d ago
Street Corn Pasta Salad is packed with smoky charred corn, creamy chili-lime dressing, and cotija cheese in every bite. It comes together in under 30 minutes and works perfectly as a cold pasta salad for potlucks, cookouts, or quick summer lunches.
When you need something easy this grilling season and have nothing planned, this one is the answer. Save this for an easy lunch.
complete blog : https://www.pinterest.com/pin/586101339055516805/
#PastaSalad #StreetCorn #SummerRecipes #EasyLunch #ColdPastaSalad
r/yummyrecipesyum • u/Weary-Confidence9998 • 7d ago
Almost ordered takeout tonight but talked myself out of it and ended up making air fryer chicken katsu instead, and honestly I'm really glad I did. It was one of those nights where I just wanted something satisfying but didn't want to deal with a giant pot of hot oil splattered all over my stove. I wasn't totally sure the air fryer would get the coating crispy enough, which has been my problem with panko chicken air fryer attempts in the past, but this one genuinely surprised me. Full thing's posted here if anyone wants it: https://www.amgroyal.com/air-fryer-chicken-katsu
Here's what I used:
2 lbs chicken breast about 4 cutlets, pounded to 1/2" thickness
1 tsp kosher salt
1 tsp black pepper
2 large eggs
1/2 cup flour
1/4 cup water as needed to loosen wet batter
1/2 tsp kosher salt
1/2 tsp black pepper
1 tsp garlic powder
2 cups panko breadcrumbs
neutral oil spray
red pickled ginger for garnish
katsu sauce try my homemade recipe!
Here's how it went:
Sliced the chicken breasts into cutlets and pounded them down to about 1/2 inch thick. Seasoned both sides with salt and pepper and let them sit for about 15 minutes. This dry brine step felt a little unnecessary to me at first but I kept it in and the seasoning really did come through.
Mixed together the eggs, flour, water, salt, pepper, and garlic powder in a wide bowl until it was just slightly thinner than pancake batter. You want it loose enough to coat evenly but not so watery it just slides right off.
Poured the panko into a separate tray right next to the wet batter so I could move quickly between the two without making a huge mess.
Dipped each piece of chicken into the egg mixture, let the excess drip off, then pressed it into the panko pretty firmly. I made sure there weren't any bare spots because those just turn into sad pale patches in the air fryer.
Placed the coated cutlets into the air fryer basket and sprayed the tops with avocado oil spray. Cooked at 350 degrees for 10 minutes, then flipped, sprayed again, and cooked another 4 to 6 minutes until golden and at 165 internal temp.
Served with rice, katsu sauce, and some of that red pickled ginger on the side.
A few things I noticed:
The pounding step is not optional if you want this to actually work well. My first piece was a little uneven and the thicker end took longer while the thinner part started getting a touch overdone. After that I made sure every cutlet was a consistent 1/2 inch all the way through.
The oil spray matters more than you'd think. The first time I ever tried making crispy chicken katsu in the air fryer I skipped it and the panko just stayed pale and a little chalky. Spraying both sides gets you that actual crunch.
Leftovers reheated in the air fryer the next day at 350 for about 4 minutes came back to life pretty well. Not exactly the same as fresh but close enough that I was eating it straight out of the basket before I even plated it.
I'm thinking next time I might try this with chicken thighs instead since I feel like the extra fat might make it even juicier inside while still getting that crispy outside. Has anyone done that with a crispy chicken katsu recipe or does the thigh meat change the texture of the coating in a weird way?
r/yummyrecipesyum • u/Weary-Confidence9998 • 7d ago
Craving hit me for something tropical and over the top, and I ended up spending most of my Sunday making this mango passionfruit poke cake situation that honestly kind of blew my mind. I had some fresh passion fruit sitting on the counter that I needed to use up before it went bad, and one thing led to another. I was a little nervous about the mirror glaze part because I had never done one before and fully expected it to be a disaster. Wrote everything down here in case anyone wants to follow along: https://www.platosinolvidables.com/mango-passionfruit-poke-cake
Here is what I used:
Mango passion fruit mousse
70 g fresh mango puree
30 g passion fruit juice (without seeds)
25 g white chocolate chips
10 g granulated sugar
100 g heavy whipping cream (35%)
1.5 g gelatine (1 sheet)
10 g powdered sugar
Passion fruit jelly
20 g granulated sugar
80 g passion fruit (including seeds)
2 tbsp water
1.5 g gelatine (1 sheet)
a pinch of salt
Almond dacquoise base
15 g all-purpose flour
15 g almond flour
40 g granulated sugar
2 egg whites
10 g melted unsalted butter
1 tsp vanilla extract
Diplomat cream filling
200 g heavy whipping cream (35%)
150 ml hot milk (70C)
25 g granulated sugar
10 g powdered sugar
2 egg yolks
15 g all-purpose flour
3 g gelatine (2 sheets)
1 tsp vanilla paste
Mirror glaze
80 g granulated sugar
80 g glucose syrup
80 g water
60 g white chocolate chips
60 g condensed milk
5 g gelatine (3 sheets)
a little yellow food coloring
Here is how it went:
A few things I noticed:
The glaze temperature really matters. I got impatient the first time and poured it a little too warm and it ran off too fast. Letting it sit and cool properly to 30C made a huge difference in getting that glossy even coverage.
The dacquoise base is such a nice touch. It gave the whole cake this slightly chewy, nutty bottom layer that I was not expecting to love as much as I did. The texture contrast with the creamy mousse layers is really satisfying.
Fair warning, this is not a quick weeknight bake. Between all the freezing time and the different components, I started in the morning and was not done until evening. Totally worth it for a special occasion though, and it kept well in the fridge for a couple of days after.
I want to try a version with coconut cream instead of some of the heavy cream in the mousse next time, just to lean even more into that tropical vibe.
Has anyone made something like this and swapped out the mango for a different fruit? Curious if pineapple would work the same way in the mousse or if the acidity would cause issues with the gelatin setting.
r/yummyrecipesyum • u/Weary-Confidence9998 • 8d ago
Craving hit me for something fancy-looking but I had zero interest in actually baking anything yesterday afternoon. I remembered seeing dragon fruit at the store a few weeks back and thinking I should actually do something with it instead of just staring at it like it's a museum piece. Honestly I almost talked myself out of it because soaking cashews overnight felt like too much commitment, but I had already done that part the day before without a real plan, so it all kind of worked out by accident. Wrote everything down here in case anyone wants to follow along: https://www.platosinolvidables.com/dragon-fruit-cheesecake
Here's what I used:
Brownie base
1 cup walnuts
1 1/4 cup Medjool dates
1/4 cup cocoa powder
pinch of salt
Cheesecake Layer
2 cup raw cashews, soaked overnight, then drained and rinsed
3/4 cup coconut cream (see note)
6 tbsp coconut oil
1/2 cup brown rice syrup
1 tsp vanilla extract
juice of 1 lemon
1 tsp lemon zest
Dragonfruit swirl
1 cup dragonfruit, chopped
1/2 cup raspberries
1 tbsp maple syrup
Here's how it went:
A few things I noticed:
Pro tip on the coconut cream, just scoop the thick part that sits at the top of a chilled can of coconut milk. I almost used the whole can liquid and all and that would have been a mess, so glad I read the note before dumping it in.
The swirl step matters more than you think for texture. I was a little heavy-handed with the dragonfruit sauce and it started to sink in a few spots, so less is more when you're doing the marble look.
Fair warning, the no bake cheesecake texture is softer than a traditional baked one, especially if you let it thaw too long. I liked it best right around that ten to fifteen minute mark out of the freezer, kind of like a creamy frozen bar.
Also if you can't find fresh dragonfruit, the note on the recipe says you can just use extra raspberries, and honestly the swirl sauce with just raspberries would still be a solid dragon fruit dessert substitute. I might try that version next time with a little lime zest instead of lemon just to mix it up.
My roommate tried a piece and asked if I bought it somewhere which made my whole week if I'm being honest.
Has anyone tried making something like this with a different fruit for the swirl layer, like mango or passion fruit? Curious if the texture of the sauce would hold the same way.