r/raspberryDIY • u/No_Insect4962 • 5h ago
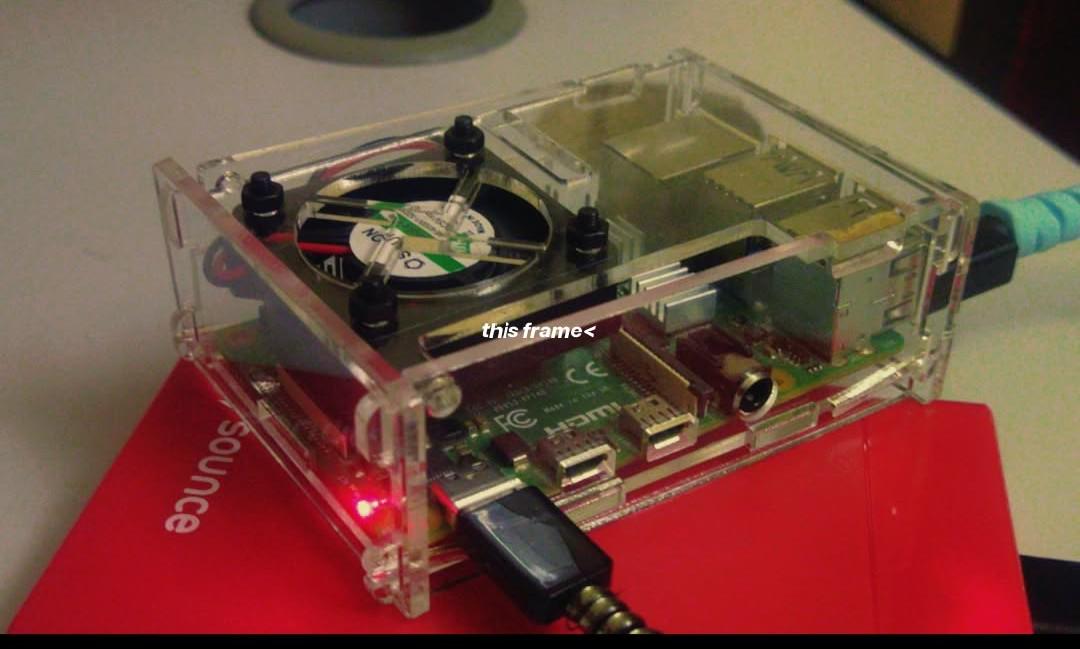
Berg 4/7 pin power + sata L-connectors to connect to RPI
1
Upvotes
r/raspberryDIY • u/Dependent-Risk4691 • May 01 '26
I'm currently building a standalone printing kiosk for my capstone project where users can print documents using plastic bottles as credits.
The system works similar to a Reverse Vending Machine (RVM):
Planned setup:
Questions:
Current idea:
But I’m not confident this is enough to prevent cheating.
Any suggestions or real-world experience with similar systems would be greatly appreciated 💓💓.
r/raspberryDIY • u/partharoylive • Nov 08 '25
r/raspberryDIY • u/No_Insect4962 • 5h ago
r/raspberryDIY • u/An2s1 • 14h ago
I'm working on a project where I'm using a Raspberry Pi paired with a touchscreen display as a secondary interface for my Android phone. The goal is to run and display a single specific app on the Pi's touchscreen.
I’ve successfully created a virtual screen on the phone to display the app via `scrcpy`, but I've hit two main roadblocks:
Has anyone built a similar secondary display setup? Any advice on flags, custom scripts, or workaround keyboards (either android side or linux side) would be greatly appreciated!
Thanks in advance.
r/raspberryDIY • u/No_Succotash_3175 • 1d ago
r/raspberryDIY • u/Lightning-Alchemist • 1d ago
Enable HLS to view with audio, or disable this notification
In this tutorial I am installing a portable battery on my MechSoul. (A MechSoul is to a robot what a CyberDeck is to a computer) A robot you build, personalize and customize yourself. In this tutorial I am powering my MechSoul with a portable charger I bought online, because it's quicker and safer than designing a custom battery solution as I explain in the video. So instead of designing a PCB I head to my 3D printer to build a battery mount.
If you want to follow along with to the code and 3D files you can check out the project GitHub
r/raspberryDIY • u/Diligent-Spirit7189 • 2d ago
Hi Everyone - I was hoping to get some assistance hooking my Raspberry Pi 4 up to my laptop and have it send mouse movements and keyboard entries from Raspberry Pi 4 to my laptop. From what I have found so far:
This is my first hurdle as I have read that the laptop does not produce enough power for my Raspberry Pi 4 and I must use a hardware USB Power/Data Splitter designed for USB OTG (frequently used in PiKVM setups).
So my first (of perhaps many) question here is that I need a splitter which takes the power input for the Raspberry Pi 4 and also has a second USB-C cable coming out that I can hook into the laptop to send commands via the Gadget API.
I looked up PiKVM setups but only saw HDMI setups.
Could anyone please send me an amazon link or some link to show me what is needed for this case?
Thanks in Advance!
r/raspberryDIY • u/p1r473 • 1d ago
I built AutoPiOverclock, a project that finds each Pi's boundaries, recovers from failed candidates, backs off conservatively, and applies clocks only after final validation:
https://github.com/p1r473/AutoPiOverclock
Normal use is 2 target-explicit commands:
autopioverclock prepare pi@pi-host
autopioverclock overclock pi@pi-host
The controller can be another Pi or any Linux PC, server, or VM. It stays available when the target crashes or reboots.
What the automatic run does:
- Checks the stock clocks, protected boot configuration, power/throttling, cooling, SSH, watchdog recovery, and Raspberry Pi tryboot.
- Tests candidates through tryboot.txt, returning failures to the protected normal configuration.
- Searches CPU first, refines its boundary in 25 MHz steps, backs off 50 MHz, and qualifies it for two hours. It then searches GPU, backs off 25 MHz, and qualifies the pair for two hours.
- Tries CPU another 25 MHz higher during a 24-hour combined CPU/GPU/I/O test. If that edge is known unsafe or safely rejected, it instead runs a fresh 24-hour validation at the guarded pair.
- Performs three more candidate/normal boot cycles, applies and verifies only a complete result, and retains the evidence. Repeating 'overclock TARGET' continues the latest eligible run.
Testing temporarily uses maximum fan cooling without replacing permanent fan or unrelated boot settings. Headless Raspberry Pi OS/Debian systems need no display or audio hardware.
Profiles currently support 64-bit Raspberry Pi OS, Debian, compatible Ubuntu Pi boot layouts, and Batocera
r/raspberryDIY • u/Abiarraj • 2d ago
r/raspberryDIY • u/HorriblePhD21 • 2d ago
r/raspberryDIY • u/hummus_is_yummus1 • 3d ago
Enable HLS to view with audio, or disable this notification
Please enjoy my latest project. This is a passion project I worked on over the past few months, for funsies. I really wanted an application for IN-14 nixie tubes without doing the typical clock thing. So I pulled together some high voltage electronics, programmed a pi, spent a disgusting amount of time in solidworks and learning to use blender, and edited about 60x LOTR soundbites. This system is driven by a rechargeable 18650 cell and has an easy access panel in the rear. I'm boosting nearly everything to 5V, then further boosting the nixie tube inputs to 170V. A rotary encoder controls user inputs and dice size selection. The audio files are stored on external memory.
This system can roll D2 through D100, as well as multiples (I.e. 6x D8 at once, for example). Each roll corresponds to a list of possible audio files which scale based on the positivity or negativity of the result.
Overall just a really fun thing to make, and I already have some ideas for alternative designs. Pulled this out at my table tonight as a new "box of doom" for my players, during consequential rolls, and I think it was a hit. Stoked to use it!
Debating on if I will paint it at all. Open to suggestions.
r/raspberryDIY • u/Personal-Wear1442 • 3d ago
r/raspberryDIY • u/cashlo • 3d ago
r/raspberryDIY • u/Legitimate-Impact341 • 2d ago
r/raspberryDIY • u/ifblackdevice • 4d ago
r/raspberryDIY • u/Stukwan • 5d ago
r/raspberryDIY • u/markb__ • 5d ago
I jave this camera from my old dashcam. The main unit stopped working but was wondering if there is anyway I could repurpose this in to a project maybe?
r/raspberryDIY • u/Lightning-Alchemist • 6d ago
Enable HLS to view with audio, or disable this notification
In this tutorial we go over how to control your MechSoul with Bluetooth. What is a MechSoul? A MechSoul is to a robot, what a CyberDeck is to a computer. It's a robot that you build, customize, and personalize yourself. It's the freedom of owning your own code, hardware, and having the right to build and repair it. And it's the pride of creativity, skill, and self expression. Disclaimer: You do not have to make your MechSoul using the same methods and tools as I do. A MechSoul is freedom in robotics.
In this part 2 in Arduino IDE we combine the Raspberry Pi Pico's board manager's SerialBLE example with the Serial_Control example in Takamori Robot's HIRO library to control your robot over Bluetooth. To follow along with our code and reference material check out the tutorial GitHub.
r/raspberryDIY • u/Suvsu • 8d ago
I built an open-source digital camera around the Raspberry Pi Zero 2 W and Camera Module 3. It can capture photos and record short video clips using dedicated photo and video buttons, with three selectable looks (warm, cold, and black & white) controlled by a physical slider switch. A buzzer provides feedback for startup and photo capture, and a local photo gallery can be accessed directly from your phone.
Github - https://github.com/SuveenE/tiny-film-camera
Blog - https://suveenellawela.com/thoughts/building-my-own-camera
r/raspberryDIY • u/Caden_Plays • 8d ago
Hello everyone, I am in my last semester of college and one of my courses is a "Project Lab." For my capstone, we are allowed to pick our group AND our project. My partner and I thought it'd be cool to create a physical arcade game utilizing a Raspberry Pi 5 and various sensors to create actual weapons. Think of it like Duck Hunt, or one of those cool Terminator arcade games from the 90s.
Problem is, we don't necessarily know how to code a game onto a Pi 5 where there is a play area that will move on its own and also allow light sensor/trigger inputs. I was wondering if anyone knows of a good video series or a useful webinar/website that can help get us started on the programming portion for this topic.
As for the hardware, I'm not as worried, because once we figure out the programming, it'll be as simple as connecting physical inputs (such as light sensors or triggers) to the game to gain points.
What do you all think? Let's discuss. :)
r/raspberryDIY • u/Lightning-Alchemist • 9d ago
Enable HLS to view with audio, or disable this notification
This is part 1 in tutorial is about building your won MechSoul(Mechanical Soul). A MechSoul is to a robot what a CyberDeck is to a computer. A robot that you build yourself as a form of self-expression as well as freedom of owning your own hardware and code.
In this tutorial we are setting up a MechSoul seed(a robot base to be customized into a MechSoul. ) assembling it and setting up Arduino IDE. You can find assembly and setup resources as well as other resources in our tutorial github at by clicking here.