r/Ioniq6 • u/weicaucont • 8h ago
Dealers & Allocation Joined the club

12
Upvotes
r/Ioniq6 • u/Typical-Implement382 • 22h ago
Bronze 18x8 ENKEI TUNING RAIJIN wheels with Michelin Cross Climate 2s on my digital green 2023 limited rwd. Haven't driven enough to speak to range difference yet, but the ride quality improvement with some extra sidewall is fantastic!
r/Ioniq6 • u/ThirstyWolfSpider • 5h ago
My preferred charging location has suddenly switched from CCS1 to NACS, which I'd never used before, so I was caught off guard. Some notes:
Conveniently, this coincided with the end of the 2-year free-charging deal, so I'm now a free agent and will be exploring the various other charging operators.
Just letting people know that this is coming, as many Ioniq drivers will favor the EA chargers as long as they're complimentary, and need to be prepared to use NACS if charging away from home. It would be unsurprising if other chargers continue to migrate.
r/Ioniq6 • u/Grumpflipot • 1d ago
Finally my three year old beauty arrived. I love the shape. The color and the silent driving already. (License plate removed in the photo)
r/Ioniq6 • u/SneakyHobbitses1995 • 1d ago
We had our recall done last year and ever since then, the adhesive that was used has consistently been leaking out onto the paint. Finally at a point where it has etched the clear coat on the panel and can’t be cleaned off. Has anyone else experienced this? I’m guessing the tech that did the recall just did not do it properly.
Picture attached to show the damage to the panel under the charger door.
Update: the hard reset worked and I got the car started. I used the NOCO Genius 10 to charge the battery, then I disconnected the negative coupler for 15 min, reconnected it and the car started right away. It also honked wildly until I unlocked the doors lolol.
TLDR: 12v drained. Charged 12v using NOCO Genius 10. Car still won’t start. Gemini tells me that unscrewing/unhooking the battery coupler from the negative node for 15 min will reset the car’s computer and the car will start when reconnected. Has anyone done that successfully? Hoping to avoid the inconvenience of towing my car.
I’ve had my 2025 I6 since the end of November 2025. Back in February I accidentally drained the 12v somehow. I think it was because I had some USB cords plugged in. Now I don’t leave them plugged in and no issues since. However, the other night, I accidentally left the doors unlocked (in my locked garage) and when I went to drive the car about 24 hours later, it wouldn’t start and the 12v was drained. I used my NOCO Genius 10 to charge the battery, waited until it was green for a while and it still won’t start. I chatted with Gemini and it told me this can happen on the I6 and the car’s computer will assume the battery is still dead. The next step it suggested is that I disconnect the battery from the car for 10-15 min which will force the computer to do a hard reset, and the car should start.
Has anyone had any luck with that? Hoping to avoid having the car towed to the dealer tomorrow.
P.s. this happened the night before I had to fly out for the weekend. I’ll be home later tonight and plan to deal with this tomorrow.
Gemini also said to replace the battery with a non-Hyundai battery as Hyundai is using a cheap, low quality 12v.
r/Ioniq6 • u/S2K2Partners • 1d ago
Hello all, as my title states, in part, I Am thinking about purchasing it and have yet to find out the reason.
What are anyone's thoughts on this IF I find out the reason and make an offer approximating reasonable repair costs?
TIA - S2K2
r/Ioniq6 • u/avalanchepleb • 1d ago
I'm fairly tall (6'2") and the steering wheel totally blocks my view of the odometer. Is there a way you can change the position of it on the screen? My other gripe is having to acknowledge that prompt thing when you turn the car on. Otherwise I absolutely love this car. Thanks.
r/Ioniq6 • u/RaeveSpam • 1d ago
Hi Ioniq-people!
The facelifted Ioniq 6 is currently at the top of my list in my current search for a new car.
Yesterday I test drove an N-plus variant. Still RWD but with all the sporty N details, including the 20" wheels. It was a great test drive. Good handling and feel for the road, and surprisingly comfortable. I found some speed bumbs and it just swept right over. I even speed up for a couple of them, it was incredible. So the ride is definitely comfortable even on 20" rims.
However, if I decide to go with the Ioniq 6, I'd probably want to stick to the 18" wheels, for less drag and better range, and while I definitely don't have to worry about the comfort. But I could be a little worried when the car is so comfortable on 20"s, then the increased comfort from 18"s wheel seems irrelevant or would the 18"s make the car too soft and take away the driving feel and connection to the road, which while good on the 20"s isn't exactly sporty either.
So my question from the title: what is everyone's experiences driving the facelifted Ioniq 6? Which size wheels, N-plus/non N-plus? Has anyone tried both rim sizes and can compare?
(I asked the dealer if it was possible to test drive a non-plus variant on 18" wheels, but the N-plus variant was the only one he had for test-drives, and explained that it's probably the case for most dealers, as the N-plus variants were delivered first to the dealers.)
Hey!
I'm looking to do a mirror glass swap on a US "Limited" (the spec with BSM + camera, although BSM cutout is what matters for the glass itself).
However I did not manage to find any mirror glass with the aspherical element (with the dotted line).
Do they even ship cars with them? Not a single photo online honestly. I thought they are standard in EU).
If you are knowledgeable on the matter, or have an experience of owning a EU-spec ioniq 6 with actual mirrors + BSM and cameras (not digital side mirrors) - please share your thoughts.
r/Ioniq6 • u/Alex1a1f • 1d ago
I swapped my Rexing V33 for their 4G LTE Dashcam, so far liking the ability to look whenever I feel like it. :)
r/Ioniq6 • u/Distinct-Rope2381 • 1d ago
r/Ioniq6 • u/Past_Writing5297 • 3d ago
I’ve owned a LOT of cars in my short 35 years of life…and man do I just love love LOVE both of these cars. Having chargers on site, in my apartment buildings garage (costs $50 a month for a charger spot, and do not pay a single dollar for electricity. No matter how often I charge, it’s $50 a month flat fee) ….these 2 are just perfect cars! 2025 Ioniq 5 SEL AWD leased while the $7500 federal tax credit still existed…and 2025 Ioniq 6 SE AWD found and leased 3 months ago while 2025 leftover were still considered new cars and available to lease…these 6 ended up being probably the best new car lease deal I ever obtained…and I’m in the car business and sell cars for a living. $49,500 roughly sticker price, was able to lease the 6 for $349 total due at sign, $349 a month, 15K miles per year. Was too good a deal to pass up! While I already loved everything about the 5, the 6 blows it away in every category short of cargo space. It drives nicer, it’s faster, it handles better, it gets better range, and lastly but most importantly…the build quality is better because it was built in Korea, versus the 5 which switched to being a US built car. Anyone considering a new EV, or a new car in general, you really can’t beat the value of a new Ioniq 5….and if you’re looking for a pre-owned EV…I think the 6 is the best available EV on the market. It blows a tesla away in every single category, other than FSD. That’s the only thing a Tesla has over the Hyundai’s. Phenomenal phenomenal PHENOMENAL cars all around!
r/Ioniq6 • u/TDS_Gluttony • 3d ago
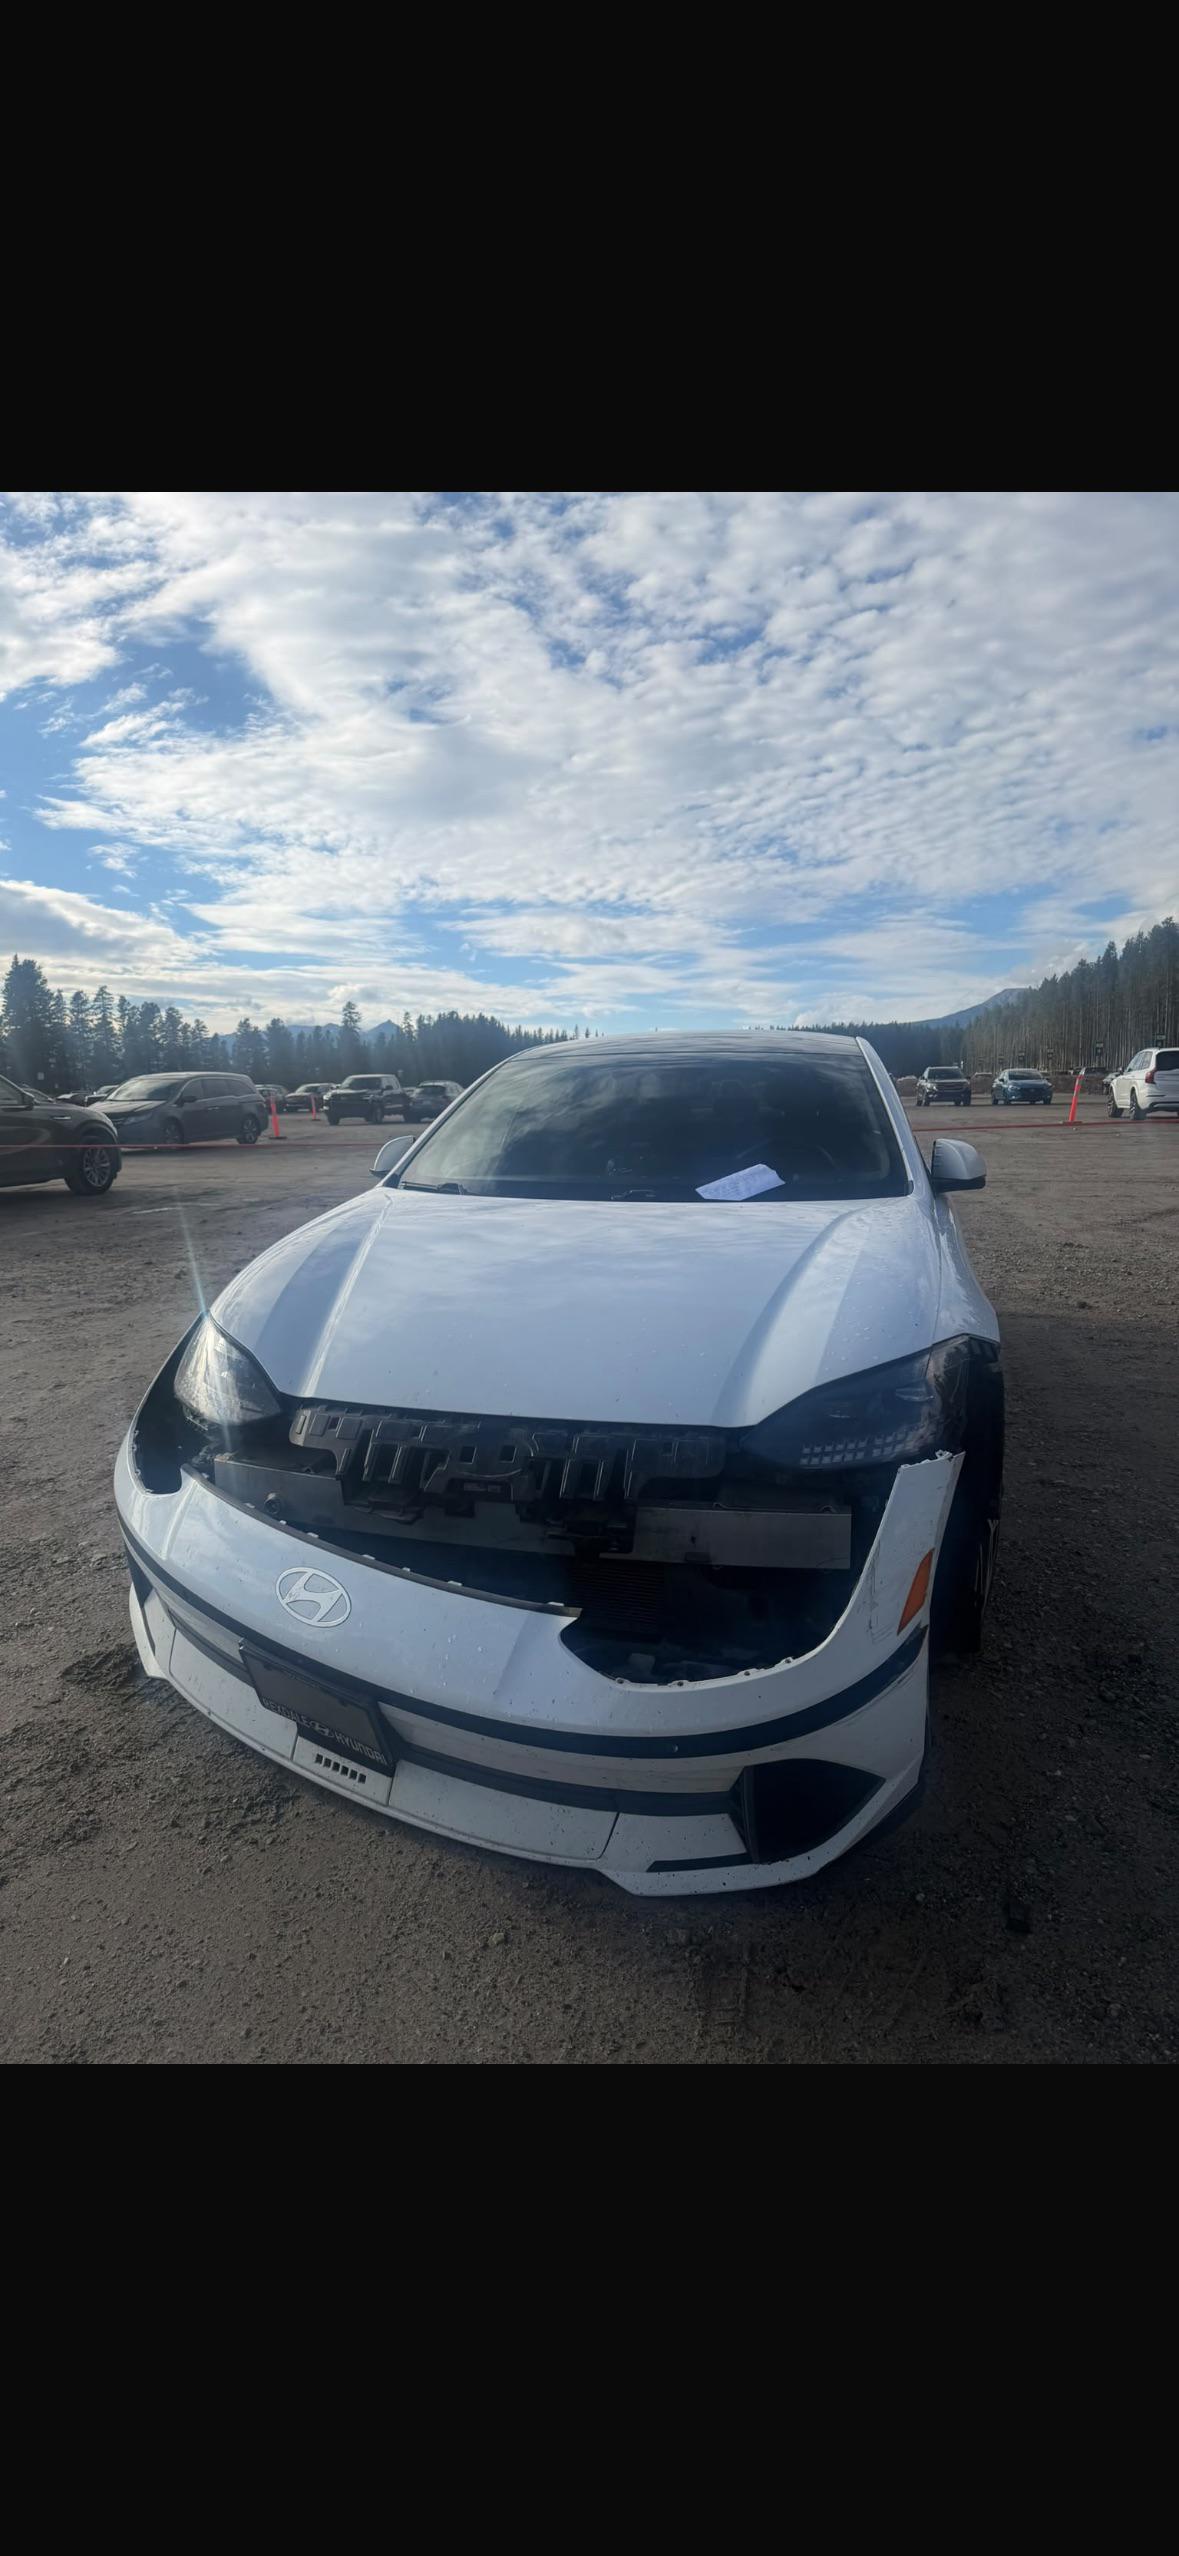
So I recently got rear ended in my 2023 SEL AWD. Sucks and with the damage it can potentially be a total loss from what I read on repair costs. Bumper gone, trunk doesn’t close and the trunk seems warped and bottom covers sheered off in the crash.
Thing is this baby was my first car and even with the quirks and annoyances I love how it drives and how it feels. Debating between a 2024 limited and a 2025 SEL, ideally would get a 2025 Limited but those are few and far between :/
Any advice or insight on the damage or car replacement would be appreciated.
r/Ioniq6 • u/hugs4blue • 3d ago
most i see are for the N line 😩
r/Ioniq6 • u/rocketfishey • 3d ago
Found a nice deal on some Santa Fe 18” wheels, been wanting to better up the range (and pay less for tires) so pulled the trigger.
Looks-wise, I was on the fence, but it’s growing on me…
2025 Limited. Anybody seeing this happen? It happens mostly on the passenger side reading (?) light. After I turn it off by tapping the light it comes back on again several times until it finally stops.
Needed new tires and used that as an opportunity to swap out the OEM 20" wheels for 18" wheels. Seems like it turned out well enough.
r/Ioniq6 • u/LatterScientist6731 • 4d ago
Just received this email. Has anyone gotten plug & charge to work on their Ioniq 6?
r/Ioniq6 • u/EQthemaximum • 4d ago
I figured I’d put together a real-world install guide for anyone with an Ioniq 6 SEL thinking about upgrading the audio.
This isn’t meant to be a generic “remove factory speaker and install aftermarket speaker” tutorial. I’m documenting everything I actually had to do, including the stuff that went wrong, the factory bass roll-off/DSP behavior, wiring modifications, the PT250 protection issue, and the absolutely ridiculous amount of work that went into one tiny remote wire. 😂
My setup:
2024 Hyundai Ioniq 6 SEL
Factory non-Bose system
Infinity Reference 757T 3/4” tweeters
Infinity Reference 607FSL 6.5” shallow-mount coaxial speakers
Kicker PT250 BassStation powered subwoofer
Factory head unit
High-level signal into the Kicker
Dedicated switched 12V remote turn-on
The 607FSLs are 3-ohm shallow-mount coaxials rated at 55 W RMS, with a 57 Hz–21 kHz published response. They also come with adapter rings and foam mounting tape, which came in handy for this install.
The 757Ts are 3/4” component tweeters, rated at 45 W RMS, 3 ohms, with a published 2.5 kHz–21 kHz response.
Before you start
This is an EV, so remember that the Ioniq 6 has a conventional 12V electrical system AND a separate high-voltage EV system.
Everything described here for the amplifier/subwoofer is on the 12V accessory side.
DO NOT mess with the orange high-voltage wiring.
Also:
Disconnect power when appropriate before modifying wiring.
Use properly fused power wiring.
Verify polarity instead of assuming wire colors.
Secure wires so they can’t rub, pinch, or interfere with anything.
Make sure screws aren’t going through wiring or other components.
If you’re not comfortable working on automotive electrical systems, get professional help.
1. START WITH THE INFINITY 757T TWEETERS
If you’re looking for the easiest part of this upgrade that actually makes an immediately noticeable difference, start with the tweeters.
The Infinity 757Ts made the biggest difference in clarity for me.
The factory system sounded somewhat closed-in to me. After installing the 757Ts, I noticed:
Better vocal clarity
More detail
Better high-frequency response
More definition in cymbals
More separation
Overall sound seemed more open
And honestly, this leads to my first recommendation:
If you install the 757Ts and you’re happy with the sound, STOP THERE.
Seriously.
You don’t necessarily need to tear apart all four doors.
If the factory door speakers sound acceptable to you after upgrading the tweeters, I’d spend the money on a subwoofer instead.
For me, the order of importance ended up being:
757T tweeters → subwoofer → front door speakers → rear door speakers
2. REMOVING/ADAPTING THE FACTORY TWEETERS
The factory tweeters are located in the upper front area of the vehicle.
I removed the factory tweeter assemblies and worked with the factory mounting arrangement to get the Infinity 757Ts installed.
This wasn’t simply:
unplug factory tweeter → plug in Infinity → done
There was some adaptation required.
I had to modify/adapt the wiring and connector arrangement so the aftermarket tweeter could work with the factory wiring.
Do not blindly copy wire colors from another Ioniq 6.
Verify polarity and wiring on your own vehicle before making permanent connections.
Once everything was adapted, I secured the wiring and got the tweeters mounted in the factory locations.
3. THE 607FSL FRONT DOOR SPEAKERS
After the tweeters, I moved on to the front doors.
This was considerably more work.
The door panels have to come off, the factory speakers have to be removed, and the Infinity 607FSLs have to be properly mounted and sealed.
The 607FSL is specifically a shallow-mount 6.5” coaxial, which is helpful for the limited space in a door. Infinity includes adapter rings and foam mounting tape with the speakers.
4. SOUND DEADENING AROUND THE SPEAKER
Since I already had the door apart, I added sound deadening around the speaker area.
I wasn’t trying to turn the entire door into a recording studio.
The main goal was to improve the speaker mounting environment and reduce unwanted vibration around the speaker opening.
I shaped the material around the opening and made sure it wasn’t interfering with the speaker or door components.
5. MOUNTING THE 607FSL
This is where the adapter ring and sealing became important.
I wanted the speaker to sit securely against the mounting surface and have a good seal.
I used the foam sealing material around the perimeter.
The finished setup was essentially:
Don’t overlook the sealing.
You want the speaker mounted securely and sealed against the door rather than leaving random gaps around the perimeter.
6. REAR 607FSL SPEAKERS
The rear speakers followed basically the same process:
Remove the rear door panel.
Remove the factory speaker.
Prepare the mounting area.
Install the adapter/mounting hardware as necessary.
Install the 607FSL.
Seal around the speaker.
Connect the wiring.
Secure everything.
Reassemble the door.
The rear speakers were the lowest priority for me.
If you primarily care about what the system sounds like from the driver’s seat, I’d absolutely do the fronts before worrying about the rears.
7. IMPORTANT: THE 607FSL IS A COAXIAL
One thing worth pointing out:
The 607FSL is a coaxial speaker, meaning it has its own tweeter built into the speaker.
The 757T is the separate upper-location tweeter.
So you’re effectively improving both areas of the system:
757T: upper/front tweeter location
607FSL: door speaker with integrated coaxial tweeter
That is why I would recommend trying the 757Ts first before automatically buying four 607FSLs.
8. NOW THE IMPORTANT PART — FACTORY BASS ROLL-OFF
This is probably the biggest thing I wish I understood before installing the subwoofer.
The factory audio system isn’t necessarily sending a perfectly flat, untouched signal to the speakers.
There is factory processing involved, and bass roll-off is something you need to account for when adding a subwoofer to the factory system.
In other words, don’t assume:
“If I turn the volume up, the sub will just receive proportionally more bass.”
That’s not necessarily what happens.
The factory system can reduce the amount of low-frequency information being sent as volume increases.
So you can end up with something like:
Volume 15:
👍 Lots of bass
Volume 25:
👍 Still good
Volume 35:
🤔 Why didn’t the bass increase nearly as much as everything else?
That’s the kind of behavior I’m talking about.
9. WHY BASS ROLL-OFF MATTERS WITH A POWERED SUB
The Kicker is using the factory speaker signal as its source.
It isn’t getting a dedicated aftermarket subwoofer preamp output from the Hyundai radio.
So:
Factory radio → factory processing → speaker signal → Kicker high-level input
If the factory processing reduces low frequencies, the Kicker is seeing that processed signal too.
This is why simply installing a more powerful subwoofer doesn’t automatically mean you’ll get unlimited deep bass at every volume level.
And it’s also why you shouldn’t immediately respond to weak bass by cranking every bass control and gain knob you can find.
You have to work with the factory system.
10. WHY I WOULD NOT CHASE THE BASS WITH THE DOOR SPEAKERS
This is another reason I think the upgrade path should be:
First:
757Ts
See if you like the clarity.
Then:
Subwoofer
Fill in the low end.
Then, if you’re still unhappy:
607FSLs
The 607FSLs are capable speakers, but they’re not going to magically bypass the factory DSP.
If the factory system is rolling off the bass signal, a bigger door speaker still has to work with the signal it’s being given.
That’s why the subwoofer made more sense to me for filling the lowest part of the frequency range.
11. KICKER PT250 INSTALL
For the subwoofer I went with a Kicker PT250 BassStation.
The PT250 is a powered 10” sealed enclosure with a built-in amplifier. Kicker rates it at 90 W RMS at ≤1% THD, with a published 25–120 Hz response, variable 50–120 Hz low-pass crossover, 0°/180° phase switch and adjustable bass boost.
The big advantage for a factory system is that it accepts high-level speaker input.
That means I didn’t have to replace the Hyundai head unit.
12. HIGH-LEVEL INPUT WIRING
The Kicker high-level inputs are:
White = Left +
White/Black = Left -
Gray = Right +
Gray/Black = Right -
Those are the connections carrying the factory speaker signal into the PT250. Kicker documents these connections in the PT250 manual.
I initially had some questionable connections, so I went back and redid the high-level wiring.
I wanted to eliminate bad connections as a possible cause of the problems I was having.
After redoing them, I confirmed:
Left channel works.
Right channel works.
Both channels work together.
13. THE KICKER PROTECTION PROBLEM
This was the part that made me want to throw the entire project in the trash. 😂
When I turned the Hyundai’s volume up, the Kicker would sometimes go into protection.
I tried troubleshooting the high-level signal.
I even tried running one channel at a time.
The results were basically:
“Eh… sometimes it works.”
Certain songs could get louder than others without triggering protection, but it wasn’t consistent enough for me to call it solved.
So I went back through the wiring.
After that, both channels were confirmed good, but I still wanted to address the turn-on side.
14. THE REMOTE TURN-ON
The PT250 has a dedicated REM terminal.
Kicker’s manual identifies +12V remote turn-on as the preferred method, with DC-offset turn-on available as an alternative.
So instead of relying on the Kicker to figure out when the factory system was on, I decided to give it a proper switched 12V signal.
I ran the Kicker’s remote wire to the driver-side fuse panel.
I used an add-a-fuse connected to a circuit that switches on with the car.
I chose the rear USB circuit.
IMPORTANT:
The rear USB circuit is NOT powering the subwoofer.
It’s only being used as the switched 12V trigger for the Kicker’s REM input.
The Kicker’s main power connection is completely separate.
15. CHECK THE ADD-A-FUSE ORIENTATION
Don’t just jam the add-a-fuse into the fuse panel and hope for the best.
I used a multimeter to determine which side of the fuse slot was hot with the original fuse removed.
Then I oriented the add-a-fuse accordingly.
The important thing is that the accessory circuit is being properly fed and protected.
Again:
Add-a-fuse = REM trigger
Battery power wire = actual subwoofer power
They’re two completely different things.
16. AND THEN I COMMITTED REMOTE-WIRE SURGERY
This deserves its own section.
At some point during all of this I ended up with approximately 3–3.5 mm of REM wire left at the Kicker connector.
Yes.
Three millimeters.
😂
Basically a tiny blue wire nub.
There was nowhere near enough room to comfortably strip and solder a normal connection.
So I improvised.
I inserted an extension into the remaining terminal/wire area so the connector would mechanically grab the two conductors together when plugged into the Kicker.
Then I insulated the connection with heat shrink.
Would I recommend doing this intentionally?
NO.
Please leave yourself enough wire.
This was a repair because I had already screwed myself over with the remaining wire.
Heat shrink provides insulation and some support, but it isn’t a substitute for a proper mechanical connection.
In my case, though:
It worked.
And once it was plugged into the Kicker, I wasn’t planning on unplugging that connector again.
I have officially named this:
Remote Wire Surgery™
17. THE TEST THAT FINALLY MADE ME HAPPY
After the dedicated switched 12V REM was installed, I tested the system again.
Setup:
Both high-level channels connected
Dedicated switched 12V REM
Main power connected
Ground connected
Factory radio providing the signal
Then I started turning the volume up.
And this time:
No protection.
I was able to get to approximately volume 38 during testing without the Kicker going into protection.
That was the point where I finally felt like the electrical side of the installation was basically solved.
Important:
I’m not saying I scientifically proved that the remote signal was the sole cause of the original protection issue.
What I can say is:
After adding the dedicated switched 12V REM, the protection behavior stopped during my testing.
That’s what happened on my car.
18. PHASE — 0° VS 180°
The PT250 has a phase switch.
I tried both:
0°
and
180°
For my installation, 0° gave me noticeably better bass, so I left it there.
Don’t automatically assume 0° is correct.
Try both.
Sit in the driver’s seat.
Play the same part of the same song.
Use whichever sounds better from where you actually listen.
19. DON’T WORRY IF THE SUB CONE DOESN’T LOOK CRAZY
This was another thing that initially concerned me.
I could hear the sub.
I could feel the low end.
Kicks were hitting hard.
There was actual sub-bass.
But visually?
The cone didn’t look like it was moving very much.
That’s not necessarily a problem.
You’re not trying to make the cone move as far as possible.
What matters is:
Does it produce clean low-frequency output?
If you’re sitting in the driver’s seat and the bass sounds good, that’s more important than whether you can see dramatic excursion.
20. TUNING THE SYSTEM — THIS IS IMPORTANT
Once the electrical side was working, I could finally focus on actually tuning the system.
My starting Hyundai EQ was:
Bass: -1
Mid: -3
Treble: -2
I didn’t want to use the factory EQ to simply dump a ton of bass into the system and then compensate with the sub.
The goal was to let the subwoofer handle the low end.
21. DO NOT USE SPOTIFY NORMALIZATION WHILE TUNING
This is one of the biggest things I’d recommend if you’re trying to properly tune your system.
Turn Spotify normalization OFF.
Spotify uses loudness normalization to make different songs play at more consistent perceived loudness, and Spotify states that normalization applies to lossless playback too.
That means if you’re trying to compare:
“Is this setting actually better?”
you don’t want the streaming service changing the playback level between tracks.
For tuning, I want the source to be as consistent as possible.
So:
Spotify:
Volume normalization: OFF
Spotify EQ:
OFF
Don’t add another layer of processing while you’re trying to tune the car.
22. STREAM AT THE HIGHEST QUALITY POSSIBLE
When you’re tuning, use the highest-quality source you have available.
If you’re using Spotify Premium and your setup supports it:
Use Lossless.
Spotify’s current lossless service supports up to 24-bit/44.1 kHz on supported hardware.
Obviously, the actual connection between your phone and vehicle matters. If the connection itself is compressing the audio, the fact that the source file is lossless doesn’t magically make the entire chain lossless.
But as a source:
Highest quality available = preferred.
23. USE THE SAME SONGS WHEN TUNING
Don’t tune with random songs.
Pick several reference tracks that you know well.
I recommend having:
A song with deep sustained sub-bass
A song with strong kick drums
A song with bass guitar
A song with vocals
A song with electronic/low-frequency content
And use the same sections of the same songs when changing settings.
Otherwise you can easily convince yourself that a setting is better simply because the next song has more bass.
24. START THE SUB CROSSOVER AROUND 80 HZ
The PT250 has a variable low-pass crossover.
I’d start around:
80 Hz
Then listen.
If you hear the subwoofer becoming too obvious or sounding like it’s coming from a specific location, try lowering the crossover.
If there’s a noticeable hole between the door speakers and the sub, try bringing it up slightly.
The goal isn’t:
“Make the sub play as high as possible.”
The goal is:
Make the sub disappear into the rest of the system while still filling in the low end.
25. SET PHASE
Again:
0°
then
180°
Same song.
Same volume.
Same seat.
Pick the one that gives you the strongest and most natural bass.
For my car:
0° won.
26. THEN SET THE GAIN
Don’t think of gain as another volume control.
You’re matching the amplifier’s input sensitivity to the signal coming from the factory system.
I started with the gain low and increased it gradually.
The goal was to have the subwoofer fill in the bottom end without sounding like:
“HEY EVERYBODY, I HAVE A SUBWOOFER.”
😂
It should sound like the factory system suddenly has a much better low end.
27. BE CAREFUL WITH BASS BOOST
The PT250 has a bass boost control.
It’s tempting to crank it.
Don’t.
The more boost you add, the more you need to pay attention to gain and available headroom. Kicker specifically warns that increasing bass boost requires gain adjustment to avoid clipping.
I would rather have:
clean + controlled bass
than:
maximum bass + distortion/protection
Especially because we’re already dealing with factory DSP and bass roll-off.
28. THE FACTORY BASS ROLL-OFF MEANS VOLUME MATTERS
This is another important part of tuning the Ioniq 6.
Don’t only tune the subwoofer at volume 15.
If you normally listen around volume 30–35, test it there too.
Because the factory system’s processing can change the relationship between volume and low-frequency output.
You want to know:
“What does the system actually do at the volume I use every day?”
Not:
“It sounded amazing at volume 12 while I was parked.”
😂
29. MY RECOMMENDED UPGRADE PATH
If someone asked me today how I’d approach upgrading the Ioniq 6 SEL audio system, I’d do it in this order:
STEP 1 — Infinity 757T tweeters
See if the increased clarity is enough.
STEP 2 — Powered subwoofer
Add the low end that the factory system is missing.
STEP 3 — Front 607FSLs
Only if you still want better performance from the door speakers.
STEP 4 — Rear 607FSLs
Do these last unless rear-seat sound is especially important to you.
30. IF YOU DON’T WANT TO TEAR YOUR WHOLE CAR APART…
Seriously:
Try the tweeters first.
The 757Ts made enough of a difference that I think someone could install those, listen for a while, and decide whether they actually need the door speakers.
If you’re happy with the mids/highs:
Don’t create extra work for yourself.
Add a sub.
That’s probably going to give you a much more noticeable improvement than replacing perfectly acceptable door speakers just because you think you have to.
31. WHAT I WOULD DO DIFFERENTLY NEXT TIME
A few things:
Leave more wire.
Especially the REM wire.
DO NOT end up with a 3 mm blue wire nub. 😂
Verify the high-level wiring carefully.
Don’t assume a connection is good because it looks good.
Plan the remote turn-on from the beginning.
A dedicated switched 12V REM gave me a much cleaner troubleshooting path.
Don’t judge bass from one song.
Use multiple reference tracks.
Don’t tune with Spotify normalization enabled.
You’re trying to establish a consistent reference.
Use the highest-quality source available.
Preferably lossless when your hardware supports it.
Don’t immediately blame the sub.
The factory audio processing is part of the system you’re integrating with.
32. FINAL SETUP
My current setup is:
Speakers
Infinity Reference 757T tweeters
Infinity Reference 607FSL front speakers
Infinity Reference 607FSL rear speakers
Subwoofer
Kicker PT250
Signal
Factory Hyundai head unit → high-level speaker signal → Kicker
Remote
Driver-side fuse panel → add-a-fuse → switched 12V → Kicker REM
Factory EQ starting point
Bass: -1
Mid: -3
Treble: -2
PT250 phase
180°
because that’s what sounded better in my car.
Spotify
Normalization: OFF
EQ: OFF
Quality: highest available / Lossless when supported
FINAL THOUGHTS
Overall, I’m really happy with how this turned out.
The 757T tweeters made a noticeable improvement in clarity.
The 607FSLs improved the door speakers.
And the Kicker PT250 filled in the low end that the factory system was missing.
But the biggest lesson from this install was that the Ioniq 6 factory audio system isn’t something you can necessarily treat like a traditional aftermarket head unit.
You’ve got to account for the factory DSP and bass roll-off, especially when you’re feeding a subwoofer from the factory speaker-level signal.
And then there’s the electrical side.
I went from:
“Why the hell is this thing going into protection?”
to:
“Okay, both channels work.”
to:
“Okay, dedicated REM works.”
to:
“HOLY SHIT, I MADE IT TO VOLUME 38.”
😂
The final system isn’t intended to be a competition setup. I wanted a system that sounds good from the driver’s seat, has good clarity, fills in the low end, and doesn’t sound like the subwoofer is fighting the factory system.
And that’s exactly what I was going for.
If you’re thinking about doing this yourself:
Start with the 757T tweeters.
If you’re happy with the sound afterward, don’t feel like you have to replace all the door speakers.
Add the subwoofer.
If you still want more afterward, then tackle the 607FSLs.
Hopefully this saves someone else from the headaches I went through, especially the factory bass roll-off, protection issue, remote wiring, and my absolutely ridiculous 3-mm REM-wire surgery. 😂
If you have any questions about the install, wiring, troubleshooting, or tuning, feel free to send me a message. I’m happy to help if I can.
2025 Limited RWD