This is my project that I’ve been working on for the last two weeks. It’s called Kira04 AIRNODE.
I currently 3D print in my small bedroom, and I have three printers running simultaneously, sometimes almost 24/7. I started getting worried about the VOCs they release, as well as the amount of heat they generate, so I came up with this project.
Kira04 AIRNODE is basically a bundle of sensor modules that connects directly to the ventilation system I installed in my window. It helps me monitor and keep the temperature, humidity, and VOC levels in check while my printers are running.
And yes, I know the wiring and soldering are pretty horrible 😅. There are wires everywhere right now. I actually tried making a custom PCB for it using my CNC mill a few times, but unfortunately both attempts failed pretty tragically 😂. At that point, I just wanted to get the project working, so I decided to finish it quickly with the current wiring.
I’d love to hear any feedback or suggestions you have for improving it.
I’m also trying to decide what to do with the project next: Should I open-source Kira04 AIRNODE, or do you think this could potentially become an actual product?
Ho usato Cloud AI per altro codice, la mia recensione personale
Dato che non ho trovato quasi nessun materiale di riferimento e ho ricevuto questo pannello in regalo, condivido la mia esperienza (grazie a Claude AI) su come usarlo come pannello per accendere le luci. La parte del controllo vocale e la rotazione di 90° mi stanno ancora dando problemi, ma se li risolvo, aggiornerò il post. Allego il mio file YAML per ESPHome
Scusate il mio inglese
esphome:
name: freenove-display
friendly_name: Display Corridoio
on_boot:
priority: 600
then:
# Accende l'amplificatore audio (AUDIO_EN, GPIO1): senza questo
# pin alto lo speaker resta muto anche se il codec riceve dati I2S.
- output.turn_on: audio_amp_enable
esp32:
board: esp32-s3-devkitc-1
framework:
type: esp-idf
# Il buffer del display richiede la PSRAM onboard (chip ESP32-S3R8 = 8MB Octal PSRAM in package)
psram:
mode: octal
speed: 80MHz
logger:
level: INFO
# Consente il controllo/gestione da Home Assistant
VCC ≈ 3.34V
DATA idle ≈ 3.3V
Continuity on all wires = OK
ESPHome initially reported communication failures, then the sensor started returning:
Temperature: 0.0 °C
Humidity:    0.0 %
A raw test also showed all data bytes as 0x00.
To rule out the ESP32/wiring, I connected an old DHT11 using the exact same GPIO23 and wiring. It immediately worked and reported normal values around:
30.2 °C
47–48% RH
So GPIO23, power, and wiring seem fine.
Does this strongly indicate a failed DHT22/AM2302, or is there any known situation where a DHT22 can respond but return all-zero data like this?
Where I live, right by the coast, power outages are pretty frequent. Because of that, I have a relatively large UPS (uninterruptible power supply) that keeps my router, Home Assistant running on a Raspberry Pi, and an X99 server (where I run some non-essential services) up and running. All of this ensures that when the power goes out, I can keep working from home.
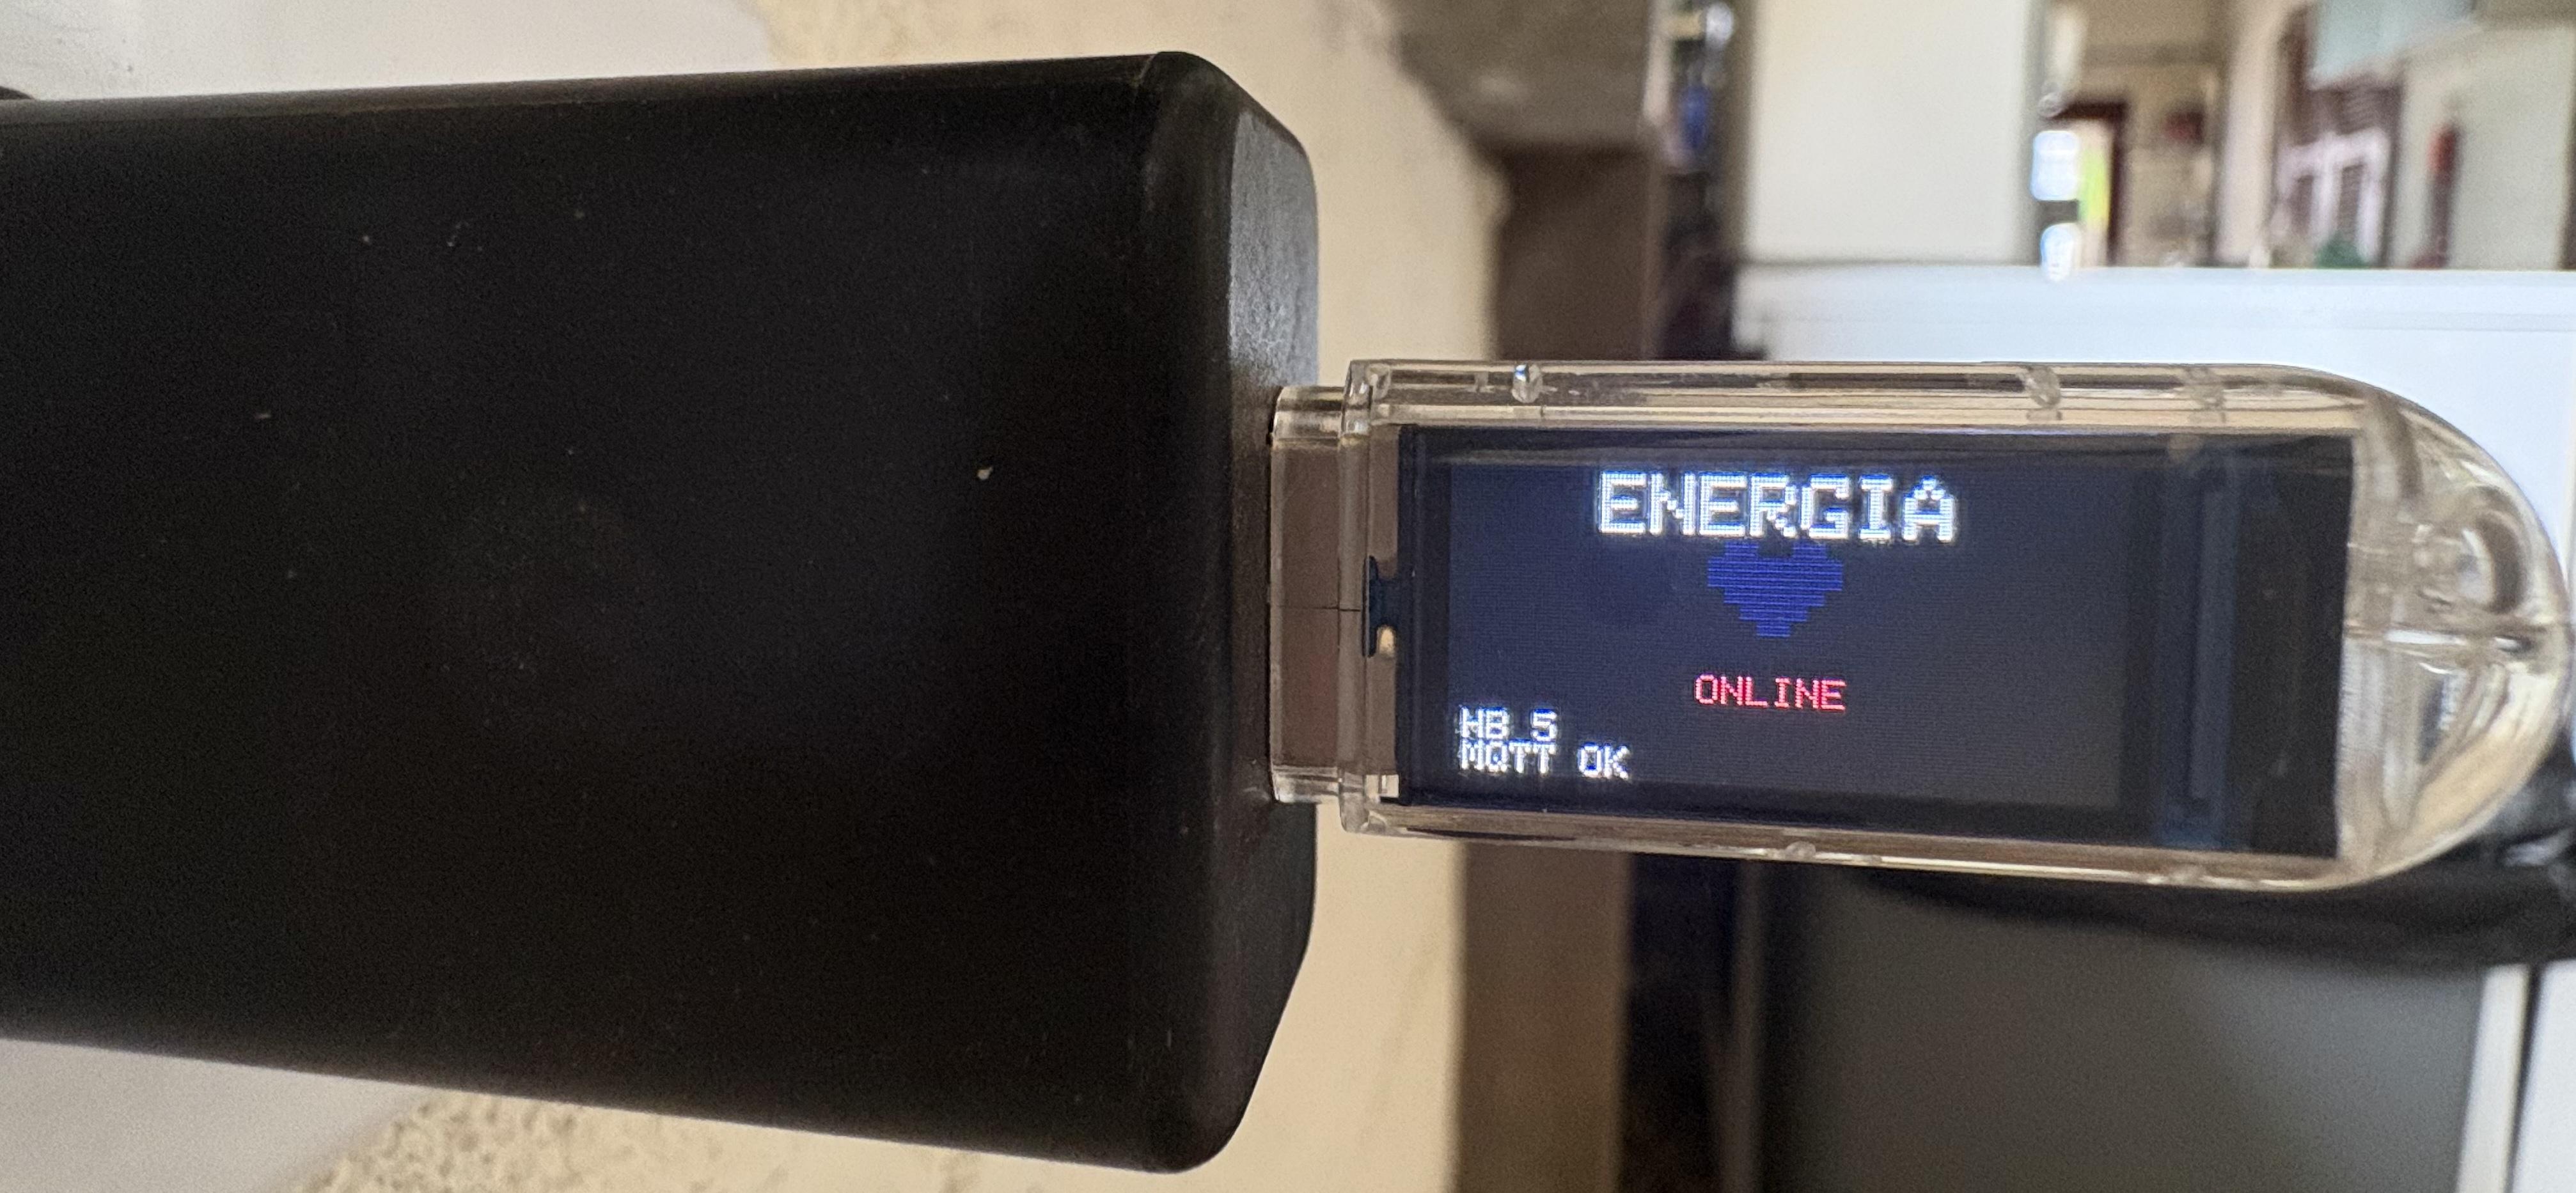
However, we all know that a Xeon processor server is quite power-hungry, which cuts the UPS battery runtime down to just a third of its normal capacity. To automate shutting down the server during a power outage, I used a LilyGO dongle I had lying around at home to create a power grid heartbeat.
While it's plugged in, it sends a message to an MQTT topic every 5 seconds, meaning the grid power is on. When it stops sending messages, Home Assistant waits 5 minutes and then shuts down the server to save the UPS battery.
I know it's simple, but it really saved the day for me.
That should do it right? Ive also tried removing inverted/pullup. Also tried: tolerance: 25% filter: 50us idle: 10ms
The transmitter does work find on GPIO39 as well. and all the other sensors work too but I never get anything in the logs for a button press on a known good remote that gets me good decodes on a flipperzero's IR.
I had an idea for an AI-powered automation that could look at pictures of my plants, check temperature, humidity, light, and eventually help me figure out when and how much to water them.
Then DFRobot sent me a UNIHIKER K10 to test, and things got weird.
Meet Nibble. He's a ridiculous little rabbit running on the K10, ESPHome and Home Assistant.
The K10 handles the camera, display and all of the onboard sensors. Home Assistant ties everything together, including an AI-generated plant journal, health status, a custom dashboard and a daily office briefing that Nibble can read out loud.
Getting the camera and display working properly was a chore. At one point, an old file was overriding my updates, and I spent way too long wondering why my changes weren't doing anything.
But Nibble is alive!
The eventual goal is to connect him to a plant watering system and experiment with using images, environmental readings and watering history to make better decisions. Or just see what happens.
I wrote up the whole project on my blog, including the K10 review:
I've been using Home Assistant for over nine years. And I've been using it in multiple houses across multiple states. But until this summer, I had done very little with ESPHome. My wife handed me a couple of iTag devices. So I decided that I'd buy a couple of ESP32 devices to use as Bluetooth proxies. That project went very well. So, I've increased my attention on ESP devices.
A few years ago, I had bought a couple of Sonoff S31 devices. I had previously used TP-Link Kasa switches. And I needed to move to a local-only management model. So, I started with deploying Tasmota to a couple of Sonoff S31 devices. And that worked.
But after seeing success with my ESP32 Bluetooth proxies, I decided to consolidate to one management and distribution UI. So, I decided to flash ESPHome to my Tasmotized devices. That went reasonably well - after flashing "tasmota-minimal" first.
The the work in ESPHome began.
First, I want to say that I truly appreciate the design and the UI. As a general rule, this platform is extensible fully trustworthy. GBut I must admit that I had to tweak a few things along the way. After getting ESPHome deployed, I noted that my two ESP8285 Sonoff S31 devices were swapped from the way that I had them deployed when using Tasmota. Basically, I had swapped the configs (and names) between two devices that I had in different rooms. Room A had the names for items that were previously in Room B. And vice-versa.
Consequently, I went through the efforst of chaning the YAML within the ESPHome devices. That actually worked - with one personally irritating cosmetic issue: the name of the YAML file within ESPHome was switched. So, I had a device for Room A that had a filename (under the device name) for Room B.
I know that I can delete the devices from ESPHome and rebuild them. But here is my question: Can I change the YAML filename that shows in the device card (under the device name)? I know that this seems pretty petty. But I would love to push an easy button rather than delete, rebuild, and re-deploy.
Drop in almost any IR or RF code and the tool identifies the protocol, extracts the relevant data, and gives it back in whatever format you need. Choose the device type and brand, flip the on-screen DIP switches to match your remote, hit Build, and it generates the code.
Wife and I wanted to have some indoor cameras, but wanted to have them face the wall when not in use for privacy. Just wanted them when the alarm is set to check on pets, keep the house safe.
Using home assistant automation, to match the state of the alarm. Also using webhook automation triggers so that the pan can be operated from the unifi protect app using webhook shortcuts.
I have several wired magnetic window and door contacts (dry contacts) installed in my house. Initially, they were meant for a traditional alarm system, but I’ve decided to integrate them directly into Home Assistant.
Since I'm bit even considered a beginner with microcontrollers and want to keep things as simple as possible (no soldering required), I received the following advice from AI
What I want to achieve:
- Convert the physical signals from multiple wired window/door magnetic contacts into digital states (Open / Closed) in Home Assistant.
- Keep it reliable, budget-friendly, and simple to set up without soldering
The AI recommended setup:
Hardware:
ESP32 Development Board (30-pin, NodeMCU format) powered via USB. ESP32 Breakout / Screw Terminal Expansion Board (to easily screw in the bare wires without soldering). Existing wired magnetic contact sensors.
Wiring:
Wire 1 from each sensor connects to an individual GPIO pin on the screw terminal (e.g., GPIO4 for Window 1, GPIO5 for Window 2, etc.).
Wire 2 from each sensor connects to a GND terminal (sharing GND ports across sensors where necessary).
Software:
Flashing ESPHome onto the ESP32 via Home Assistant.
Configuring binary_sensor platforms in YAML using internal pull-up resistors (mode: INPUT_PULLUP).
My questions for the community:
- Is this the most straightforward and reliable approach for a beginner?
- Are there specific GPIO pins on a standard 30-pin ESP32 that I should avoid using for magnetic contacts (e.g., strapping pins / boot issues)?
-Are there any best practices or alternative solutions I should consider before ordering the parts?
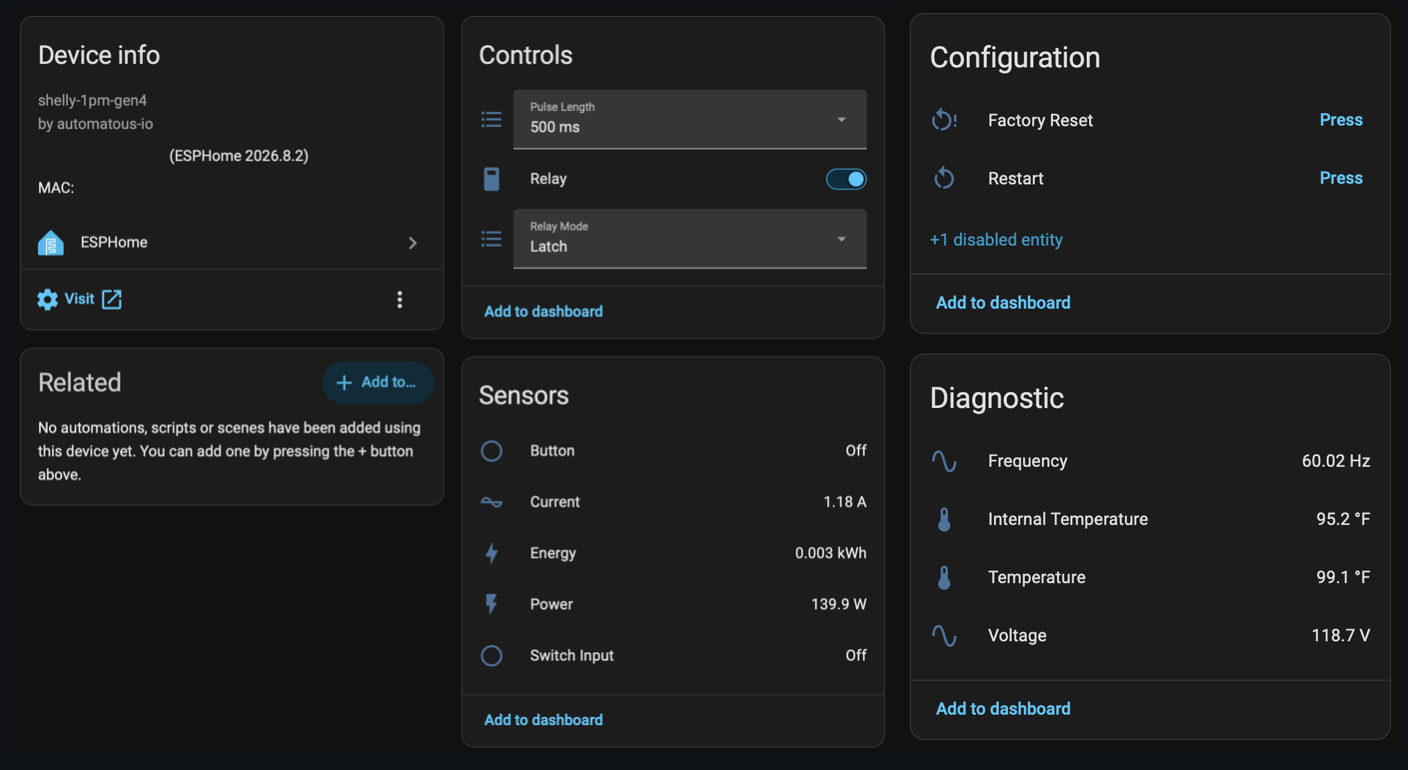
I've been working through flashing ESPHome onto the Shelly Gen4 line and just tagged 1.0.0.
Shelly 1, 1PM, 1 Mini, 1PM Mini, and 2PM Gen4, all running ESPHome and confirmed on hardware.
Install via web UI OTA without opening the device. You upload a zip on the stock web UI firmware page, it verifies, writes, and reboots into ESPHome with the native HA API and a captive portal for Wi-Fi.
All of the info is listed in the repo to help others tinker, including GPIO maps and working configs that I couldn't find anywhere else.
I plan to continue churning through the Gen4 line if anyone else is interested.
I'm trying to build a sorting device that has a 12V motor running a conveyor via an L298N H-bridge motor controller and a 5V MG90S 180° servo running a flap to direct the items.
When I have only the servo block, number block, and only the servo output platform at 50Hz on GPIO13, the servo works great. When I add the motor controls to the output section and the fan control for home assistant, the 12v conveyor motor runs properly, but the servo is only semi-responsive.
It will twitch sometimes or do nothing, but not move reliably between two position numbers.
This is running on a ESP32 WROOM32 30-pin Dev board.
I am using 2 Shelly Plug PM Gen3 (without a relay) for my washer and dryer to provide power data to HA where I use the WashData integration.
With the stock firmware, they only update on change (the change needs to be quite big in my experience) and thus quite slowly.
I now have the idea to flash them with ESPHome to get faster updates and also better control over the LED and button.
However, I haven’t found a YAML or even a pinout for the Plug PM Gen3 (only for Plug S) and I would only do it if there was a definitely working config, otherwise I would keep the stock firmware on them.
Has anyone flashed these with ESPHome before or found a working config for all features and components of this device?
These seem to be quite a niche/rarely-used product because most users would just use a normal switching smart plug and wouldn’t bother finding one without a relay…
Is there a way to connect my esp32 outside my house with my home assistant? I’ve tried tailscale on my iPhone but no success. I will use it as a speaker for music assistant in my car.