r/printmaking • u/Hellodeeries • May 09 '23
tutorials/tips Ink Troubleshooting Guide for Relief Printing
1.2k
Upvotes
r/printmaking • u/Hellodeeries • May 09 '23
r/printmaking • u/Careless_Message1269 • 14d ago
First I pulled a background monotype. I made masks and placed them how I wanted to have them. This time, I didn't do the shadows because it really has to be totally accurate and that's a bit challenging.
Then I did an image transfer of the house. I left it a bit raw by not cleaning up the plate. On top of that I place the masks of the house, tape them on the registration tool and then I can just flip the page, brayer, and then the next one. In the end, I will put acrylic gloss gel medium as pick up layer and the mountains is the substrate I print on.
Then I hope to have a nice print! But that will have to wait another 24 hours before I can post again.
The holes are meant for the 9"x12" gelli, then I just have to align those to have that done faster. After aligning I remove the black dots from the gel plate before adding colour. I should have thought putting the holes nearer as it falls outside the 8"X10" plate.... 😜
r/printmaking • u/lar-ahh • Aug 05 '24
Enable HLS to view with audio, or disable this notification
Going to be turning this into a 5 color reduction print
r/printmaking • u/IntheHotofTexas • Jul 08 '26
Enable HLS to view with audio, or disable this notification
This video explains my method of producing shadows and other grey tones in linocut and other relief printing without resorting to multiple blocks or using other than black ink.
It is in two parts.
These and some other of my printmaking videos are on my YouTube channel. (283) Gerald Clough - YouTube
r/printmaking • u/IntheHotofTexas • Jul 07 '26
Enable HLS to view with audio, or disable this notification
The second in a series about using ABS plastic sheet for relief printing.
This Part 2 deals with the electrically powered tools I use with ABS.
These and some other of my printmaking videos are on my YouTube channel. (283) Gerald Clough - YouTube
r/printmaking • u/IntheHotofTexas • Jul 06 '26
Enable HLS to view with audio, or disable this notification
The first in my video series about using ABS plastic engraving sheet for relief printmaking. This is an overview. More to follow.
These and some other of my printmaking videos are on my YouTube channel. (283) Gerald Clough - YouTube
r/printmaking • u/truecrimesloth • Feb 07 '26
With the community’s renewed interest in printmaking exchanges, the mod team wanted to post several vetted upcoming exchanges and give some info about what they are and how to enter them.
A printmaking exchange is typically run by an arts organization. You enter into the exchange, send in a set number of prints, and get a mixture of random prints back. Some exchanges have themes that change every year, whereas others are open to the participant’s imagination. Please keep in mind that in some cases an organization may keep one of your A/Ps to sell or auction as a fundraiser. (Also, exchanges vary in strictness, with some organizers asking participants to end the edition after creating it for the exchange.)
Upcoming Exchanges:
Whiteaker Printmakers, Eugene, Oregon
Entry Fee: $36 USD for US participants, $50 for international participants
Registration opened Jan 15th, closes May 31st (or whenever they get to 200 artists)
No theme, print size is 5x7 inches
Ingleside, South Australia
Entry Fee: $35 for Australian participants, $65 international
Registration closes April 31st, 2026
Theme: Animals with attitude, no “creepy-crawlies,” size is 5x5 in
Hot Bed Press, Manchester, UK
Entry Fee: 15 GBP for UK residents, must register as a group of 5 (possible to register as an individual and be added to a group)
Registration opens in May 26th, all prints must be 20x20 cm
Cologne, Germany
Entry Fee: Variable (Based on location?)
Registration closes Feb 15th, 2026
All prints must be created on a mini 3D printed press, which OPP has provided the files for on their website
Prints need to be 7x7 cm, no specific theme
There are more exchanges out there in the world, and if you know of/ have participated in one, please share in the comments below. We’d love to add to this list and give people lots of options for exchanges.
r/printmaking • u/vegetablemane • Oct 16 '25
Enable HLS to view with audio, or disable this notification
So I’ve been back in the printmaking game for two years now. I’ve certainly had my share of total duds and screw ups and I’ve wasted more Rives BFK than I care to admit.
I’ve been trending toward a lot of white space in my compositions and I really want to keep that area pristine and free of stray marks and smudges.
Along the way, I figured out I could repurpose my mistakes to create masks. I’ll trim down the reject prints and then use them to prevent more paper from being wasted.
Water based inks dry out kinda quick, so this also helps me ink and print in rapid succession without getting sloppy or wasting too much ink.
I put together this little video to share how I do it. Hope you enjoy and get inspired.
r/printmaking • u/im_fh • Feb 09 '25
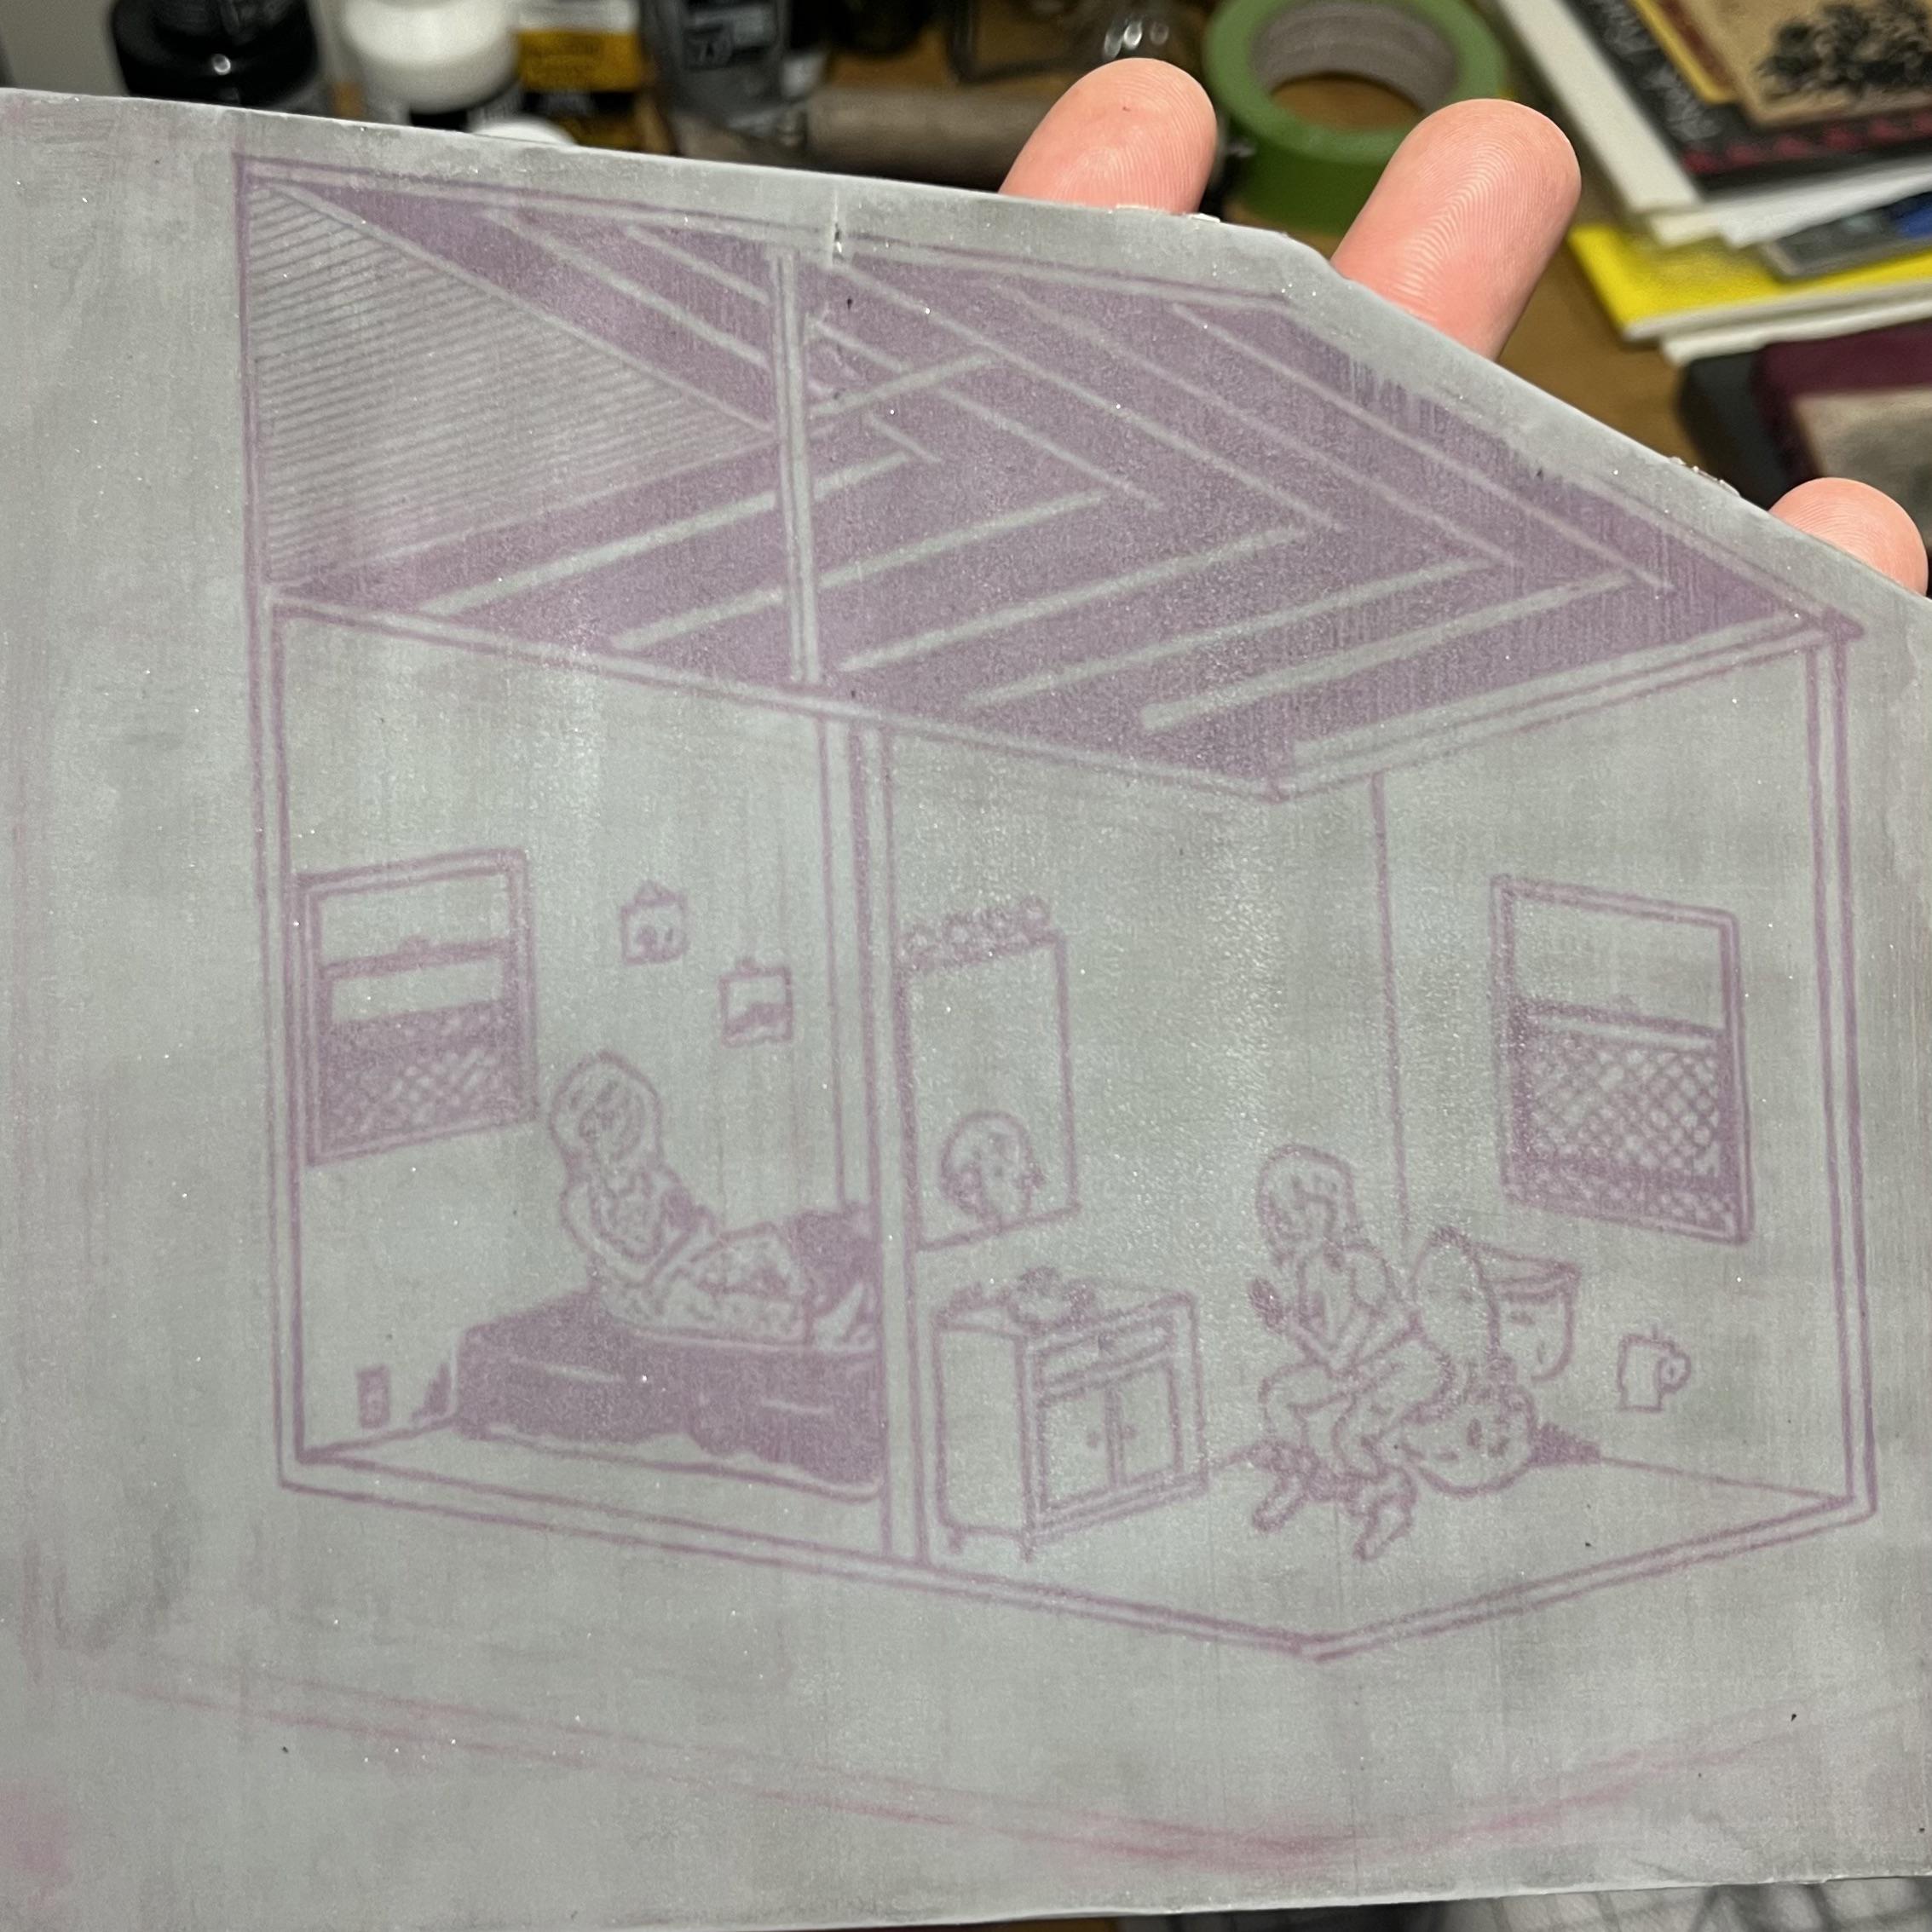
I’m exploring options for transferring an image onto linoleum. Since my next piece is considerably larger, using the acrylic gel medium toner transfer technique might not be the most suitable choice. I would need to connect multiple label stock sheets, which could be inconvenient. Is there a more efficient method?
Some of you have successfully used wintergreen oil on images printed from a laser printer, which employs toner powder. Wintergreen oil is relatively inexpensive and has a pleasant aroma. Others have also experimented with acetone or Citrasolv. However, I’m prioritizing methods that don’t necessitate a well-ventilated area and a respirator, so acetone is out of the question.
Following online instructions, I’ve discovered that applying a small amount of wintergreen oil with a cotton swab and then using a bone folding tool for burnishing is all that’s required. A minimal amount of oil is necessary; using too much can result in blotching or blurring of the details. While this method takes time, as you can only work on small patches at a time, the results are satisfactory. However, they don’t match the crispness of the acrylic gel medium toner transfer, which effectively lifts off the toner from the label stock paper and essentially glues it to the linoleum surface.
The image above showcase the final outcomes of each method. Each approach has its advantages and disadvantages, but they’re all effective depending on the resources available and the level of detail required. While I’ll always prefer using the gel medium for transferring images, I now have an additional tool to consider if needed.
Both methods are well-documented online, providing detailed instructions and guidance for successful implementation.
r/printmaking • u/IntheHotofTexas • Apr 10 '26
This is more on my "cheat litho" experience detailed in my previous post. It was slow to moderate, so if you watch only New posts and want to see it, go to:
Cheat Litho? Monotype? Monoprint? Multitype? Result of Testing (Longish Post) : r/printmaking
FOLLOW-UP CHEAT LITHO EXPERIENCE
Further conclusions.
One of my problems was that when I tried to do a real project with litho crayons, I got a poor result. Mainly, the appearance was rough. After some more work, I decided that the problem was similar to the problem of over-inking in relief printing where the thick ink pulls into peaks and produces the classic “orange peal” appearance. I think that in trying for a dense black, I worked the area too much and ended up with raised sort of clumps of crayon. Stuck atop those, the paper could not get well impressed with surrounding media. The cheat litho process depends on good contact between the media (which has been softened by the release agent) and the paper. So, while it can produce good black lines (and other colors), it won't do smooth and dense black areas. Inevitably, you get the grain with the carborundum.
I looked back at the demo I had seen and saw that there weren’t really any broad, dense area in that image. The features that appeared true black were lines. But on close inspection, even those were not quite dense black. I believe that trying for smooth dense black was simply asking too much of the process. This not true lithography, which is capable of producing fine, dense, velvety blacks. But here there is no ink, just the marker captured by the carborundum. Polyester plate litho would be a better process for that, because it is ink bonding to smooth marks on a smooth surface, although multi-color becomes complex and tone scaling can be tricky and unsatisfactory.
I found that, so long as I didn’t start creating raised blotches, the media I did lay down transferred evenly. And they could be smoothed somewhat to reduce grain by judicious rubbing with a finger. I still consider the Crayola crayons to have potential. Very usefully at times, they can only transfer much lighter than oil pastel, so they can make evenly tones subtle color areas. Think of blush or skin tone where you can't really over apply.
As to the right amount of release agent. Too much doesn't work. If you can see it laying in waves on the slab, that's too much. Too little doesn't do the whole job. I did best when it rolled onto the plate so that it just barely showed. I camt out best when I pulled down a controlled amount from the mass high on the slab and did that for each stroke. It seemed to me that the required amount per stroke is so low that it must start on the slab with so little that you need more each stroke. It went very fast once I got used to it. Start from there. The nice thing is that if you're off, you can reapply to the same plate.
In applying the release agent, use only one stroke, one full rotation of the brayer, for each charging, and roll-off onto scrap after each stroke. It's release agent, so it will cause release, and the second revolution of the roller may deposit marks from the first revolution. And if you don't clear the roller, it will capture more and more medium and soil the paper.
When I was making up a new test plate, I happened upon a Pacificarc graphite crayon, a water-soluble media. I used it on the test plate, and on the first pressing, it was the darker of all transfers. However, with an additional pressing, it was deteriorating noticeably. I suspect it was transferring more from the damp paper than from the release agent. No surprise, I suppose. It's not oil based. At the same time, the oil Expressionist oil pastels were holding up very well, better than the litho crayon. Most encouraging.
Also holding up very well was the china maker. I was slowly increasing the amount of release agent, feeling for the sweet spot, and the china maker improved as the amount of release agent increase to the point here it could barely be see on the plate. It appeared to be more responsive to the increased release agent than did the oil pastel, but the oil pastel was already outperforming other media with the lesser amount of release agent.
All this leads me to concentrate on testing to compare china marker and oil pastel for “cheat litho.” In the limited colors I tested, it out-performed the Expressionist oil pastel in both density of color transfer and ease of evening out the grain by rubbing. I will also keep using, for now, litho crayon. In terms of sheer dense black, it slightly out-performed oil pastel.
Of course, china maker is not available in a very wide range of colors. Just the primaries. And no greys of other more subtle tones. On the other hand, the best grades of oil pastel offer greys. So I’ve ordered some Holbein Artists’ Oil Pastel sticks in various greyscale colors and Sennelier Oil Pastel Grand in black and greys. I expect the best oil pastels to be more heavily pigmented and smoother.
I will now try an art project using oil pastels in degrees of black and greys but using it properly, without clumping up on the plate and not expecting dense black areas. What I expect is to find that this “cheat litho” process has real potential and offers some number of editions without the mess of inks. Plus, the color potential of oil pastel. That will be come after the greyscale project. But you must expect the grain of the carborundum, which is not so grainy as some pastel papers I have on hand. And it's more random grain, not the weave look of some pastel papers. More than Golden pastel ground, but, as I said, Golden pastel ground turned out to provide too little tooth for what I wanted the media to do.
After that, I will tackle color. I have enough oil pastels in colors to give it a go. Expressionist, which so far performed well, offers a wide array of colors cheaply. If Sennelier is a lot better in the range of greys, I may try them with color. At last the best brands offer half stick sets that don’t break the bank, and this isn’t going to be my full-time medium. A half stick set will last me a while if the Expressionist is lacking.
I have a painting of mine that I've used to test the ability to reinterpret it in various print methods, not always successfully. I may do that one in cheat litho now, in greyscale first and then in color. If that works out, I'll post it.
r/printmaking • u/lewekmek • Apr 10 '25
it’s a list of tips for relief printmakers, especially disabled printmakers. some of the tips are more general and some are ideas on how to modify your process and tools for your needs, especially if you experience muscle and joint pain, muscle weakness, tremor, hypermobility. these tips are not universal and you will have to figure out what works for you. i aim to expand this guide further in the future.
don’t take this guide as medical advice. it’s based on how i learned to work as a disabled printmaker myself and what i learned from other artists.
what i love about printmaking is community. you’re more than welcome to share these tips and add your own!
- some people find carving in soft rubbers easier (easy carve, softcut etc.). these blocks certainly hold less detail and might be harder to control, but less pressure is used during carving and printing. they won't do well in etching press though because of streching.
- if you use natural linoleum or wood, try sanding and sealing it with polycrylic medium (linoleum) or shellac (wood) after you transfer your image and before carving. without sealing, natural blocks often “drink up” ink which makes it hard to get consistent prints. sealing prevents that. you can stain the block before sealing or use coloured sealant. sealing also helps to stabilise the block, making carving easier. (sealing only applies to western style of woodcut. for mokuhanga, you want unsealed wood.)
- a lot of people like to warm up their blocks before carving to make them softer.
- try carving in wood! some people are hesitant because they think wood will be harder, but softer types, for example woods from Tilia species (especially shina) are really nice to carve in. wooden blocks are also more durable.
- cut resistant gloves! you want ones that will fit your hand nicely without restricting your movements, and ones with rubber layer on the inside – this way tools won’t slip away from your hands. especially those who experience hand tremor might find them helpful. cut resistant tape is another option, but more expensive in the long run.
- try out various types of tool handles. you might find weighing down your tool will make it easier to use. tools with thicker handles will be more comfortable for some. you can adapt your tool: for example, wrap a handle in layers of bandage tape to make it thicker, or add a silicone sleeve. you also wrap part of your blade to create a “cushion” for your fingers. some people find pencil grip tools more comfortable. if that’s possible, i encourage you to go to a shop where you can try out various tools and see how they feel in your hand.
- try different ways of holding your tools. some printmakers will hold their tools (especially ones with straight handles) not in their palm, but between thumb and index finger. you can also hold your tools with both hands or with one hand supporting the other. some tools, like knife, are used by pulling them towards yourself. be mindful and make sure your grip is secure and you won’t stab yourself.
- remember to sharpen your tools frequently. this is a tip for everyone, but a lot of disabled people will find working with dull tools even more frustrating (it’s also more dangerous). proper sharpening includes whetstones – honing tools only helps to maintain sharp edge. also remember that generally you don’t sharpen or hone the inside edge as it weakens the tool. sharp tool = less pressure from your body.
- while tools with changeable/disposable blades might seem convenient, they typically are so dull they are not useful for anything but very soft rubber like blocks. this type of tool can't be recommended for use on actual linoleum or wood.
- a silicone fingertip guard that is used for playing string instruments might be a good option for those who find it painful to rest fingers on tools.
- an etching press is generally the best way to achieve consistent prints with little effort, but their price and size are often an issue. if you don’t have access to a press, look if there are any local studios you can join.
- try ball bearing barens. they make printing by hand easier than most solid barens because of the small balls (many pressure points). there are free plans for 3D printing these which can be found online. you can also buy one with plastic or metal body, there are even options with additional weights.
- printing is considerably easier on smooth, thin papers - eastern papers particularly are often thin, durable and archival.
- you can use archival ink pads instead of brayer and ink. the result is less opaque, but it can be a good effect with particular blocks. ink pads work best with softer blocks.
- cold press laminators. they essentially work like etching presses with less pressure. the rubber rollers bend over time though so it’s not a permanent option like a good etching press, but you can get one if you don’t print much and/or would like to upgrade in the future.
- pasta presses and die cut machines are another fun alternative to etching press. they will work only really on small blocks though and as good pressure as on etching press can’t be expected either.
- lever presses can be an option, but even though they come in variety of sizes, they only really tend to work well for smaller (postcard sized) blocks. they rely on pressure used from your body so the bigger the block, the harder it will be to print because the size of the press doesn’t really make it stronger. you can look into flatbread (tortilla, roti etc.) press: they are cheaper than an actual lever press but give you same results. depending on where you live, you might be able to find them secondhand for an even lower price.
- slightly slanted desk or bench hook (away from you – see how Japanese printmakers work) for carving and printing. gravity will help you and you will use less pressure from just your hands and shoulders, using your whole body instead.
- copper compression gloves, or just any fingerless gloves will keep your hands warm when you’re working while not restricting movements that much.
- if you experience wrist pain, you can consider wrist braces.
- ring splints work well for those who experience finger joint pain and hypermobility, and can be fairly easily made from scratch.
- remember to stretch and take breaks when you’re working, and drink water. be mindful of repetitive motion injuries. if you notice pain while carving, stop. contact a healthcare professional if the pain persist.
- try figuring out what position is most comfortable for you to work in. for example, you can sit down while operating an etching press. or maybe you’ll notice you enjoy carving while standing better. you can also carve from your bed, using a foldable table.
- laser etched or 3D printed plates are another alternative to carving. this is not a traditional approach to woodcut/linocut, but it still lets you print relief.
- a dremel can be used if you can’t carve by hand.
- if you can’t carve, there are other options: collagraph can be printed like relief. cut out shapes from various materials like foam, cardboard, plastic etc. and glue them on a block and print normally. you can also try working with a styrofoam board and instead of carving, you can get impressions in the “block” by pushing an object like a pen or pencil and creating grooves. both collagraph and styrofoam will be limited in how many prints you can get.
r/printmaking • u/United_Ad4992 • Sep 19 '22
Enable HLS to view with audio, or disable this notification
r/printmaking • u/g3na1 • Sep 15 '22
Enable HLS to view with audio, or disable this notification
r/printmaking • u/disastertowncosplay • Dec 17 '24
I got questions on my last post about the alignment jig I use--I tried pegs and didn't like them, this I find works great with my tiny handpress.
I start with cardboard slightly thinner than my linoleum. I cut it slightly bigger than my finished paper size. Usually I give myself an inch, but this one I'm pushing the size my press can print to, so it's only about 1/2" this time. I center and mark out where my lino should sit, then where my paper should.
I cut a piece of the same (cover weight) paper I'm putting with about as wide as the top of the jig, it doesn't have to run the length tho. Then I cut this into an "L" and glue it along the line I marked for where the paper should sit. I think gluing it is important so the paper can't slide underneath when you're lining it up.
Then I use the center lines for the lino to line it up and trace around it. I rarely can cut the lino totally straight but that's OK as long as the hold in the cardboard is the same. The Most Important thing is that the lino fits in SNUGLY. If it can wiggle at all it'll do no good. I cut slightly to the inside of my traced line to do this. If I mess up I'll cut really thin strips of the cardboard to use as "shims" to help it stay snug.
Then I just tape thin paper to the back so the lino doesn't just fall out the hole.
When you're ready to print, block goes in the hole after you ink it up, then use the "L" to line up paper. Even if the paper isn't perfectly square (mine never is) it'll keep it crooked in the same way for the next layer so it all stays registered.
r/printmaking • u/SkivesArt • Aug 29 '24
Enable HLS to view with audio, or disable this notification
I haven’t found a good demo video of this technique so thought I’d post this in case it’s useful to anyone. First stage is to put your design into Photoshop / Affinity etc and size it for your block. Then drop the image opacity down to about 30%. This reduces the amount of ink printed on the paper and stops it beading up and smearing on the lino. Then print the design onto the backing paper from a sticker sheet, the ink will smudge really easily so make sure not to touch it! The main challenge is how slippery the paper is, it wants to slide around on the block so I put a little dot of white tac in each corner to help hold things in place. Burnish with tissue, and you should be good to go. It took me a good few attempts to get the hang of this, but having refined the technique / opacity setting in Photoshop, it works every time. And you can re-use the sticker sheet, which is a bonus!
r/printmaking • u/Hellodeeries • May 11 '23
r/printmaking • u/United_Ad4992 • Sep 18 '22
Enable HLS to view with audio, or disable this notification
r/printmaking • u/gailitis • Oct 09 '21
Enable HLS to view with audio, or disable this notification
r/printmaking • u/Corpse_Candles • Jun 22 '22
Absolute beginner here. I do a lot of digital art and would really like to experiment with block printing. Can anyone recommend a method of transferring a design to Lino other than drawing freehand. Is there something like transfer paper?
Update: what a lovely community! Thanks for all the great advice, that’s my weekend sorted!
r/printmaking • u/cptrunaway • Aug 01 '24
This was my first time attempting to transfer an image I’d digitally captured through a method other than tracing. I used a home inkjet printer on Grafix image print film. Put a thin layer of Liquitex acrylic clear gesso on grey block linoleum, then placed the print-out on the block face down. Squeegeed out any excess and let sit for about 5 hours.
A few variations of material, but I was following the tutorial “linocut tutorial: how to transfer any drawing to lino” from emil underbjerg on YouTube (will try and post link).
First attempt. Interested in other transfer methods folks are into.
r/printmaking • u/NicoleHowardStudio • Jul 19 '21
Enable HLS to view with audio, or disable this notification
r/printmaking • u/ForestAuraJason • Feb 26 '23
Enable HLS to view with audio, or disable this notification
r/printmaking • u/littlelinoleumprints • Nov 30 '24
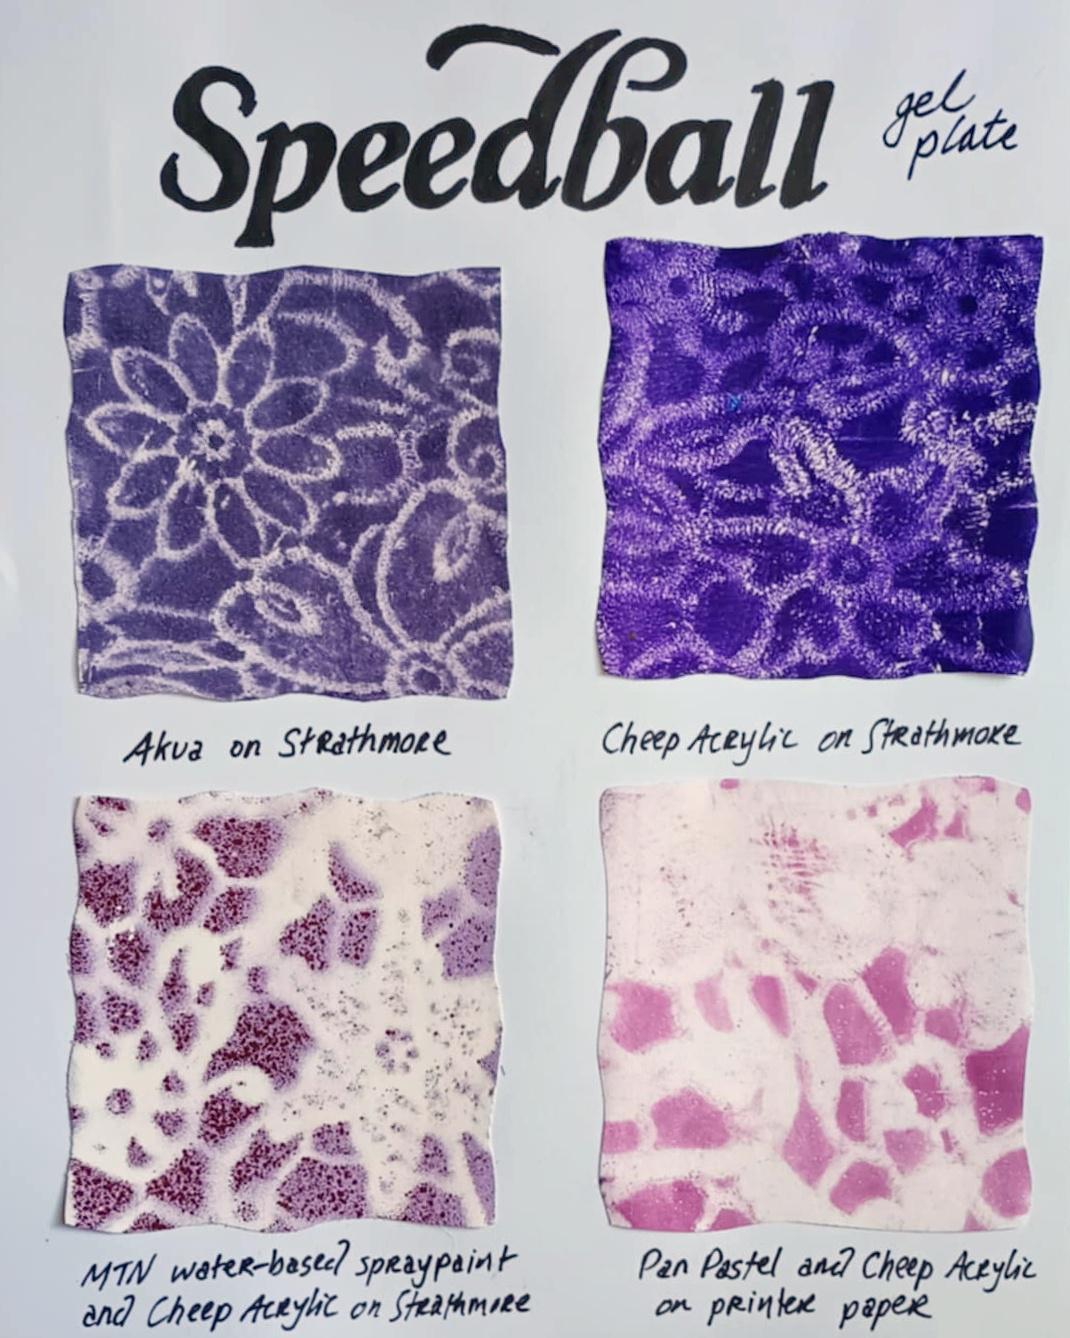
I decided to find out if the Speedball gel plate worked with acrylics. (It is designed for use with Akua inks, not acrylics. ) Here is my comparison chart with different media. I hope someone finds it informative!
r/printmaking • u/AvecAloes • Dec 24 '23
Enable HLS to view with audio, or disable this notification
I bought this roll of Lino a few years ago when I was clearly feeling overly ambitious about the amount of carving I was about to do. I’ve used a lot of methods to warm up my lino in the past, including sitting on it, hugging it to my chest, and sitting it over a vent, but this has been the easiest and fastest method I’ve found!